Bosch SHE3AEE5N - Manuals
Bosch SHE3AEE5N Dishwasher – User Manual, Manual in PDF format online.
Manuals:
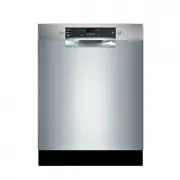
User Manual Bosch SHE3AEE5N


Summary
en-us 2 Further information and explanations are available online: Table of contents 1 IMPORTANT SAFETY INSTRUCTIONS.................... 41.1 Safety definitions....................................................... 41.2 General information................................................... 41.3...
en-us 3 20 STATEMENT OF LIMITED PRODUCT WARRANTY ........................................................... 33 20.1 What this warranty covers & Who it applies to....... 3320.2 How long the warranty lasts .................................. 3320.3 Extended Warranty ..............................
en-us 4 Read all instructions carefully before use. Theseprecautions will reduce the risk of electrical shock, fire andinjury to persons. When using kitchen appliances, basicsafety precautions must be followed including those in thefollowing pages. 1.1 Safety definitions Here you can find explanatio...
Manual Bosch SHE3AEE5N


Bosch Dishwashers Manuals
-
 Bosch SBI8EDS01A
User Manual
Bosch SBI8EDS01A
User Manual
-
 Bosch SBT8ZD801A
User Manual
Bosch SBT8ZD801A
User Manual
-
 Bosch SBV8EDX01A
User Manual
Bosch SBV8EDX01A
User Manual
-
 Bosch SGE53B55UC
User Manual
Bosch SGE53B55UC
User Manual
-
 Bosch SGV 57T13EU
User Manual
Bosch SGV 57T13EU
User Manual
-
 Bosch SGV78C53UC
User Manual
Bosch SGV78C53UC
User Manual
-
Bosch SGV78C53UC
Manual
-
 Bosch SGX78C55UC
User Manual
Bosch SGX78C55UC
User Manual
-
Bosch SGX78C55UC
Manual
-
 Bosch SHE3AEM2N
User Manual
Bosch SHE3AEM2N
User Manual
-
Bosch SHE3AEM2N
Manual
-
 Bosch SHE3AEM5N
User Manual
Bosch SHE3AEM5N
User Manual
-
Bosch SHE3AEM5N
Manual
-
 Bosch SHE3AEM6N
User Manual
Bosch SHE3AEM6N
User Manual
-
Bosch SHE3AEM6N
Manual
-
 Bosch SHE3AR72UC
User Manual
Bosch SHE3AR72UC
User Manual
-
Bosch SHE3AR72UC
Manual
-
Bosch SHE3AR72UC
Installation Manual
-
 Bosch SHE3AR76UC
User Manual
Bosch SHE3AR76UC
User Manual
-
Bosch SHE3AR76UC
Manual