Page 2 - Table of contents; Observe the following safety instructions.
en Safety 2 Table of contents 1 Safety .................................................................... 2 2 Preventing material damage ............................... 5 3 Environmental protection and saving en-ergy ....................................................................... 7 4 S...
Page 3 - WARNING ‒ Risk of fire!
Safety en 3 provided that they are supervised or havebeen instructed on how to use the appliancesafely and have understood the resultingdangers.Do not let children play with the appliance.Children must not perform cleaning or usermaintenance unless they are at least 15 yearsold and are being superv...
Page 4 - WARNING ‒ Risk of injury!
en Safety 4 or a similarly qualified person in order toprevent any risk. If the appliance or the power cord is dam-aged, this is dangerous. ▶ Never operate a damaged appliance. ▶ Never operate an appliance with a crackedor fractured surface. ▶ Call customer services. → Page 36 An ingress of moistu...
Page 5 - Preventing material damage
Preventing material damage en 5 1.4 Plinth drawer WARNING ‒ Risk of fire! The surfaces of the plinth drawer may be-come very hot. ▶ Only store oven accessories in the drawer. ▶ Do not keep any flammable or combustibleobjects in the plinth drawer. 1.5 Halogen bulb WARNING ‒ Risk of burns! The bulbs ...
Page 6 - Avoiding material damage
en Preventing material damage 6 ▶ Do not keep moist food in the cooking compartmentfor a long time with the door closed. ▶ Do not store food in the cooking compartment. Leaving the appliance to cool down with the door openwill damage the front of neighbouring kitchen units overtime. ▶ Always allow ...
Page 7 - Environmental protection and saving energy; Disposing of packaging; Saving energy; Suitable cookware
Environmental protection and saving energy en 7 2.3 Drawer area Follow the corresponding instructions when using thedrawer. ATTENTION! Do not place hot objects in the plinth drawer. The plinthdrawer may be damaged. ▶ Do not place hot objects in the plinth drawer. Do not place oven accessories that ...
Page 8 - Size and characteristics of the cookware; Installation and connection; Electrical connection
en Installation and connection 8 cooking zone. If cookware is not detected on a cookingzone, place this on the cooking zone with the nextsmallest diameter. 4.1 Size and characteristics of the cookware To correctly detect the cookware, take the size and thematerial of the cookware into consideration...
Page 9 - Setting up the appliance; Setting the base height of the appliance; Removing the appliance
Installation and connection en 9 ¡ Fit the mains plug and socket together. ¡ The mains plug can be accessed at all times. ¡ The cross section of the cable is sufficient. ¡ The mains cable is not kinked, crushed, modified orsevered. ¡ If required, the mains cable must only be replacedby a qualified ...
Page 10 - Familiarising yourself with your appliance; Controls
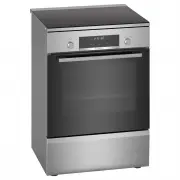
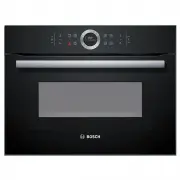
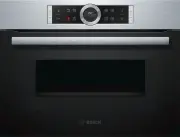
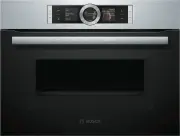
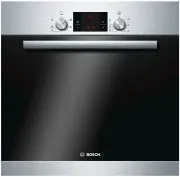
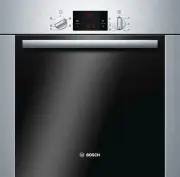
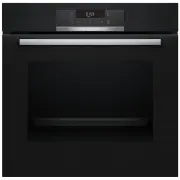
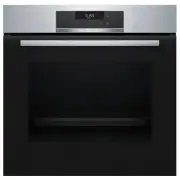
en Familiarising yourself with your appliance 10 6 Familiarising yourself with your appliance 6.1 Your appliance You can find an overview of the parts of your appliancehere. Note: On certain models, specific details such as col- our and shape may differ from those pictured. 1 2 3 4 5 Explanation ...
Page 13 - Cooking compartment; Rails
Familiarising yourself with your appliance en 13 Distribution of the cooking zones The specified power has been measured with thestandard pots, which are described in IEC/EN60335-2-6. The power may vary depending on the sizeof the cookware or cookware material. Cook-ingzone Size Maximum power 18...
Page 14 - Lighting; Using the accessory
en Accessories 14 Lighting The oven light lights up the cooking compartment.With most types of heating and functions, the lightinglights up during operation. If you use the function se-lector to end the operation, the lighting switches off.You can use the oven light button to switch on the lightwit...
Page 15 - Other accessories; Before using for the first time; Initial configuration; Setting the time; Operating the hotplate; Switching the hob on and off; ReStart; Setting the cooking zones
Before using for the first time en 15 Wire rackor bakingtray Position the accessory so that itsedge is behind the lug on the pull-out rail. Note: The pull-out rails lock in place when they are fully pulled out. Gently push the pull-out rails backinto the cooking compartment. 4. Slide the acces...
Page 16 - Cooking recommendations
en Operating the hotplate 16 Power level Lowest power level Highest power level Notes ¡ In order to protect the appliance's electronic partsfrom overheating or surge currents, the hob maytemporarily reduce the power level. ¡ In order to prevent the appliance from producing ex-cess noise, the ...
Page 17 - Activating CombiZone; 1 Time-setting options; Programming the cooking time; Setting the kitchen timer; 2 PowerBoost
CombiZone en 17 10 CombiZone You can use this function to cook with two interconnec-ted cooking zones and select the same power level forboth. This is intended in particular for cooking with longcookware.This function allows you to cook with one item of cook-ware that occupies one cooking zone and...
Page 18 - Overview of the basic settings
en Childproof lock 18 13 Childproof lock The hob is equipped with a childproof lock. This pre-vents children from switching on the hob.To switch the function on, switch the hob off.Touch for four seconds to switch on or off. If you want to activate the childproof lock automaticallyevery time th...
Page 19 - 5 Cookware test; 6 Basic operation; Changing the type of heating
Cookware test en 19 Product information Display Production number 1 . Production number 2 . a The first four displays provide the product informa-tion. Touch or to view the individual displays. 3. Touch to access the basic settings. a and light up alternately as well as ...
Page 20 - 7 Rapid heating; Setting rapid heating; Cancelling rapid heating; 8 Time-setting options; Overview of the time-setting options; Setting the timer; Changing the timer; Setting the cooking time
en Rapid heating 20 17 Rapid heating To save time, rapid heating can shorten the preheatingtime for set temperatures over 100 °C.You can use rapid heating for the following types ofheating: ¡ 3D hot air ¡ Top/bottom heating 17.1 Setting rapid heating To ensure an even cooking result, do no...
Page 21 - Changing the cooking time; Setting the end time; Changing the end time; Setting the time; 9 Programmes; Suitable cookware for programmes
Programmes en 21 a When the cooking time has elapsed, a signalsounds and the duration is at zero in the display. 3. When the cooking time has elapsed: ‒ Press any button to end the signal prematurely. ‒ To set another cooking time, press the button. ‒ When the dish is ready, switch off the appli...
Page 24 - 0 Childproof lock
en Childproof lock 24 No. Meal Cookware Weight range Adjustmentweight Add liquid Shelfposi-tion Information 27 Rabbit, whole Ready to cook,seasoned Roasting dish withglass lid 1.0–2.5 kgWeight of meat Cover thebottom of theroasting dish,and add upto 250 g ve-getables, ifrequired. 2 - 28 Pork neck j...
Page 25 - 1 Sabbath mode; Starting Sabbath mode; 2 Basic settings; Overview of the basic settings
Sabbath mode en 25 ▶ To activate the childproof lock, press and hold the button until appears in the display. ‒ To deactivate the childproof lock, press and holdthe button until goes out in the display. 21 Sabbath mode You can use the Sabbath mode to set a time of over70 hours. You can...
Page 26 - Changing the basic settings; 3 Cleaning and servicing; Suitable cleaning agents
en Cleaning and servicing 26 Display Basic setting Selection Automatic rapid heating from 200 °C 2 = No = Yes 1 Reset all values to factory settings = no 1 = yes 1 Factory setting (may vary according to model) 2 Depending on the appliance specifications 22.2 Changing t...
Page 27 - Cleaning the appliance
Cleaning and servicing en 27 Appliance door Area Suitable cleaning agents Information Door panels ¡ Hot soapy water Do not use a glass scraper or stainless steel wool. Tip: Remove the door panels in order to clean them thoroughly. → "Appliance door", Page 30 Door panel ¡ Made of stainless...
Page 29 - 5 Cleaning aid; Setting the cleaning aid
Cleaning aid en 29 The cooking compartment gets very hot when thecleaning function is in progress. ▶ Never open the appliance door. ▶ Allow the appliance to cool down. ▶ Keep children at a safe distance. WARNING ‒ Risk of harm to health! The cleaning function heats up the cooking compart-ment to a ...
Page 30 - Unhooking the rails; Attaching the rails; 7 Appliance door
en Rails 30 26 Rails To clean the rails and cooking compartment thor-oughly, you can remove the shelf supports. 26.1 Unhooking the rails WARNING ‒ Risk of burns! The rails can be very hot. ▶ Never touch the rails when they are hot. ▶ Allow the appliance to cool down. ▶ Keep children at a safe dist...
Page 31 - Removing the appliance door; Removing the door panes
Appliance door en 31 2. When the locking levers are open in order to detachthe oven door, the hinges are secured. The hinges cannot snap shut. 27.2 Removing the appliance door 1. Open the oven door fully. 2. Open the locking levers on the left- and right-handhinges. 3. Close the oven door as far as...
Page 32 - Fitting the door panes
en Appliance door 32 6. Remove the seal from below the pane. To do this,pull the seal and remove it upwards. Remove thepane. 7. Pull the lower pane diagonally upwards and out. 8. Never remove the screws that are located on theright and left of the sheet metal part. 27.4 Fitting the door panes When ...
Page 33 - 8 Troubleshooting
Troubleshooting en 33 6. Fit the two small seals on the left and right of thepane again. 7. Put the cover back in place and screw it on. 8. Attach the oven door. → "Attaching the appliance door", Page 33 Note: Only use the oven once the glass panes have been correctly fitted. 27.5 Attachi...
Page 35 - Information on the display panel; Normal noises from your appliance
Troubleshooting en 35 28.2 Information on the display panel Fault Cause and troubleshooting No displays light up. The power supply has been disconnected. ▶ Use other electrical appliances to check whether there has been a power failure. The appliance has not been connected as shown in the circuit d...
Page 36 - 9 Transportation and disposal; Disposing of old appliance; If the original packaging is no longer available; 0 Customer Service
en Transportation and disposal 36 WARNING ‒ Risk of electric shock! When changing the bulb, the bulb socket contacts arelive. ▶ Before replacing the bulb, ensure that the applianceis switched off in order to prevent a potential electricshock. ▶ Also unplug the appliance from the mains or switchoff ...
Page 37 - 1 How it works
How it works en 37 This product contains light sources from energy effi-ciency class G. 30.1 Product number (E-Nr.) and productionnumber (FD) You can find the product number (E-Nr.) and the pro-duction number (FD) on the appliance's rating plate.You will see the rating plate with these numbers if y...
Page 38 - Greaseproof paper; Cakes and other baked goods; Baking tips
en How it works 38 ¡ Only use original accessories.The original accessory has been tailored to thecooking compartment and the types of heating.Ensure that the accessory slides in the right wayround. Greaseproof paper Only use greaseproof paper that is suitable for the se-lected temperature. Always ...
Page 40 - Tips for next time you bake
en How it works 40 Meal Accessory/cookware Shelf posi- tion Type ofheating Temperaturein °C Cookingtime,minutes Viennese whirls, 2 levels Universal pan+Baking tray 3+1 150–170 25–40 Puff pastry Universal pan 3 180–200 20–30 Puff pastry, 2 levels Universal pan+Baking tray 3+1 180–200 25–35...
Page 41 - Bread and bread rolls; Recommended settings
How it works en 41 Topic Tip Your cake collapses. ¡ Note the ingredientsand preparation in-structions that aregiven in the recipe. ¡ Use less liquid.Or: ¡ Reduce the bakingtemperature by 10 °Cand increase the bak-ing time. Your cake is too dry. Increase the baking tem-perature by 10 °C andshorten t...
Page 42 - Bakes and gratins
en How it works 42 Meal Accessory/cookware Shelf posi- tion Type ofheating Temperaturein °C Cookingtime,minutes Flatbread, frozen 1 Universal pan 2 200–220 2 10–25 Bread rolls, sweet, fresh Universal pan 3 170–180 2 20–30 Bread rolls, sweet, fresh, 2 levels Universal pan+Baking tray 3+1 1...
Page 44 - Tips for poultry, meat and fish; Tips for roasting and braising
en How it works 44 ¡ Add a little liquid to the poultry in the cookware.Cover the base of the cookware with approx. 1–2 cm of liquid. ¡ When you turn poultry, ensure that the breast sideor skin side is underneath to begin with. ¡ Use tongs to turn the pieces of food you are grilling.If you pierce t...
Page 46 - Tips for next time you roast; Vegetables and side dishes
en How it works 46 Tips for next time you roast If roasting is not successful the first time, you can findsome tips here. Topic Tip The roast is too dark andthe crackling is partlyburnt. ¡ Select a lower temper-ature. ¡ Reduce the roastingtime. Your roast is too dry. ¡ Select a lower temper-ature. ...
Page 48 - Tips for slow cooking; Preparation for drying
en How it works 48 Food Accessories/cook-ware Shelf pos-ition Type ofheating Searingtime inmins Temperature in°C Cookingtime inmins Turkey breast, boned, 6.5–8.5 cm thick, 1 kg, welldone Cookware without lid 2 6–8 120 1 140–180 Pork tenderloin steak, 5–6 cm thick, 1.5 kg, welldone Cookware witho...
Page 49 - Preparing fruit or vegetables for preserving
How it works en 49 Recommended settings Drying The table contains settings for drying various foodstuffs. If you want to dry food that is not listed in the table, youshould use similar foodstuffs in the table as a reference. Note: Use the following shelf positions for drying: ¡ 1 wire rack: Shelf p...
Page 50 - Proving dough
en How it works 50 Recommended settings Preserving food The specified times in the table are average values for preserving fruit and vegetables. They may be influenced byroom temperature, the number of jars, quantity, heat and quality of the jar contents. The specifications are based on1-litre roun...
Page 56 - Register your new device on MyBosch now and profit directly from:; • Expert tips & tricks for your appliance; Free and easy registration – also on mobile phones:; BSH Hausgeräte GmbH; A Bosch Company
Thank you for buying a Bosch Home Appliance! Register your new device on MyBosch now and profit directly from: • Expert tips & tricks for your appliance • Warranty extension options • Discounts for accessories & spare-parts • Digital manual and all appliance data at hand • Easy access to Bos...


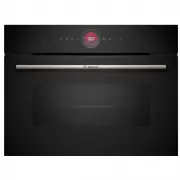
 Bosch CMG633BB1A
User Manual
Bosch CMG633BB1A
User Manual
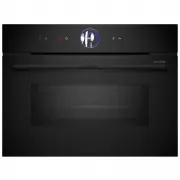
 Bosch CMG633BS1B
User Manual
Bosch CMG633BS1B
User Manual
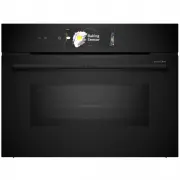
 Bosch CMG656RS1A
User Manual
Bosch CMG656RS1A
User Manual
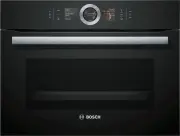
 Bosch CMG7241B1A
User Manual
Bosch CMG7241B1A
User Manual
 Bosch CMG936AB1A
User Manual
Bosch CMG936AB1A
User Manual
 Bosch CMG978NB1A
User Manual
Bosch CMG978NB1A
User Manual
 Bosch CSG656RB1A
User Manual
Bosch CSG656RB1A
User Manual
 Bosch CSG656RS1A
User Manual
Bosch CSG656RS1A
User Manual
 Bosch CSG656RS2A
User Manual
Bosch CSG656RS2A
User Manual
 Bosch CSG958DB1
User Manual
Bosch CSG958DB1
User Manual
 Bosch HBA11B150A
User Manual
Bosch HBA11B150A
User Manual
 Bosch HBA13B150A
User Manual
Bosch HBA13B150A
User Manual
 Bosch HBA13B253A
User Manual
Bosch HBA13B253A
User Manual
 Bosch HBA172BB0A
User Manual
Bosch HBA172BB0A
User Manual
 Bosch HBA172BS0A
User Manual
Bosch HBA172BS0A
User Manual
 Bosch HBA22B250E
User Manual
Bosch HBA22B250E
User Manual
 Bosch HBA22R251E
User Manual
Bosch HBA22R251E
User Manual
 Bosch HBA23B160R
User Manual
Bosch HBA23B160R
User Manual