Bosch HBJ538ES0M - Manuals
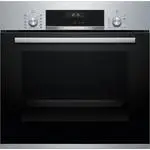
User Manual Bosch HBJ538ES0M


Summary
en Safety 2 Table of contents USER MANUAL 1 Safety .................................................................... 2 2 Preventing material damage ............................... 4 3 Environmental protection and saving en-ergy .....................................................................
en Preventing material damage 4 2 Preventing material damage 2.1 General ATTENTION! Objects on the cooking compartment floor at over50 °C will cause heat to build up. The baking androasting times will no longer be correct and the enamelwill be damaged. ▶ Do not place any accessories, greaseproof p...
Familiarising yourself with your appliance en 5 4 Familiarising yourself with your appliance 4.1 Control panels You can use the control panel to configure all functionsof your appliance and to obtain information about theoperating status. Controls You can use the controls to configure all function...
Bosch Ovens Manuals
-
 Bosch CMG633BB1A
User Manual
Bosch CMG633BB1A
User Manual
-
 Bosch CMG633BS1B
User Manual
Bosch CMG633BS1B
User Manual
-
 Bosch CMG7241B1A
User Manual
Bosch CMG7241B1A
User Manual
-
 Bosch CMG936AB1A
User Manual
Bosch CMG936AB1A
User Manual
-
 Bosch CMG978NB1A
User Manual
Bosch CMG978NB1A
User Manual
-
 Bosch CSG958DB1
User Manual
Bosch CSG958DB1
User Manual
-
 Bosch HBA11B150A
User Manual
Bosch HBA11B150A
User Manual
-
 Bosch HBA13B150A
User Manual
Bosch HBA13B150A
User Manual
-
 Bosch HBA13B253A
User Manual
Bosch HBA13B253A
User Manual
-
 Bosch HBA172BB0A
User Manual
Bosch HBA172BB0A
User Manual
-
 Bosch HBA22R251E
User Manual
Bosch HBA22R251E
User Manual
-
Bosch HBA22R251E
Installation Manual
-
 Bosch HBA23R150R
User Manual
Bosch HBA23R150R
User Manual
-
 Bosch HBA23R160R
User Manual
Bosch HBA23R160R
User Manual
-
 Bosch HBA23S150R
User Manual
Bosch HBA23S150R
User Manual
-
 Bosch HBA33B150A
User Manual
Bosch HBA33B150A
User Manual
-
 Bosch HBA534BB0A
User Manual
Bosch HBA534BB0A
User Manual
-
 Bosch HBA534ES0A
User Manual
Bosch HBA534ES0A
User Manual
-
 Bosch HBA574BS0A
User Manual
Bosch HBA574BS0A
User Manual
-
Bosch HBA574BS0A
Manual