Bosch HBA63B150B - Manuals
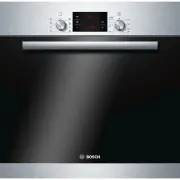
User Manual Bosch HBA63B150B


Summary
3 Table of contents [en]Instruction manual Important safety information..................................................... 4 Causes of damage .............................................................................5 Your new oven ..................................................................
4 : Important safety information Read these instructions carefully. Only then will you be able to operate your appliance safely and correctly. Retain the instruction manual and installation instructions for future use or for subsequent owners.This appliance is only intended to be fully fitted in a k...
5 ■ The cable insulation on electrical appliances may melt when touching hot parts of the appliance. Never bring electrical appliance cables into contact with hot parts of the appliance. Risk of electric shock! ■ Do not use any high-pressure cleaners or steam cleaners, which can result in an electri...
Bosch Ovens Manuals
-
 Bosch CMG633BB1A
User Manual
Bosch CMG633BB1A
User Manual
-
 Bosch CMG633BS1B
User Manual
Bosch CMG633BS1B
User Manual
-
 Bosch CMG656RS1A
User Manual
Bosch CMG656RS1A
User Manual
-
 Bosch CMG7241B1A
User Manual
Bosch CMG7241B1A
User Manual
-
 Bosch CMG936AB1A
User Manual
Bosch CMG936AB1A
User Manual
-
 Bosch CMG978NB1A
User Manual
Bosch CMG978NB1A
User Manual
-
 Bosch CSG656RB1A
User Manual
Bosch CSG656RB1A
User Manual
-
 Bosch CSG656RS1A
User Manual
Bosch CSG656RS1A
User Manual
-
 Bosch CSG656RS2A
User Manual
Bosch CSG656RS2A
User Manual
-
 Bosch CSG958DB1
User Manual
Bosch CSG958DB1
User Manual
-
 Bosch HBA11B150A
User Manual
Bosch HBA11B150A
User Manual
-
 Bosch HBA13B150A
User Manual
Bosch HBA13B150A
User Manual
-
 Bosch HBA13B253A
User Manual
Bosch HBA13B253A
User Manual
-
 Bosch HBA172BB0A
User Manual
Bosch HBA172BB0A
User Manual
-
 Bosch HBA172BS0A
User Manual
Bosch HBA172BS0A
User Manual
-
 Bosch HBA22B250E
User Manual
Bosch HBA22B250E
User Manual
-
Bosch HBA22B250E
Installation Manual
-
 Bosch HBA22R251E
User Manual
Bosch HBA22R251E
User Manual
-
Bosch HBA22R251E
Installation Manual
-
 Bosch HBA23B160R
User Manual
Bosch HBA23B160R
User Manual