Bosch HBA172BS0A - Manuals
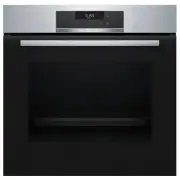
User Manual Bosch HBA172BS0A


Summary
en Safety 2 Futher information and explanations are available online: Table of contents INFORMATION FOR USE 1 Safety .................................................................... 2 2 Preventing material damage ............................... 5 3 Environmental protection and saving en-ergy ...
Safety en 3 1.4 Safe use Always place accessories in the cooking com-partment the right way round. → "Accessories", Page 8 WARNING ‒ Risk of fire! Combustible objects that are left in the cook-ing compartment may catch fire. ▶ Never store combustible objects in thecooking compartment. ▶ If...
Preventing material damage en 5 2 Preventing material damage 2.1 General ATTENTION! Alcoholic vapours may catch fire in the hot cookingcompartment and cause permanent damage to the ap-pliance. The appliance door may spring open due toan explosion and it may fall off. The door panels mayshatter and...
Bosch Ovens Manuals
-
 Bosch CMG633BB1A
User Manual
Bosch CMG633BB1A
User Manual
-
 Bosch CMG633BS1B
User Manual
Bosch CMG633BS1B
User Manual
-
 Bosch CMG656RS1A
User Manual
Bosch CMG656RS1A
User Manual
-
 Bosch CMG7241B1A
User Manual
Bosch CMG7241B1A
User Manual
-
 Bosch CMG936AB1A
User Manual
Bosch CMG936AB1A
User Manual
-
 Bosch CMG978NB1A
User Manual
Bosch CMG978NB1A
User Manual
-
 Bosch CSG656RB1A
User Manual
Bosch CSG656RB1A
User Manual
-
 Bosch CSG656RS1A
User Manual
Bosch CSG656RS1A
User Manual
-
 Bosch CSG656RS2A
User Manual
Bosch CSG656RS2A
User Manual
-
 Bosch CSG958DB1
User Manual
Bosch CSG958DB1
User Manual
-
 Bosch HBA11B150A
User Manual
Bosch HBA11B150A
User Manual
-
 Bosch HBA13B150A
User Manual
Bosch HBA13B150A
User Manual
-
 Bosch HBA13B253A
User Manual
Bosch HBA13B253A
User Manual
-
 Bosch HBA172BB0A
User Manual
Bosch HBA172BB0A
User Manual
-
 Bosch HBA22B250E
User Manual
Bosch HBA22B250E
User Manual
-
Bosch HBA22B250E
Installation Manual
-
 Bosch HBA22R251E
User Manual
Bosch HBA22R251E
User Manual
-
Bosch HBA22R251E
Installation Manual
-
 Bosch HBA23B160R
User Manual
Bosch HBA23B160R
User Manual
-
 Bosch HBA23B450
User Manual
Bosch HBA23B450
User Manual