Blaupunkt BP4000HDV7100 - Manuals
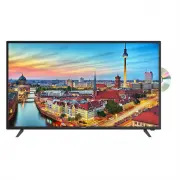
User Manual Blaupunkt BP4000HDV7100


Summary
General Safety 4 Installation 8 Controls and Connections 10 Remote Control 12 Basic Operations 15 Recording 16 Media 17 Menus Channel Settings 18 Tuning Settings 19 Picture Settings 20 Sound Settings 21 Lock Settings 22 Time Settings 23 Setup Settings 24 FAQs 25 Specifications 26 Customer Support 28...
4 Read this manual thoroughly before you start using the TV.Store this manual, the completed warranty card, your receipt and the product packaging.The safety precautions instructions reduces the risk of fire, electric shock and injury when correctly complied to.Please follow all instructions and tak...
6 GENERAL SAFETY INSTRUCTIONS (Cont.) • Please beware that Dust could accumulate over time on the unit and cause it to generate heat and or deteriorate insulation, which in turn may result in an electrical fire.• The product is not intended for use by persons (including children) with reduced physic...
Blaupunkt TVs Manuals
-
 Blaupunkt 40FB5000T
User Manual
Blaupunkt 40FB5000T
User Manual
-
 Blaupunkt 50UB7000T
User Manual
Blaupunkt 50UB7000T
User Manual
-
 Blaupunkt BP320HSG9700
User Manual
Blaupunkt BP320HSG9700
User Manual
-
 Blaupunkt BP400FSG9200
User Manual
Blaupunkt BP400FSG9200
User Manual
-
 Blaupunkt BP4021FHDV
User Manual
Blaupunkt BP4021FHDV
User Manual
-
 Blaupunkt BP420FSG9200
User Manual
Blaupunkt BP420FSG9200
User Manual
-
 Blaupunkt BP5040UHD
User Manual
Blaupunkt BP5040UHD
User Manual
-
 Blaupunkt BP550USG9500
User Manual
Blaupunkt BP550USG9500
User Manual
-
 Blaupunkt BP550USG9700
User Manual
Blaupunkt BP550USG9700
User Manual
-
 Blaupunkt BP580USG9500
User Manual
Blaupunkt BP580USG9500
User Manual
-
 Blaupunkt BP580USG9700Q
User Manual
Blaupunkt BP580USG9700Q
User Manual
-
 Blaupunkt BP650USG9200
User Manual
Blaupunkt BP650USG9200
User Manual
-
 Blaupunkt BP650USG9500
User Manual
Blaupunkt BP650USG9500
User Manual
-
 Blaupunkt BP650USG9700
User Manual
Blaupunkt BP650USG9700
User Manual
-
 Blaupunkt BP650USG9700Q
User Manual
Blaupunkt BP650USG9700Q
User Manual
-
 Blaupunkt BP750USG700Q
User Manual
Blaupunkt BP750USG700Q
User Manual
-
 Blaupunkt BP860USG9700
User Manual
Blaupunkt BP860USG9700
User Manual