Black & Decker HVFE2150LB-XE - Manuals
User Manual Black & Decker HVFE2150LB-XE


Summary
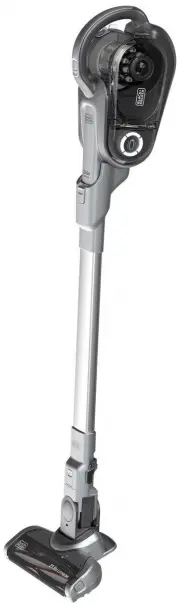
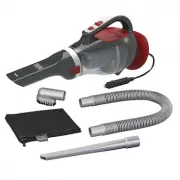
2 ENGLISH (Original instructions) Intended use Your Black & Decker Dustbuster® handheld vacuum cleaner has been designed for vacuum cleaning purposes. This appliance is intended for household use only. Read all of this manual carefully before operating the appliance. Safety instructions @ Warnin...
3 ENGLISH (Original instructions) Additional safety instruc- tions After use u Unplug the charger before cleaning the charger or charging base. u When not in use, the appliance should be stored in a dry place. u Children should not have access to stored appliances. Residual risks. Additional residua...
4 ENGLISH (Original instructions) Chargers Your charger has been designed for a specific voltage. Always check that the mains voltage corresponds to the voltage on the rating plate. Warning! Never attempt to replace the charger unit with a regular mains plug. u Use your Black & Decker charger on...
Black & Decker Vacuums Manuals
-
 Black & Decker ADV1200-XK
User Manual
Black & Decker ADV1200-XK
User Manual
-
 Black & Decker BCHV001C1
User Manual
Black & Decker BCHV001C1
User Manual
-
 Black & Decker BDASP103
User Manual
Black & Decker BDASP103
User Manual
-
 Black & Decker BDASV102
User Manual
Black & Decker BDASV102
User Manual
-
 Black & Decker BDH1200FVAV
User Manual
Black & Decker BDH1200FVAV
User Manual
-
 Black & Decker BDH1200PVAV
User Manual
Black & Decker BDH1200PVAV
User Manual
-
 Black & Decker BDH1220AV
User Manual
Black & Decker BDH1220AV
User Manual
-
Black & Decker BDH1220AV
Manual
-
 Black & Decker BDH2000L
User Manual
Black & Decker BDH2000L
User Manual
-
 Black & Decker BDH2000PL
User Manual
Black & Decker BDH2000PL
User Manual
-
 Black & Decker BDH2020FL
User Manual
Black & Decker BDH2020FL
User Manual
-
 Black & Decker BHFEA18D1
User Manual
Black & Decker BHFEA18D1
User Manual
-
 Black & Decker BHFEA420J
User Manual
Black & Decker BHFEA420J
User Manual
-
 Black & Decker BHFEA515J-XE
User Manual
Black & Decker BHFEA515J-XE
User Manual
-
 Black & Decker BHFEA520J
User Manual
Black & Decker BHFEA520J
User Manual
-
 Black & Decker BHFEB520D1
User Manual
Black & Decker BHFEB520D1
User Manual
-
 Black & Decker BHFEV182CP-XE
User Manual
Black & Decker BHFEV182CP-XE
User Manual
-
 Black & Decker BHFEV362DA-XE
User Manual
Black & Decker BHFEV362DA-XE
User Manual
-
 Black & Decker BHHV520BFP-XE
User Manual
Black & Decker BHHV520BFP-XE
User Manual
-
 Black & Decker BHSB320JP
User Manual
Black & Decker BHSB320JP
User Manual