Page 2 - To contact Belling about your appliance, please call:; Customer Care Helpline; During the; Countries of destination:
To contact Belling about your appliance, please call: Customer Care Helpline AU - 1 800 444 357 NZ - 09 274 8265 To register your appliance by mail: Please complete the warranty card and return to the address supplied To register your appliance online: AU - www.belling.com.au NZ - www.belling.co.nz ...
Page 3 - Thank you for buying this British-built appliance from us.; please retain your Certificate of Compliance.; Disposal of Packaging Material; Call the gas emergency helpline; INTRODUCTION
Thank you for buying this British-built appliance from us. This user guide book is designed to help you through each step of owning your new product. Please read it carefully before you start using your appliance, as we have endeavored to answer as many questions as possible, and provide you with as...
Page 4 - CONTENTS; SAFETY
CONTENTS SAFETY PG 5 USING YOUR APPLIANCE PG 9 USING THE GRILL PG 17 USING THE TOP OVEN PG 19 USING THE MAIN OVEN - ELECTRIC PG 21 USING THE OVEN/GRILL - MULTIFUNCTION PG 27 USING THE OVEN - SLOW COOK PG 36 USING THE SPLITTER - 90CM DELUXE ONLY PG 39 INSTALLATION INSTRUCTIONS PG 54 REGULATION STANDA...
Page 5 - This appliance is not intended for use by persons (including
SAFETY WARNING • During use the appliance becomes hot. Care should be taken to avoid touching heating elements. • This appliance is not intended for use by persons (including children) with reduced physical, sensory or mental capabilities, or lack of experience and knowledge, unless they have been g...
Page 6 - • If the hob surface is cracked, broken or shattered, switch off the
SAFETY • If the hob surface is cracked, broken or shattered, switch off the appliance to avoid the possibility of electric shock and call for a service engineer’s visit. • Never put items directly on the base of the oven or cover the oven with foil, as this can cause the base element to overheat. • ...
Page 8 - This appliance must be earthed.
SAFETY • This appliance must be earthed. • The appliance must never be disconnected from the mains supply during use, as this will seriously affect the safety and performance, particularly in relation to surface temperatures becoming hot and gas operated parts not working efficiently. The cooling fa...
Page 9 - Getting to know your product; Your appliance layout may differ depending on the model.; Note: All numbers refer to the nominal power rating in Kilowatts (kW); Dual Fuel Hob 90cm; USING YOUR APPLIANCE; Wok
Getting to know your product Note: Your appliance layout may differ depending on the model. Note: All numbers refer to the nominal power rating in Kilowatts (kW) Dual Fuel Hob 90cm Gas-Through-Glass Hob 90cm Dual Fuel Hob 100/110cm Gas-Through-Glass Hob 100/110cm Fascia Fascia 90cm Deluxe 100/110cm ...
Page 10 - Oven Selector Control
Control Panel 90cm Dual Fuel Deluxe Control Panel 90cm Gas-Through-Glass Deluxe Control Panel 100/110cm Dual Fuel Deluxe USING YOUR APPLIANCE Cook zones Cook zones Oven Oven Selector Control Top Oven Clock/Programmer Grill Oven Thermostat indicator Slow Cook Hob and Oven controls Hob and Oven contro...
Page 12 - Appliance functions; Oven Selector Control Electric oven Hob
Appliance functions Note: Your oven may not have all of the functions shown here. We recommend for best cooking results, please preheat your oven for 15 minutes and 3-5 minutes for grilling. Only slow cook using the dedicated function. When using the multifunction oven, firstly select the fanned ove...
Page 13 - Choose required setting; MUST
USING YOUR APPLIANCE Ovens and Grill Choose required setting When using the top oven or main oven, the thermostat indicator light will come on until the selected temperature is reached. When the Top oven/grill or grill is switched on, the cooling fans come on to keep the fascia and control knobs coo...
Page 14 - USING YOUR APPLIANCE; Grill pan and trivet; Hob; Once lit, turn the control knob to the required setting.
USING YOUR APPLIANCE Grill pan and trivet The grill trivet (inside the grill pan) can be inverted to give a high or low position, or it may be removed. The speed of grilling can be controlled by selecting a higher or lower shelf position, or adjusting the grill setting. Inverted Hob • Press the cont...
Page 15 - Fitting burner caps and heads; Pan placement; base of the pan. Do not place pans directly onto the burners.; Pan sizes required; Dual Fuel; All other cook zones
USING YOUR APPLIANCE Fitting burner caps and heads angled parallel burner cap burner head burner cap not central Pan placement Always make sure that your pans are placed centrally and do not allow the flame to extend over the base of the pan. Do not place pans directly onto the burners. Pan sizes re...
Page 16 - Cook Zones; Using the Dual Wok; 0cm Wok
USING YOUR APPLIANCE 90cm Gas-Through-Glass Cook Zones Minimum Pan Sizes (mm) Maximum Pan Sizes (mm) Wok 100 300 All other cook zones 220 110cm Gas-Through-Glass Cook Zones Minimum Pan Sizes (mm) Maximum Pan Sizes (mm) Wok 100 280 All other cook zones 220 Warning: Do not allow cooking vessels to ove...
Page 17 - USING THE GRILL
USING THE GRILL Warning: Accessible parts may become hot when the grill is in use. Children should be kept away BEFORE YOU START GRILLING. . . . Before you use the grill, make sure you have placed the grill shelf in the posi- tion you need as once the grill is on you may injure yourself if you try t...
Page 19 - USING THE TOP OVEN; The top element gets
USING THE TOP OVEN When you are cooking keep children away from the vicinity of the oven . Caution: The top element gets extremely hot when in use, so take extra care to avoid touch- ing it. The top oven is a conventional oven.Note: The top oven is not controlled by the programmer. To turn on the to...
Page 21 - USING THE MAIN OVEN - ELECTRIC; Accessible parts may be
USING THE MAIN OVEN - ELECTRIC Accessible parts may be hot when the oven is used. Young children should be kept away. To switch on the oven Turn the oven control knob(s) to the required setting. The white thermostat neon (if fitted) will come on until the selected temperature is reached and then go ...
Page 40 - Using the upper and lower ovens; Upper Oven temperature; Grilling; THE DOOR; BE OPEN WHEN THE GRILL IS USED FOR CONVENTIONAL GRILLING.; USING THE SPLITTER - 90CM DELUXE ONLY
Using the upper and lower ovens When using the upper and lower ovens at different temperatures, use the upper oven at the higher temperature and the lower oven at the lower temperature. The table below shows the minimum temperature that can be achieved in the lower oven when the upper oven is in use...
Page 42 - Your clock / programmer may not have all these functions; Using the touch controls; Plus - Increase time or volume; Manual Mode
Please be aware that only the multifunction oven is controlled by the programmer. Note: Your clock / programmer may not have all these functions Minute minder Menu Minus Plus C ooking time / Duration End of cooking time Time of day Keylock Auto cooking Automatic mode Manual mode Volume level 7-segme...
Page 43 - Setting the time of day; Setting the minute minder; The maximum cooking time that can be set is 99 minutes.
Setting the time of day By pressing menu, scroll through the functions until you reach ‘time of day’. 1 Press the function button until the ‘time of day’symbol appears 2 Press the plus or minus buttons to set a time Setting the minute minder The maximum cooking time that can be set is 99 minutes. 1 ...
Page 44 - To modify or cancel the minute minder; To modify or cancel the cooking time
To modify or cancel the minute minder Return to the minute minder function and use either the plus or minus buttons to adjust the time. Bysetting the time to ‘0.00’, this will cancel the countdown. Setting the cooking time (the duration of time the oven will operate for) Semi Auto-matic cooking Note...
Page 45 - Automatic; To modify or cancel the end of cooking time
Setting the end of cooking time (to set a time for the oven to turn off) Fully Automatic Enter cooking duration as described in ‘Setting the cooking time’ section. The display shows the current ‘time of day’ plus the ‘end of cooking time’ symbol. The latest ‘end of cooking time’ is limited to the cu...
Page 46 - Setting the volume; Default tone is L3; Activating / deactivating Key lock
Setting the volume Press the menu button until “LX” (X = 1, 2 or 3) flashes on the display. Use the plus or minus buttons to select a tone. Note: Default tone is L3 Activating / deactivating Key lock 1 Press and hold the plus button for 3-5seconds 2 Once the Key lock is active, the buttons will be i...
Page 47 - Removing Shelf Runners; Standard shelves
USING YOUR APPLIANCE Removing Shelf Runners To Open Standard shelves Front of appliance 2 Ensure the shelf is fully pushed back towards the back of the oven, until the shelf stopper is reached. Slightly raise the shelf and insert in the chosen shelfposition 1
Page 48 - the instructions below.; Option 1: Removing Telescopic guides
USING YOUR APPLIANCE Your product will be supplied with either one of the fitted Telescopic guides as shown. Please refer to the instructions below. Option 1: Removing Telescopic guides Option 1 Option 2 1 2 3
Page 49 - of the shelves as shown below.; Option 2: Removing Telescopic guides; Front Clip; Pull the guide away from the shelf runner.
USING YOUR APPLIANCE Note: The Telescopic guides can only be attached to the top part of the top, middle and bottom sections of the shelves as shown below. Option 2: Removing Telescopic guides Front Clip Push the front of the guide upwards firmly, ensuring the front clip is released from the shelf r...
Page 50 - Pull the back clip away from in between the shelf runner.; Option 2: To reinstall the Telescopic guides; Back clip; back of shelf runner.; Front clip; is secured into place.
USING YOUR APPLIANCE Back clip Pull the back clip away from in between the shelf runner. Option 2: To reinstall the Telescopic guides Back clip Secure the back clip in between the shelf runner. Ensure the guide is fully pushed back towards the back of shelf runner. Front clip Locate the front clip o...
Page 51 - Full width oven pan
USING YOUR APPLIANCE The Telescopic guide should now be fitted correctly and secure to the shelf runner. Full width oven pan Note: Please ensure the wires / oven pan locate around the small tabs on the telescopic runner. Telescopic sliders Option 1 Option 2 Option 1 Option 2 3
Page 52 - Changing the light bulb; Please remember that bulbs are not covered by your warranty.; Please refer to our website for further information on recipes
USING YOUR APPLIANCE Changing the light bulb Not all appliances have the same number and type of bulbs. Before you replace your bulb, check to see what type you have. Please remember that bulbs are not covered by your warranty. Wok Cradle (Deluxe only) if supplied Please ensure the woke cradle sits ...
Page 53 - CLEANING YOUR APPLIANCE; Dos; Always clean food spillages as soon as possible.; Don’ts
CLEANING YOUR APPLIANCE Dos Note: Always switch off your appliance and allow it to cool down before you clean any part of it. Note: Please take extra care when cleaning over the symbols on the control panel, as this can lead to them fading. H Tips: Some foods can mark or damage the metal or paint wo...
Page 54 - been made subsequent to publishing.; Please keep to the following points most carefully; reliability by ensuring that it will cool down, efficiently.; INSTALLATION INSTRUCTIONS; Before you start please read the instructions.
FAILURE TO INSTALL APPLIANCES CORRECTLY IS DANGEROUS AND COULD LEAD TO PROSECUTION. This appliance shall only be installed only by authorised persons and in accordance with the manufacturer's installation instructions, local regulations, municipal building codes, electrical wiring regulations, and a...
Page 55 - WARNING: Servicing shall be carried out by authorized personnel; and any other relevant statutory regulations.; Ventilation Requirements; should have an air supply.; REGULATIONS AND STANDARDS
Prior to installation, ensure that the local distribution conditions (nature of the gas and gas pressure) and the adjustment of the appliance are compatible. The adjustment conditions are stated on the data badge. This appliance is not connected to a combustion evacuation device. It shall be install...
Page 56 - Levelling Your Cooker; Place a spirit level on a baking sheet onto an oven shelf.; Fitting the plinth; Oven cavity; BEFORE INSTALLATION
Levelling Your Cooker Place a spirit level on a baking sheet onto an oven shelf. The cooker is fitted with leveling feet (1) Level your cooker to your desired height using the leveling feet at the front and rear of the cooker. Rear wheels (if fitted) Adjustment of the wheel height can be made with a...
Page 57 - If this appliance is installed near vinyl wrapped
Fitting the towel rail (if applicable) • On the towel rail there are two holes, top (A) and bottom (B), these holes have corresponding holeson the fascia at each end. • Both screws must be inserted through the towel rail at each end and screwed into the fascia. Bothscrews are M6 screws but the longe...
Page 58 - Cupboard / hood clearances; Nominal width of the hob; Wall Unit; min; View from front; DIMENSIONS AND CLEARANCES; View from above, with the
Cupboard / hood clearances Nominal width of the hob 90mm Wall Unit Wall Unit 400mm No shelf or overhang of combustible material should be closer than 650mm above the hob. 90mm 10mm 400mm min 650mm worktop worktop 10mm View from front Worktop Worktop 10mm 10mm 60mm • If your appliance has a side open...
Page 59 - Stability Bracket; of the cooker. A stability bracket is included with this product.
Stability Bracket If the cooker is fitted with a flexible connection, a stability bracket should be fitted to engage in the back of the cooker. A stability bracket is included with this product. A stability bracket can be fitted as follows: 1. Place the cooker in the position and draw a PENCIL LINE ...
Page 60 - First strip the wires then push the cable through the cable clamp.; CONNECT TO THE ELECTRICITY AND GAS SUPPLY
WARNING: This appliance must be earthed. • This appliance must be fitted to a switch providing all pole disconnection with a minimum contact separation of 3mm. • Access to the mains terminal is gained by removing the terminal block cover at the rear of the appli-ance. • Connection should be made wit...
Page 61 - Electric and gas connection location (see illustration below)
Electric and gas connection location (see illustration below) The electric connection can be found on the rear of the appliance, 25.7cm from the bottom of the appli-ance and 35cm from the right hand side of the appliance. The gas inlet can be found on the rear of the appliance, 56.5cm from the botto...
Page 62 - COMMISSIONING; The installer must test the operation of the appliance.; Burner aeration; All burners have fixed aeration and no adjustment is possible.; Pressure setting; onto the outlet of the regulator.; Hob burner
COMMISSIONING The installer must test the operation of the appliance. Burner aeration All burners have fixed aeration and no adjustment is possible. Pressure setting Natural Gas @ 1.00kPa Pressure test point The pressure test point is fitted on the outlet of the regulator or on an adapter which shou...
Page 67 - Please see data badge for your specified gas type. Can be convert; TECHNICAL DATA
Gas - range Databadge Lower part of the front frame Appliance class Class 1 - freestanding cooker Electrical supply 240V/415 3N ~ 50Hz Type of gas Please see data badge for your specified gas type. Can be convert - ed from natural gas to LPG. Never attempt to convert an appliance unless the data bad...
Page 69 - MANUFACTURER GUARANTEE
MANUFACTURER GUARANTEE This warranty is provided in Australia by Glen Dimplex Australia Pty Limited ABN 69 118 275 460 (Phone number 1300 556 816) and in New Zealand by Glen Dimplex New Zealand Limited NZBN 9429000069823 (Phone number 09 274 8265) in respect of the Belling product. 1. Belling Expres...
Page 70 - other parts of the product which require routine replacement; Consumer guarantees; this document
c) The repair relates to the replacement of consumable parts such as fuses and bulbs or any other parts of the product which require routine replacement; d) You are unable to provide us with reasonable proof of purchase for the product; e) the breakdown occurs after the expiry of the express warrant...
Page 71 - Glen Dimplex Australia Pty Ltd
5. Warranty claims If you make a valid claim under this warranty and none of the exclusions set out in section 2 apply, we will, at our election, either repair the product or replace the product with a product of identical specification (or where the product is superseded or no longer in stock, with...


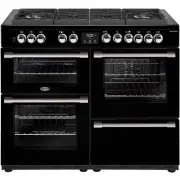
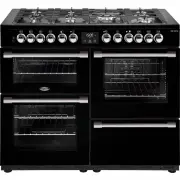 Belling BCC1100DFB
User Manual
Belling BCC1100DFB
User Manual
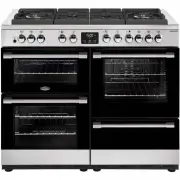
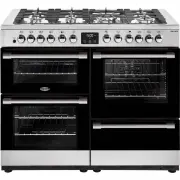 Belling BCC1100DFSS
User Manual
Belling BCC1100DFSS
User Manual
 Belling BCC1100GTGB
User Manual
Belling BCC1100GTGB
User Manual
 Belling BCC1100GTGSS
User Manual
Belling BCC1100GTGSS
User Manual
 Belling BCC1100IB
User Manual
Belling BCC1100IB
User Manual
 Belling BCC1100ISS
User Manual
Belling BCC1100ISS
User Manual
 Belling BCC900DFB
User Manual
Belling BCC900DFB
User Manual
 Belling BCC900DFSS
User Manual
Belling BCC900DFSS
User Manual
 Belling BCC900GTGSS
User Manual
Belling BCC900GTGSS
User Manual
 Belling BCC900IB
User Manual
Belling BCC900IB
User Manual
 Belling BCC900ISS
User Manual
Belling BCC900ISS
User Manual
 Belling BFS54DOGG
User Manual
Belling BFS54DOGG
User Manual
 Belling BFS60DODF
User Manual
Belling BFS60DODF
User Manual
 Belling BFS60DOGG
User Manual
Belling BFS60DOGG
User Manual
 Belling BFS60SCCER
User Manual
Belling BFS60SCCER
User Manual
 Belling BFS60SCDF
User Manual
Belling BFS60SCDF
User Manual
 Belling BMR60DODFB
User Manual
Belling BMR60DODFB
User Manual
 Belling BMR60DODFW
User Manual
Belling BMR60DODFW
User Manual
 Belling BMR60DOINDB
User Manual
Belling BMR60DOINDB
User Manual
 Belling BMR60DOINDW
User Manual
Belling BMR60DOINDW
User Manual