Page 2 - CONGRATULATIONS
2 Dear Customer, Congratulations on the purchase of your new product from Belling . We recommend you please take some time to read the instruction manual thoroughly to familiarise yourself with the functionality and operations to ensure optimum performance of your new appliance. After reading the ma...
Page 3 - CONTENTS
3 CONTENTS PRODUCT / INSTALLER DETAILS 4 WARNINGS & PRECAUTIONS 5 - 8 Safety precautions 5 Other Important Safety Information 6 Warning for Use of Grill, Oven & Appliance Hob 6 Installation Warnings 7 Cleaning & Service Warnings 8 Electrical Shock Hazard 8 Disposal of your old Machine 8 ...
Page 4 - PRODUCT / INSTALLER DETAILS; Date of installation:
4 PRODUCT / INSTALLER DETAILS For future reference we suggest that you staple a copy of your purchase receipt here and complete the below so the information is always at hand. PRODUCT DETAILS Model number: Description: Serial number: (Located on the product rating label) Telephone number: Telephone ...
Page 5 - SAFETY PRECAUTIONS; WARNINGS & PRECAUTIONS
5 WARNING : ensure that no downward pressure is applied to the oven door when open. In particular,do not allow a child to climb on to open oven door. WARNING : accessible parts can become hot during use, especially the oven door. To avoid burns, young children must be kept away. WARNING: Young child...
Page 7 - INSTALLATION WARNINGS; If this cooking range is to; In order to avoid accidental; To prevent; SAFETY INSTRUCTIONS; of used gas is different than the values; Failure to follow this advice
7 INSTALLATION WARNINGS CAUTION: If this cooking range is to be connected to a new or upgraded electrical installation, then it MUST be connected to the supply by a supply cord fitted with; an appropriately rated plug that is compatible with the socket-outlet fitted to the final sub-circuit in the f...
Page 8 - ELECTRICAL SHOCK HAZARD; Switch the appliance off at; B C; Assembly of gas supply and leakage; Points that must be checked during
8 CLEANING & SERVICE WARNINGS Always ensure the appliance is switched off before cleaning. DO NOT use corrosive cleaners e.g. caustic soda-based cleaners. DO NOT use a steam cleaner to clean the appliance. Always clean the appliance immediately after any food spillage. Cleaning and user maintena...
Page 9 - OPERATION; Product Overview
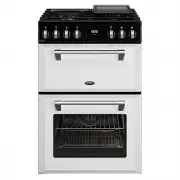
9 OPERATION 1. Hotplate burners with removable caps x 4 2. Cast Iron Trivets 3. Control Panel 4. Side Racks 5. Top Oven Door 6. Bottom Oven Door 7. Shelf 8. Baking Tray 9. Oven Element ( Hidden under floor) 10. Wok adapter 11. Griddle 12. Oven Element (Hidden under floor) (conventional models only) ...
Page 10 - ignites gas; sets the desired oven function; Control Panel
10 OPERATION 1. Gas control knobs: ignites gas and adjusts individual temperature 2. Oven temperature controls knobs: sets oven temperature 3. Oven function control knobs 2. Oven temperature control knob 1. Gas control knobs 4. 3 button programmable timer 3. Oven function control knobs: sets the des...
Page 11 - PREPARING YOUR PRODUCT FOR THE FIRST TIME; Oven shelf positions; Position 1; Fitting oven shelves
11 PREPARING YOUR PRODUCT FOR THE FIRST TIME Oven shelf positions The main oven has 5 shelf positions to choose from. Position 1 is the position at the bottom of the oven and position 5 is located at the highest point of the oven. The 5 position side rack system can house both the standard oven shel...
Page 12 - USING THE OVEN OF YOUR ELECTRIC COOKER; Control Knob Icons (printed around the knobs); Cooking Mode Selection Knob
12 USING THE OVEN OF YOUR ELECTRIC COOKER Control Knob 1 & 2: Oven Function Control Knob Icons (printed around the knobs) Control Knob 3: Temperature OPERATION Cooking Mode Selection Knob Cooktop Burner Control Knob Cooking Temperature Selection Knob
Page 14 - Wash grill tray & insert after every use.; Conventional mode; When set to Conventional mode, the top and bottom heating; USING THE TOP OVEN / GRILL OF YOUR ELECTRIC COOKER
14 Full Grill mode : Select ‘Full Grill’ mode with cooking mode selection knob and turn cooking temperature selection knob to ‘Max’. When set to Grill mode, the top inner element operates. The extremely high and direct temperature of the grill makes it possible to brown the surface of meats and roas...
Page 15 - Function Description
15 Using the Programmable Clock (3 Button Digital Clock) This model has a digital display, 24hr clock with 3 control buttons. When the power is connected, the screen displays ‘ 12:00 ’ and the bar above the ‘ ’ symbol flashes. Setting the time when power is first connected To set the correct time, p...
Page 16 - Automatic setting
16 OPERATION START COOKING NOW AND SET COOKING TIME This semi-automatic setting of the oven allows you to start cooking immediately, set the cooking time (up to 10 hours), select the temperature and cooking mode. The oven will cook according to the selected cooking mode and temperature and then swit...
Page 17 - TIMER
17 START COOKING NOW AND SET THE FINISH TIME 1. Press the function button repeatedly until the bar above ‘ ’ flashes, then press ‘ ’ or ‘ ’ button to set the time to finish cooking (up to 23 hours and 59 minutes). 2. Set cooking temperature and cooking mode by turning the thermostat knob and selecto...
Page 18 - COOKING GUIDE; Dishes
18 OPERATION COOKING GUIDE Dishes Fan-forced Conventional Thermostat (C) Shelf position Cook time (min) Thermostat (C) Shelf position Cook time (min) Layerd pastry 170 - 190 1, 2 or 3 35 - 45 170 - 190 1 or 2 35 - 45 Cake 150 - 170 1, 2 or 3 30 - 40 170 - 190 1 or 2 30 - 40 Cookie 150 - 170 1, 2 or ...
Page 19 - Hotplate Ignition; Triple Ring Burner; Gas Burner
19 USING THE HOTPLATES OF YOUR COOKER The symbols on the control knobs mean the following: No gas flow Maximum gas flow Minimum gas flow Hotplate Ignition To light these hotplates: 1. Choose the hotplate you want to use. 2. Press and turn the hotplate burner control knob to ‘ ’. 3. Hold the control ...
Page 20 - FITTING ACCESSORIES & CLEANING; SAFETY WARNING REGARDING CLEANING; Always make sure that the cooker is turned off before cleaning.; Cleaning the Enamel; Make sure control knobs are in off position.
20 FITTING ACCESSORIES & CLEANING SAFETY WARNING REGARDING CLEANING Always make sure that the cooker is turned off before cleaning. Always clean cooker immediately after use. Do not use steam cleaners. These may cause moisture build-up. Do not use caustic- based cleaners. These will damage alumi...
Page 21 - CLEANING THE GAS HOB; The trivets locate in the recessed area of the hob.; Figure 1
21 FITTING ACCESSORIES & CLEANING Cast iron panframe components Burner base Iron burner cover The burner cover CLEANING THE GAS HOB Removing the Trivets The trivets locate in the recessed area of the hob. They can be removed for cleaning by carefully lifting them from the hob. Clean by washing i...
Page 22 - Removing the burners; Figure 2
22 Removing the burners The burner caps and crowns are removable for cleaning. Flame port blockage should be removed by means of a match stick or brush. If the caps, crowns and cups are heavily soiled, use a non-abrasive cleaning compound. Do not clean them with abrasive or caustic type cleaners, or...
Page 23 - CLEANING THE OVEN; Cleaning the oven door / how to remove the oven doors
23 G G G G G G G G G G G G CLEANING THE OVEN 1. Open the door fully. 2. Remove oven shelves and side racks. 3. Clean in hot soapy water. Cleaning the oven door / how to remove the oven doors For a more thorough clean, you can remove and disassemble the oven door. Proceed as follows: 4. Gently close ...
Page 24 - Cleaning the door glass; Do not use the oven without the inner door glass fitted.
24 Removing the Inner Pane of Glass 1. Double oven door: Remove the seal G by unscrewing the no.2 bolts. 2. Gently pull out the inner pane of glass. 3. Clean the glass with an appropriate cleaner. Dry thoroughly, and place on a soft surface. 4. Now you can also clean the inside of the outer glass. C...
Page 25 - REPLACING THE OVEN LAMP; Remove the glass
25 REPLACING THE OVEN LAMP Ensure that the appliance is switched off before replacing the lamp to avoid the possibility of electric shock. EN - 2 Icon Type Meaning WARNING Serious injury or death risk RISK OF ELECTRIC SHOCK Dangerous voltage risk SYMBOL ISO 7010 W021 :DUQLQJ5LVNRI¿UHÀDPPDEOHPDWHULDO...
Page 26 - SOLVING PROBLEMS; Problem
26 HINT & TIPS SOLVING PROBLEMS If you have a problem with your appliance, check the table below before calling service. You may be able to avoid a service call by and avoid unnecessary inconvenience and expense. Problem Possible causes What to do No spark obtained when gas burner knob is pushed...
Page 27 - Oven shelf tight
27 HINT & TIPS Only service centers should carry out servicing. Otherwise warranty may be void. Problem Possible causes What to do Digital timer display flashing Power failure or interruption Reset time of day Household fuse blown or power supply is off Check fuses, power supply Unit smoking whe...
Page 28 - INSTALLATION; INSTALLING YOUR NEW COOKER; Safety warnings about installation; LOCATING THE COOKER
28 INSTALLATION INSTALLING YOUR NEW COOKER Safety warnings about installation The cooker must be installed and serviced only by an authorized person. A certificate of compliance must be supplied by Installer and is to be kept by the customer. The packing materials must be removed before you install ...
Page 31 - FITTING A POWER SUPPLY CABLE
31 FITTING A POWER SUPPLY CABLE EN - 2 Icon Type Meaning WARNING Serious injury or death risk RISK OF ELECTRIC SHOCK Dangerous voltage risk SYMBOL ISO 7010 W021 :DUQLQJ5LVNRI¿UHÀDPPDEOHPDWHULDOV CAUTION ,QMXU\RUSURSHUW\GDPDJHULVN IMPORTANT / NOTE 2SHUDWLQJWKHV\VWHPFRUUHFWO\ 'HDU&XVWRPHU &RQJ...
Page 32 - CONNECTION TO THE GAS SUPPLY; Gas connection
32 CONNECTION TO THE GAS SUPPLY This appliance is suitable for connection with rigid pipe or flexible hose. The isolating manual shut-off valve connection point must be accessible when the appliance is installed. The flexible hose assembly must be certified to AS/NZS 1869 class B or D, be of appropr...
Page 33 - Checking gas pressures; Wok; Total Gas Consumption; Checking gas supply; Check the manometer zero point is correct.; For LPG cookers
33 INSTALLATION Checking gas pressures The cookers come in gas types: Natural gas and Universal LPG: If the cooker is required to use LPG, a conversion kit is included. Before installation check that the cooker is suitable for the gas supply. To do this check the gas type on the carton sticker or on...
Page 34 - Natural Gas; (test point is located at the regulator); Universal LPG; (the appliance test point is located at the injector); Testing the operation of the gas cooker
34 Natural Gas (test point is located at the regulator) The supplied regulator must be fitted to the appliance inlet connection. Gas pressure must be adjusted to 1.0 kPa when approximately 50% of the burners are on high flame. Universal LPG (the appliance test point is located at the injector) Gas p...
Page 35 - Changing injectors; Changing injectors hob burners; Remove the burner caps and the adapters.
35 Checking the function of the regulator With the appliance operating check the outlet pressure: When all burners of the appliance are operating at maximum, When the smallest burner of the appliance is operating at minimum. Under these conditions the outlet pressure should not vary from the nominal...
Page 36 - Changing the gas inlet; Adjusting the minimum flame position; TESTING THE COOKER FEATURES
36 EN - 2 Icon Type Meaning WARNING Serious injury or death risk RISK OF ELECTRIC SHOCK Dangerous voltage risk SYMBOL ISO 7010 W021 :DUQLQJ5LVNRI¿UHÀDPPDEOHPDWHULDOV CAUTION ,QMXU\RUSURSHUW\GDPDJHULVN IMPORTANT / NOTE 2SHUDWLQJWKHV\VWHPFRUUHFWO\ 'HDU&XVWRPHU &RQJUDWXODWLRQVRQWKHSXUFKDVHRI\RX...
Page 37 - TECHNICAL SPECS; Model; Contact our Customer Care Team; Glen Dimplex Australia Pty Ltd
37 TECHNICAL SPECS If the cooker cannot be adjusted to perform correctly, then inform the customer of the problem and put a warning notice on the cooker. If the problem is dangerous, then disconnect the cooker. If there is a fault, then the customer should be advised to contact the manufacturer’s lo...
Page 39 - Belling; MANUFACTURER GUARANTEE
39 This warranty is provided in Australia by Glen Dimplex Australia Pty Limited ABN 69 118 275 460 (Phone number 1300 556 816) and in New Zealand by Glen Dimplex New Zealand Limited NZBN 9429000069823 (Phone number 09 274 8265) in respect of the Belling product. 1. Belling Express Warranty Subject t...
Page 40 - Warranty exclusions; This express warranty does not apply where:; Consumer guarantees
40 MANUFACTURER GUARANTEE 2. Warranty exclusions This express warranty does not apply where: a) The product has been installed, used or operated otherwise than in accordance with the product manual or other similar documentation provided to you with the product; b ) The product requires repairs due ...
Page 41 - To make a valid claim under this warranty, you must:
41 Contact our Customer Care Team Glen Dimplex Australia Pty Ltd Glen DImplex New Zealand Ltd Ph: 1300 556 816 [email protected] www.glendimplex.com.au Ph: 09 274 8265 [email protected] www.glendimplex.co.nz 4. How to make a claim You may make a claim under this warranty through our website, contact...
Page 42 - NOTES
Page 43 - VOID; warranty. Alfresco areas are not a Domestic application.
43 READ THE INSTRUCTION BOOKLET BEFORE INSTALLING AND USING THE APPLIANCE. The manufacturer will not be responsible for any damage to property or to persons caused by incorrect installation or improper use of the appliance. The manufacturer is not responsible for any inaccuracies, due to printing or...