Beko CWB9601X - Manuals
User Manual Beko CWB9601X


Summary
Please read this user manual first! Dear Customer, Thank you for prefering a Beko product. We hope that you get the best results from your product which has been manufactured with high quality and state-of-the-art technology. Therefore, please read this entire user manual and all other accompanying ...
3 / 13 EN TABLE OF CONTENTS 1 Important safety and environmental instructions 4 1.1 General Safety . . . . . . . . . . . . . . . . . . . . . . . 41.1.1 Electrical safety . . . . . . . . . . . . . . . . . . . . . 41.1.2 Product safety . . . . . . . . . . . . . . . . . . . . . . 41.2 Intended purpose ...
4 / 13 EN This section contains safety instructions that will help you prevent injuries or material damages. Any warranty shall be void if you do not observe these instructions. 1.1 General Safety • Always have the installation and repair work performed by Authorized Dealers. Manufacturing firm shal...
Beko Range Hoods Manuals
-
 Beko BHCB61632XH
User Manual
Beko BHCB61632XH
User Manual
-
 Beko BRH52UX
User Manual
Beko BRH52UX
User Manual
-
 Beko BRH60CX
User Manual
Beko BRH60CX
User Manual
-
 Beko BRH60TW
User Manual
Beko BRH60TW
User Manual
-
 Beko BRH70UX
User Manual
Beko BRH70UX
User Manual
-
 Beko BRH90CB
User Manual
Beko BRH90CB
User Manual
-
 Beko BRH90CX
User Manual
Beko BRH90CX
User Manual
-
 Beko BRH90TW
User Manual
Beko BRH90TW
User Manual
-
 Beko BRH90UX
User Manual
Beko BRH90UX
User Manual
-
 Beko CCB5140XA
User Manual
Beko CCB5140XA
User Manual
-
 Beko CCB7140XA
User Manual
Beko CCB7140XA
User Manual
-
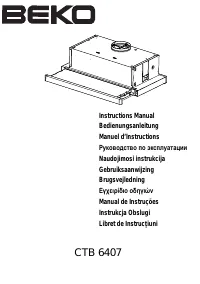 Beko CTB 6407 W (X)
User Manual
Beko CTB 6407 W (X)
User Manual
-
 Beko CTB6250XA
User Manual
Beko CTB6250XA
User Manual
-
 Beko CTB6407X
User Manual
Beko CTB6407X
User Manual
-
 Beko CTB9250XA
User Manual
Beko CTB9250XA
User Manual
-
 Beko CWB 6420 W
User Manual
Beko CWB 6420 W
User Manual
-
 Beko CWB 6420 X
User Manual
Beko CWB 6420 X
User Manual
-
 Beko CWB 6550 X
User Manual
Beko CWB 6550 X
User Manual
-
 Beko CWB 6660 X
User Manual
Beko CWB 6660 X
User Manual
-
Beko CWB 9550 X
User Manual