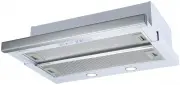
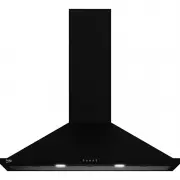
Beko CTB6250XA - Manuals
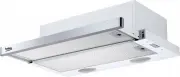
User Manual Beko CTB6250XA


Summary
3 / 11 EN Hood / User Manual 1 Recommendations and Suggestions 4 1.1 Installation . . . . . . . . . . . . . . . . . . . . . . . . . . 41.2 Use . . . . . . . . . . . . . . . . . . . . . . . . . . . . . . . 41.3 Maintenance . . . . . . . . . . . . . . . . . . . . . . . . 5 2 Characteristics 6 2.1 Comp...
4 / 11 EN Hood / User Manual 1 Recommendations and Suggestions A The Instructions for Use apply to several versions of this appliance. Accordingly, you may find descripti- ons of individual features that do not apply to your specific appliance. 1.1 Installation • The manufacturer will not be held li...
6 / 11 EN Hood / User Manual 2.1 Components Ref. Q.ty Product Components 1 1 Hood Body, complete with: Con- trols, Light, Blower, Filters 8 1 Directional Air Outlet grille 9 1 Reducer Flange ø 150-120 mm 20 1 Closing element Ref. Q.ty Installation Components 12a 4 Screws 4,2 x 44,4 12e 2 Screws 2,9 ...
Beko Range Hoods Manuals
-
 Beko BHCB61632XH
User Manual
Beko BHCB61632XH
User Manual
-
 Beko BRH52UX
User Manual
Beko BRH52UX
User Manual
-
 Beko BRH60CX
User Manual
Beko BRH60CX
User Manual
-
 Beko BRH60TW
User Manual
Beko BRH60TW
User Manual
-
 Beko BRH70UX
User Manual
Beko BRH70UX
User Manual
-
 Beko BRH90CB
User Manual
Beko BRH90CB
User Manual
-
 Beko BRH90CX
User Manual
Beko BRH90CX
User Manual
-
 Beko BRH90TW
User Manual
Beko BRH90TW
User Manual
-
 Beko BRH90UX
User Manual
Beko BRH90UX
User Manual
-
 Beko CCB5140XA
User Manual
Beko CCB5140XA
User Manual
-
 Beko CCB7140XA
User Manual
Beko CCB7140XA
User Manual
-
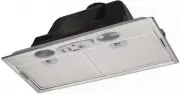
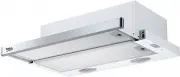
 Beko CTB 6407 W (X)
User Manual
Beko CTB 6407 W (X)
User Manual
-
 Beko CTB6407X
User Manual
Beko CTB6407X
User Manual
-
 Beko CTB9250XA
User Manual
Beko CTB9250XA
User Manual
-
 Beko CWB 6420 W
User Manual
Beko CWB 6420 W
User Manual
-
 Beko CWB 6420 X
User Manual
Beko CWB 6420 X
User Manual
-
 Beko CWB 6550 X
User Manual
Beko CWB 6550 X
User Manual
-
 Beko CWB 6660 X
User Manual
Beko CWB 6660 X
User Manual
-
Beko CWB 9550 X
User Manual
-
 Beko CWB 9610 X
User Manual
Beko CWB 9610 X
User Manual