Beko BDC830W - Manuals
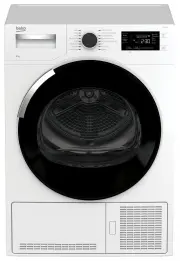
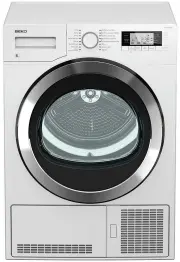
User Manual Beko BDC830W


Summary
Please read this user manual first! Dear Customer, Thank you for prefering a Beko Euromed product. We hope that your product which has been manufactured with high quality and technology will give you the best results. We advise you to read through this manual and the other accompanying documentation...
3 / EN Dryer / User Manual 1 Important instructions for safety and environment This section contains safety instructions that will help protect from risk of personal injury or property damage. Failure to follow these instructions shall void any warranty. 1.1 General safety • The dryer can be used by...
5 / EN Dryer / User Manual Important instructions for safety and environment B Damaged mains cable should be changed notifying the Authorized Service. B If the dryer is faulty, it must not be operated unless it is repaired by an authorized service agent! There is the risk of electric shock! 1.1.2 Pr...
Beko Dryers Manuals
-
 Beko B3T47238
User Manual
Beko B3T47238
User Manual
-
 Beko BDC710W
User Manual
Beko BDC710W
User Manual
-
 Beko BDCB8020W
User Manual
Beko BDCB8020W
User Manual
-
 Beko BDP700W
User Manual
Beko BDP700W
User Manual
-
 Beko BDP710MG
User Manual
Beko BDP710MG
User Manual
-
 Beko BDP710W
User Manual
Beko BDP710W
User Manual
-
 Beko BDP810W
User Manual
Beko BDP810W
User Manual
-
 Beko BDP83HW
User Manual
Beko BDP83HW
User Manual
-
 Beko BDPB802SW
User Manual
Beko BDPB802SW
User Manual
-
 Beko BDPB904HG
User Manual
Beko BDPB904HG
User Manual
-
 Beko BDPB904HW
User Manual
Beko BDPB904HW
User Manual
-
 Beko BDV60W
User Manual
Beko BDV60W
User Manual
-
 Beko BDV70W
User Manual
Beko BDV70W
User Manual
-
 Beko BDV70WG
User Manual
Beko BDV70WG
User Manual
-
 Beko DCU 7230
User Manual
Beko DCU 7230
User Manual
-
 Beko DCU 7332 C
User Manual
Beko DCU 7332 C
User Manual
-
 Beko DCY7402GXB2
User Manual
Beko DCY7402GXB2
User Manual
-
 Beko DCY8502XB1
User Manual
Beko DCY8502XB1
User Manual
-
 Beko DF 7439 SXUV TP
User Manual
Beko DF 7439 SXUV TP
User Manual
-
 Beko DPE7400
User Manual
Beko DPE7400
User Manual