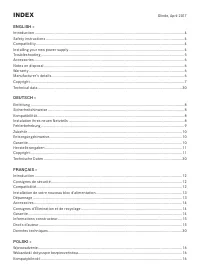
Page 2 - INDEX; Technical data �������������������������������������������������������������������������������������������������������������������������������������������� 30
ENGLISH » DEUTSCH » INDEX Technical data �������������������������������������������������������������������������������������������������������������������������������������������� 30 Technische Daten ��������������������������������������������������������������������������������������������������...
Page 4 - SAFETY INSTRUCTIONS; Opening the device voids your warranty.; motherboard specifications such as:
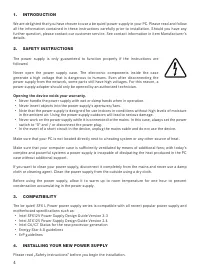
1. INTRODUCTION We are delighted that you have chosen to use a be quiet! power supply in your PC� Please read and follow all the information contained in these instructions carefully prior to installation� Should you have any further question, please contact our customer ser vice� See contact inform...
Page 5 - Note; the power supply because they have the correct thread�; First remove your old power supply. To do so, proceed as follows:; is connected correctly�; Caution; sources of error first:
Note : You will need a screwdriver to fit the power supply in your PC. Only use the screws provided with the power supply because they have the correct thread� Caution: Only use the supplied cable set� Using cables that were not included (e�g� cables of older power supply unit series) may lead to de...
Page 7 - excerpts of it, without the prior written consent of Listan�
10. COPYRIGHT ∙ You are not allowed to reproduce, disclose, publish or store the contents of this documentation, or excerpts of it, without the prior written consent of Listan� ∙ be quiet! is a registered trademark of Listan GmbH & Co� KG� Other products and company names mentioned in this docum...
Page 8 - Durch das Öffnen des Gerätes erlischt die Garantie.; INSTALLATION IHRES NEUEN NETZTEILS
1. EINLEITUNG Wir freuen uns, dass Sie sich dazu entschieden haben, ein be quiet! Netzteil in Ihrem Rechner einzusetzen� Vor der ersten Inbetriebnahme befolgen Sie bitte alle Punkte dieser Anleitung� Falls Sie weitere Fragen haben, richten Sie diese gerne an unseren Kundenser vice� Siehe hierzu Kont...
Page 9 - aufweisen können�; Gerätes führt zum Garantieverlust.
Anmerkung: Zum Einbau des Netzteils in Ihren PC benötigen Sie einen Schraubendreher� Benutzen Sie nur die mitgelieferten Schrauben aus dem Lieferumfang, da diese über das richtige Gewinde verfügen� Achtung: Verwenden Sie nur den mitgelieferten Kabelsatz! Das Verwenden von nicht mitgelieferten Kabeln...
Page 12 - CONSIGNES DE SÉCURITÉ
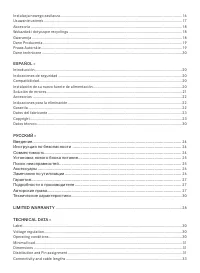
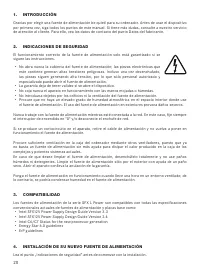
12 13 1. INTRODUCTION Nous sommes heureux que vous ayez choisi d’installer un bloc d’alimentation be quiet! dans votre PC� Avant la première mise en ser vice, nous vous recommandons de lire attentivement ce manuel et d’en obser ver les consignes� Si vous avez d’autres questions, nous vous invitons à...
Page 13 - INSTALLATION DE VOTRE NOUVEAU BLOC D’ALIMENTATION; Remarque; cet effet sur la carte mère.; Attention
12 13 4. INSTALLATION DE VOTRE NOUVEAU BLOC D’ALIMENTATION Nous vous invitons à lire le paragraphe « Consignes de sécurité » en préambule à l’installation de votre bloc d’alimentation� Remarque : vous aurez besoin d’un tournevis pour effectuer l’installation de votre bloc d’alimentation. Utilisez ex...
Page 15 - Listan GmbH & Co. KG – Biedenkamp 3a – 21509 Glinde – Allemagne; modifications de la présente documentation, ou à son retrait.
14 15 9. INFORMATIONS CONSTRUCTEUR be quiet! est une marque appartenant à Listan GmbH & Co. KG – Biedenkamp 3a – 21509 Glinde – Allemagne Si vous avez besoin de joindre notre ser vice après-vente, vous pouvez contacter notre numéro vert, du lundi au vendredi, de 09h à 18h : Tél� 0800 469 209 ou ...
Page 16 - WSK AZÓWKI DOTYCZĄCE BEZPIECZEŃSTWA; Otworzenie urządzenia powoduje wygaśnięcie gwarancji.; Nie należy włączać urządzenia mokrymi lub wilgotnymi rękami.
16 17 1. WPROWADZENIE Jesteśmy ogromnie wdzięczni, że wybrałeś zasilacz be quiet! do swojego komputera. Przed instalacją należy dokładnie zapoznać się z wszystkimi informacjami zawartymi w niniejszej instrukcji. W razie dodatkowych pytań prosimy o kontakt z działem obsługi klienta. Sprawdź dane kont...
Page 17 - dodatkowe piny na bok�; Uwaga
16 17 Uwaga : Do zamontowania zasilacza w komputerze potrzebny będzie śrubokręt. Należy użyć śrub dostarczonych wraz z zasilaczem, gdyż posiadają one odpowiednie gwinty. Uwaga: Należy używać wyłącznie dostarczonego zestawu kabli. Używanie kabli innych niż dostarczone (np. kabli starszych serii zasil...
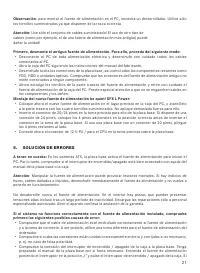
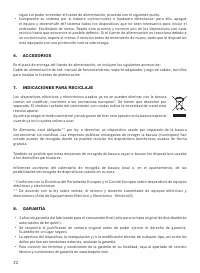
Page 21 - Observación; los tornillos suministrados ya que disponen de la rosca correcta�; Montaje del nuevo fuente de alimentación be quiet! SFX L Power:; SOLUCIÓN DE ERRORES; Atención
20 21 Observación : para montar el fuente de alimentación en el PC, necesita un destornillador. Utilice sólo los tornillos suministrados ya que disponen de la rosca correcta� Atención: Use sólo el conjunto de cables suministrado! El uso de otro tipo de cables (como por ejemplo, el de una fuente de a...
Page 24 - Открытие корпуса устройства лишает гарантии.
24 25 1. ВВЕДЕНИЕ Мы рады, что вы выбрали блок питания производства be quiet! для вашего ПК� Пожалуйста, прочтите и следуйте информации, представленной в данной инструкции� Если у вас возникну т дополнительные вопросы, пожалуйста, свяжитесь со службой поддержки пользователя� Контактную информацию вы...
Page 25 - УСТАНОВК А НОВОГО БЛОК А ПИТАНИЯ; Для установки нового блока питания be quiet!:; ПОИСК НЕИСПРАВНОСТЕЙ
24 25 требованиями к блокам питания и системным платам: ∙ Intel SFX12V Power Supply Design Guide Version 3�3 ∙ Intel AT X12V Power Supply Design Guide Version 2�4 ∙ Intel C6/C7 States для нового поколения процессоров ∙ Соответствие требованиям Energy Star 6�0 ∙ Соответствие требованиям ErP 4. УСТАНО...
Page 26 - с момента отк лючения�; ЗАМЕЧАНИЯ ПО УТИЛИЗАЦИИ; электрические
26 27 с момента отк лючения� Пожалуйста, проводите все необходимые ремонтные работы, используя услуги авторизованного эксперта! Открытие корпуса устройства приведет к потере гарантии. Если система, в которой установлен блок питания, не работает должным образом, проверьте возможные причины ошибок: ∙ ...
Page 27 - ПОДРОБНОСТИ О ПРОИЗВОДИТЕЛЕ
26 27 8. ГАРАНТИЯ ∙ 3-летняя гарантия производителя для потребителей (для оборудования, купленного только у авторизованных представителей be quiet!)� ∙ Для гарантийного случая потребуется оригинальная квитанция, подтверждающая факт покупки� Пожалуйста, храните ее в надежном месте� ∙ Открытие корпуса...
Page 28 - Limited Warranty; The following are not covered by the warranty:; IV. EXCLUSION OF DAMAGES
28 29 Limited Warranty Per the terms and conditions of this limited warranty as given below, be quiet! warrants its new products to be free of defects resulting from faulty materials and faulty manufacturing for the length of the warranty period� I. APPLICABILITY This non-transferable warranty is ap...
Page 29 - VI. LOCAL LAW AND YOUR WARRANTY; These rights may vary�; VII. NO OTHER WARRANTY; addition to this warranty�; VIII. TO OBTAIN TECHNICAL SUPPORT OR WARRANTY SERVICE
28 29 VI. LOCAL LAW AND YOUR WARRANTY This warranty gives you specific legal rights. You may also have other rights granted under local law. These rights may vary� VII. NO OTHER WARRANTY No be quiet! employee, dealer, or other agent is authorized to make any modification, extension, or addition to t...
Page 30 - TECHNICAL DATA; Технические характеристики; OPERATING CONDITIONS
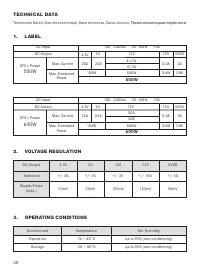
30 31 1. LABEL TECHNICAL DATA Technische Daten, Données technique, Dane technicze, Datos técnico, Технические характеристики 3.3V 5V 12V 50A 600W -12V 0.3A 5VSB 3A 3.6W 15W 22A 22A 105W Max. Current Max. Combined Power 600W 10A 100 - 240Vac 50 - 60Hz AC Input DC Output SFX L Power 600W 50A 3.3V 5V 1...
Page 31 - SFX L Power; DISTRIBUTION AND PIN ASSIGNMENT; E P S + 1 2 V P O W E R C O N N E C T O R
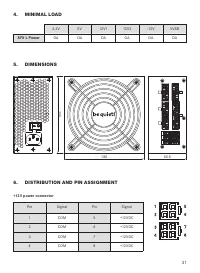
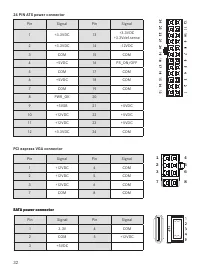
30 31 4. MINIMAL LOAD 3�3V 5V 12V1 12V2 -12V 5VSB SFX L Power OA OA OA OA OA OA 130 63.5 125 5. DIMENSIONS 6. DISTRIBUTION AND PIN ASSIGNMENT +12V power connector Pin Signal Pin Signal 1 COM 5 +12VDC 2 COM 6 +12VDC 3 COM 7 +12VDC 4 COM 8 +12VDC Yellow +12VDC Yellow +12VDC YellowYellow +12VDC +12VDC ...
Page 33 - CONNECTIVITY AND CABLE LENGTHS
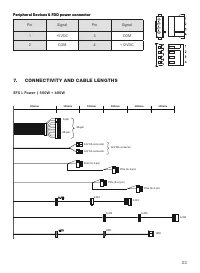
32 33 Peripheral Devices & FDD power connector Peripheral Devices & FDD power connector Pin Signal Pin Signal 1 +5VDC 3 COM 2 COM 4 +12VDC SFX L Power | 500W + 600W S-ATA S-ATA S-ATA S-ATA S-ATA S-ATA 300mm 100mm 100mm 100mm 20-pin 4-pin 24-pin PCIe (6+2-pin) PCIe (6+2-pin) PCIe (6+2-pin) PC...
Page 34 - Notes