Page 2 - reading to get the very best from it.; CUSTOMER CARE AND SERVICE; Always use original spare parts.
CONTENTS 1. SAFETY INFORMATION.................................................................................................3 2. SAFETY INSTRUCTIONS................................................................................................ 4 3. PRODUCT DESCRIPTION...............................
Page 4 - SAFETY INSTRUCTIONS; Installation
• If the supply cord is damaged, it must be replaced by the manufacturer, its Authorised Service Centre or similarly qualified persons in order to avoid a hazard. • Before maintenance, deactivate the appliance and disconnect the mains plug from the mains socket. • Do not use water spray and steam to...
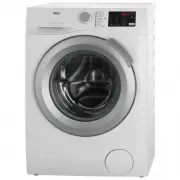
Page 5 - PRODUCT DESCRIPTION; Appliance overview
2.4 Use WARNING! Risk of injury, electrical shock, fire, burns or damage to the appliance. • Use this appliance in a household only. • Obey the safety instructions on the detergent packaging. • Do not put flammable products or items that are wet with flammable products in, near or on the appliance. ...
Page 6 - CONTROL PANEL; Control panel description; Display
4. CONTROL PANEL 4.1 Control panel description 1 2 3 4 5 6 7 8 9 10 1 On/Off button ( ВКЛ / ВЫКЛ ) 2 Programme knob 3 Display 4 Start Pause button ( Старт / Пауза ) 5 Delay start button (O тсрочка старта ) 6 Time save button ( Экономия времени ) 7 Extra rinse button ( Доп . полоскание ) 8 Stain butt...
Page 7 - PROGRAMMES; Programme Chart
B Spin area: Spin speed indicator No Spin indicator 1) Rinse Hold indicator 1) Only available for Spin/Drain programme. C Display indicators: Washing phase Rinses phase Spin phase Child safety lock Door lockedYou cannot open the appliance door when the symbol is on.You cannot open the appliance door...
Page 10 - CONSUMPTION VALUES
Programme Отжим Вывед ение пятен 1 ) Доп . по лоскан ие 2) Эконо мия време ни 3) O тсро чка старта Очень тихая ■ ■ ■ ■ Синтетика ■ ■ ■ ■ ■ ■ Синтетика + Предв . стирка ■ ■ ■ ■ ■ ■ Легкая глажка ■ ■ ■ ■ ■ Тонкие ткани ■ ■ ■ ■ ■ ■ Шерсть / Шелк ■ ■ ■ Отжим / Слив ■ ■ ■ Полоскание ■ ■ ■ ■ Шторы ■ ■ ■ ■...
Page 11 - SETTINGS; Acoustic signals
At programme start the display shows the duration programme for the maximum load capacity. During the washing phase the programme dura- tion is automatically calculated and can be greatly reduced if the laundry load is lower than the maximum load capacity (e.g. Cotton 60°C, maxi- mum load capacity 6...
Page 12 - Permanent Extra Rinse; OPTIONS
• After you press Старт / Пауза : the options and the programme knob are locked. • Before you press Старт / Пауза : the appliance cannot start. 7.3 Permanent Extra Rinse With this option you can permanently have an extra rinse when you set a new programme. • To activate/deactivate this option press ...
Page 13 - Температура; BEFORE FIRST USE; Activating the appliance; Loading the laundry
To drain the water refer to ‘At the end of the programme’. 8.8 Температура Set this option to change the default temperature. Indicator = cold water. The display shows the set temperature. 9. BEFORE FIRST USE 1. Put a small quantity of detergent in the compartment for washing phase. 2. Set and start...
Page 14 - Setting a programme; Starting a programme
10.4 Check the position of the flap 1. Pull out the detergent dispenser until it stops. 2. Press the lever down to remove the dispenser. 3. To use powder detergent, turn the flap up. A 4. To use liquid detergent, turn the flap down. B With the flap in the position DOWN: • Do not use gelatinous or th...
Page 16 - AUTO Stand-by option; HINTS AND TIPS; The laundry load
To open the appliance door: 1. Press button Старт / Пауза . In the display the door lock indicator goes off. 2. Open the appliance door. 3. Close the door and press button Старт / Пауза . The delay start continues. 10.14 End of cycle When the programme has finished, the appliance stops automatically...
Page 17 - CARE AND CLEANING; External cleaning
• Button up pillowcases, close zippers, hooks and poppers. Tie up belts. • Empty the pockets and unfold the items. • Turn inside out multilayered fabrics, wool and items with painted illustrations. • Remove hard stains. • Wash with a special detergent heavy soil stains. • Be careful with the curtain...
Page 19 - Cleaning the drain filter
12.6 Cleaning the drain filter WARNING! Do not clean the drain filter if the water in the appliance is hot. 1. 2. 2 1 1 3. 4. 2 1 5. 1 2 6. ENGLISH 19
Page 20 - Cleaning the inlet hose and the valve filter
7. 8. 2 1 9. 12.7 Cleaning the inlet hose and the valve filter 1. 1 2 3 2. www.aeg.com 20
Page 21 - TROUBLESHOOTING; Introduction
3. 4. 45° 20° 12.8 Emergency drain Because of a malfunction, the appliance cannot drain the water.If this occurs, do steps (1) through (9) of 'Cleaning the drain filter'. If necessary, clean the pump.When you drain the water with the emergency drain procedure, you must activate again the drain syste...
Page 22 - Possible failures
• - The anti-flood device is on. Disconnect the appliance and close the water tap. Contact the Authorised Service Centre. WARNING! Deactivate the appliance before you do the checks. 13.2 Possible failures Problem Possible solution The programme doesnot start. Make sure that the mains plug is connect...