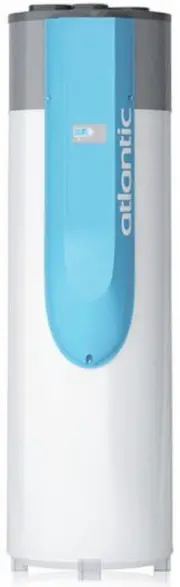
Atlantic ODYSSEO2 - User Manual
Atlantic ODYSSEO2 Hot Water System – User Manual, read for free online in PDF format. We hope this helps you resolve any issues you may have. If you have further questions, please contact us through the contact form.


Table of Contents:
- Page 2 – WATER HEATER; the water heater must remain switched on at all times.; Electric; For more information; WIRING DIAGRAM; WATER HEATER
- Page 3 – Contents
- Page 4 – Important recommendations; If the inclination indicator is red, our warranty is null and void; Acceptable positions; Safety instructions
- Page 5 – Presentation of the product; How it works; the
- Page 6 – Technical characteristics; Other performances
- Page 7 – Dimensions / components
- Page 8 – Installation; Selecting the location
- Page 9 – Recommended configurations; installation without ducts in an unheated space (Volume > 20m; set to; Configuration; installation in a heated or unheated room with ducts; set to
- Page 10 – Configuration tolerated under certain conditions
- Page 11 – Installing the product; Transport the water heater to the place where it is to be installed.; levelled; using the supporting feet.
- Page 13 – Air connections; regulation
- Page 14 – Electric connections; The appliance must be earthed.
- Page 15 – functional
- Page 16 – system diagnostic section. The temperature setting appears.; After 3 minutes; NOTE
- Page 17 – pressing; Settings to be adjusted; OFF
- Page 18 – Use; Control panel; Mode selection button
- Page 19 – Description of the modes
- Page 20 – BOOST mode
- Page 21 – Adapting the mode of your appliance to your needs
- Page 22 – Recommendations – Maintenance & Repairs; Advice for users; Flushing of sediment and draining :; Domestic maintenance; Troubleshooting
- Page 23 – Maintenance by a qualified professional; once a year
- Page 24 – or
- Page 25 – Fault diagnosis for professionals; IMPORTANT; To switch the actuator being tested, press:; FAULT
- Page 26 – connection
- Page 32 – WARRANTY CERTIFICATE; TO BE KEPT BY THE USER OF THE APPLIANCE; HEAT PUMP WATER HEATER USING NON-HEATED AIR; FOR INFORMATION, REPAIRS AND SERVICE; MAINTENANCE AND USER MANUAL - WARRANTY; ODYSSEO 2; HEAT PUMP WATER HEATER USING NON-HEATED AIR; EN; GUIDE
WARRANTY CERTIFICATE
TO BE KEPT BY THE USER OF THE APPLIANCE
ODYSSEO 2
HEAT PUMP WATER HEATER USING NON-HEATED AIR
Duration of the warranty*
- Water heater (cylinder): 5 years in domestic installations
3 years in commercial installation
- Electric elements and components parts: 2 years in domestic installations
1 year in commercial installations
The warranty covering service items, or replacement unit, expires at the end of the original
purchase warranty period.
* see details about warranty conditions and exclusions inside the user manual
FOR INFORMATION, REPAIRS AND SERVICE
CALL: AUSTRALIA : 1800 677 857
NEW ZEALAND : 0800 422 000
FOR WARRANTY REGISTRATION:
REGISTER AT: AUSTRALIA - www.atlantics.com.au
NEW ZEALAND - www.atlantics.co.nz
MAINTENANCE AND USER MANUAL - WARRANTY
ODYSSEO 2
HEAT PUMP WATER HEATER USING NON-HEATED AIR
EN
GUIDE
TO BE KEPT
BY THE USER
"Loading the manual" means you need to wait until the file loads and becomes available for online reading. Some manuals are very large, and the time they take to appear depends on your internet speed.
Summary
Active – brownNeutral –blue WIRING DIAGRAM STARTING YOUR HEAT PUMP WATER HEATER In order to protect the tank against corrosion, the water heater must remain switched on at all times. The wires in the electric cable are crimped. If you need to cut them, remember to crimp them again before connecting ...
- 1 - Contents Important recommendations....................................................................................................... 2 Transportation & Storage ...................................................................................................................... 2 Safe...
- 2 - Important recommendations Transportation & Storage The product can be inclined at 90° on one side. This side is clearly shown by a sign on the packaging. It is forbidden to incline the product on the other sides. An indicator shows whether the product has been transported and handled accor...