Artusi CACC90 - User Manual
Artusi CACC90 Hob – User Manual, read for free online in PDF format. We hope this helps you resolve any issues you may have. If you have further questions, please contact us through the contact form.


Table of Contents:
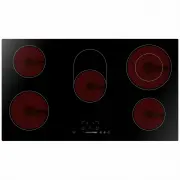
- Page 10 – Congratulations; Product Overview; Top View
- Page 12 – Using your Ceramic Hob; To start cooking
- Page 13 – When you have finished cooking
- Page 14 – Double Zone Function
- Page 15 – Locking the Controls
- Page 16 – Using the Timer; Using the Timer as a Minute Minder
- Page 18 – If the timer is set on one zone:
- Page 19 – Cooking Guidelines; Cooking Tips
- Page 20 – Heat Settings
- Page 21 – Care and Cleaning
- Page 22 – Hints and Tips; Technical Specification; Zones; Installation
- Page 23 – Selection of installation equipment
- Page 24 – Before locating the fixing brackets; Cautions
- Page 25 – Connecting the hob to the mains power supply
- Page 27 – Warranty Card; ffi
- Page 28 – MODEL NUMBER; (a) These terms and conditions do not affect your; continued
CACC90
OPERATION MANUAL
A P P L I A N C E S
F O R L I V I N G
"Loading the manual" means you need to wait until the file loads and becomes available for online reading. Some manuals are very large, and the time they take to appear depends on your internet speed.
Summary
9 Congratulations on the purchase of your new Ceramic Hob. We recommend that you spend some time to read this Instruction / Installation Manual in order to fully understand how to install correctly and operate it. For installation, please read the installation section. Read all the safety instructio...
11 Make sure that the base of your pan is smooth, sits flat against the glass, and is the same size as the cooking zone. Always centre your pan on the cooking zone. Always lift pans off the ceramic hob – do not slide, or they may scratch the glass. Using your Ceramic Hob To start cooking • After pow...
12 3. Touching the heating zone selection control, and a indicator next to the key will flash. 4. Ajust heat setting by touching the the slider control. • If you don’t choose a heat setting within 1 minute, the ceramic hob will automatically switch off. You will need to start again at step 1. • You ...