ZLINE Kitchen and Bath RK527-36 - User Manual
ZLINE Kitchen and Bath RK527-36 Range Hood – User Manual, read for free online in PDF format. We hope this helps you resolve any issues you may have. If you have further questions, please contact us through the contact form.


Table of Contents:
- Page 4 – TABLE OF CONTENTS
- Page 5 – SAFETY INSTRUCTIONS
- Page 8 – UNDER CABINET INSTALLATION; Installation Tutorial Video
- Page 9 – Undercabinet Recirculating Kit; Undercabinet Recirculating Kit
- Page 12 – Remote Blower Installation; REMOTE BLOWER INSTALLATION
- Page 14 – ation; OPERATION
- Page 15 – Changing th; CHANGING PARTS
- Page 17 – Replacing Light Bulbs
- Page 18 – Changing Baffle Filter; Release
- Page 25 – oublesh; TROUBLESHOOTING
- Page 26 – Troublesh
- Page 32 – WARRANTY
Installation Manual
www.zlinekitchen.com
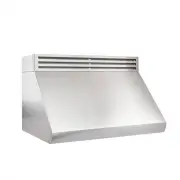
UNDERCAB RANGE HOODS
"Loading the manual" means you need to wait until the file loads and becomes available for online reading. Some manuals are very large, and the time they take to appear depends on your internet speed.
Summary
IMPORTANT SAFETY INSTRUCTIONS 1 UNDER CABINET INSTALLATION 5 REMOTE BLOWER INSTALLATION 8 BUTTON/CONTROL PANEL OPERATION 10 HOW TO CHANGE PARTS 11 TROUBLESHOOTING AND FAQ 21 WARRANTY 28 TABLE OF CONTENTS
11 Gener al Safet y SAFETY INSTRUCTIONS WARNING This is the safety alert symbol. This symbol alerts you to potential hazards that can hurt you and others. All safety messages will follow the safety alert symbol. READ ALL INSTRUCTIONS BEFORE INSTALLING AND OPERATING THIS APPLIANCE. • The installation...
4 UNDER CABINET INSTALLATION 30”-36” Height 30” Installation Tutorial Video 4 Under Cabinet Installation