Page 2 - WE’RE THINKING OF YOU; Visit our website to:; CUSTOMER CARE AND SERVICE; Always use original spare parts.; Register your product for better service:; CONTENTS
2 www.westinghouse.com WE’RE THINKING OF YOU Thank you for choosing Westinghouse. We have designed this product to make your life simpler and deliver impeccable performance for many years. Please spend a few minutes reading this document to get the best from your new Westinghouse appliance. Visit ou...
Page 3 - SAFETY INFORMATION
3 EN 1. SAFETY INFORMATION Note: You must read these warnings carefully before installing or using the refrigerator. If you need assistance, contact your customer care centre. The manufacturer will not accept liability, should these instructions or any other safety instructions incorporated in this ...
Page 5 - QUATTRO FRENCH DOOR REFRIGERATOR FEATURES; DESCRIPTION OF THE APPLIANCE
5 EN 2.1 QUATTRO FRENCH DOOR REFRIGERATOR FEATURES WQE5600 illustrated 1 1 2 3 1 1 1 3 12 13 13 13 13 13 4 5 5 6 7 8 8 10 11 9 9 1 Door Bins* 2 Door Bin Small* 3 Bottle Storage Bins 4 Egg Tray 5 Spillsafe™ Glass shelves 6 Wine Rack 7 UI Control Panel (on the left side wall) 8 Fresh Seal Manual Humid...
Page 6 - QUATTRO FRENCH DOOR WITH ICE & WATER REFRIGERATOR FEATURES
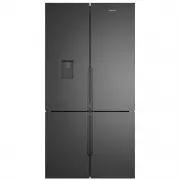
6 www.westinghouse.com 2.2 QUATTRO FRENCH DOOR WITH ICE & WATER REFRIGERATOR FEATURES WQE5650 illustrated 31 1 11 32 2 2 3 2 2 2 12 33 4 4 13 34 5 15 14 15 15 35 6 15 15 36 37 7 7 38 8 39 40 10 9 11 10 1 Water Dispenser 2 Door Bins* 3 Door Bin Small* 4 Bottle Storage Bins 5 Egg Tray 6 Water Filt...
Page 7 - QUATTRO FRENCH DOOR WITH TANK ICE & WATER REFRIGERATOR FEATURES
7 EN 2.3 QUATTRO FRENCH DOOR WITH TANK ICE & WATER REFRIGERATOR FEATURES WQE5660 illustrated 31 1 11 32 2 2 3 2 2 2 12 33 5 13 34 6 15 14 15 15 35 15 15 36 37 7 7 38 8 39 40 10 9 11 10 4 1 Water Dispenser 2 Door Bins* 3 Door Bin Small* 4 Water Tank 5 Bottle Storage Bins 6 Egg Tray 7 Spillsafe™ G...
Page 8 - INSTALLING YOUR NEW APPLIANCE; Unpacking; Locating the refrigerator; Installing your refrigerator
8 www.westinghouse.com Product Dimensions Total width (W) mm 896 Total depth (D) mm 726 Maximum height (H) mm 1795 Cabinet width (W1) mm 890 Cabinet depth (D1) mm 640 Depth door open 90° (D2) mm 1104 When positioned in a corner area, spacing of at least 285mm on the hinge side will allow the doors t...
Page 10 - Flipper Mullion
10 www.westinghouse.com 2. Ensure both doors are bind-free with their seals touching the cabinet on all four sides and that cabinet is stable. Flipper Mullion Adjust Flipper Mullion for proper connection with the mullion guide by ensuring the flipper mullion is folded and perpendicular to the fresh ...
Page 11 - TEMPERATURE CONTROL; Functions of the user interface
11 EN 4. TEMPERATURE CONTROL The following pages explain the various functions of the user interface to help you better understand how to get the most out of your new refrigerator. IMPORTANT NOTE: When you set a temperature, you set an average temperature for the whole refrigerator cabinet. Ensuring...
Page 15 - Alert and Alarms
15 EN Check water Alert When water tank is empty, the Ice maker senses the lack of warm water feeding in, and will turn off the ice maker.This trigger will also displays the "Check water alert". The intention is the alert user that Ice maker has been turn off due to the lack of water.The ale...
Page 16 - STORAGE FEATURES; Doors
16 www.westinghouse.com SpillSafe™ glass shelves To remove the shelves, gently pull them forward until the shelf comes clear of the shelf guides. To return the shelf, make sure there is nothing behind that may obstruct movement. Gently push the shelf, into the cabinet and back into position. CAUTION...
Page 17 - Freezer storage
17 EN Water Tank CAUTION BEFORE REMOVE; to empty the water in the tank. To remove the water tank and disassembly cleanable parts follow these steps: 1. Life up water tank until locking release.2. Pull water tank forward. 3. Remove water tank lid ( 1 ), water tank tube ( 2 ) and filter ( 3 ). Reverse...
Page 18 - Water
18 www.westinghouse.com Twist & Serve Ice Bin: 1. Prior the first use clean the ice tray.2. Fill the water up to max level of the ice tray. 3. Put the ice tray in place.4. Rotate ice twist clockwise to release the ice from ice tray. Water
Page 19 - CONNECTING THE WATER SUPPLY; Water Filter
19 EN 6. CONNECTING THE WATER SUPPLY WARNING Connect to potable water supply only. If using tank or bore water it is recommended to also use an external filter (not supplied). The new hose-sets supplied with the appliances must be used and old hose-sets should not be reused.Never connect the applian...
Page 20 - Party Ice
20 www.westinghouse.com Step 3 Push the tube into tap fitting past insertion mark. Step 4 Connect other end of tube to inlet on rear of refrigerator. Step 5 Turn on water and check all joints and tubes for leaks. Step 6 Reconnect the power. Step 7 Move the refrigerator back into place being careful ...
Page 21 - AUTOMATIC ICE &WATER DISPENSER
21 EN Note: The water dispenser has a built-in device that shuts off the water flow after three minutes of continuous use. To reset this shut-off device, simply release the dispenser paddle. Only the first 750 ml of dispensed water is chilled. CAUTION Do not fill the Water tank with anything other t...
Page 22 - Ice maker/dispenser tips; Cleaning the ice maker
22 www.westinghouse.com IMPORTANT Turning off the ice maker simply disables ice making. You will still be able to dispense existing ice, and you will still be able to dispense water. Ice maker/dispenser tips • If your refrigerator is not connected to a water supply or the water supply is turned off,...
Page 23 - GENERAL INFORMATION; CLEANING YOUR REFRIGERATOR; Doors and exterior; Switching off your refrigerator; Replacing the Water Filter
23 EN 8. GENERAL INFORMATION 8.1 CLEANING YOUR REFRIGERATOR WARNING BEFORE CLEANING: Turn the refrigerator off at the power point and unplug the cord to prevent any chance of electrocuting yourself. Doors and exterior You should only clean the doors with lukewarm soapy water and a soft cloth. Interi...
Page 24 - Ice and water
24 www.westinghouse.com 5. Engage the filter by firmly rotating clockwise until the filter snaps into position (once engaged the filter cannot be rotated further). 6. Press a drinking glass against the water dispenser while checking for any leaks at the filter housing. Any spurts and sputters that o...
Page 25 - FOOD STORAGE GUIDE
25 EN 9. FOOD STORAGE GUIDE IMPORTANT Please note, use this information as a guide only, actual storage times will vary depending on how you use your refrigerator, climatic conditions and the freshness of the food. CATEGORY FREEZER REFRIGERATOR STORAGE TIPS Meat Sausages and Mince 1-2 Days 2-3 Month...
Page 26 - TROUBLESHOOTING
26 www.westinghouse.com 10. TROUBLESHOOTING CONCERN WHAT TO DO Refrigerator is too warm • Adjust the refrigerator to a colder setting• Ensure food is allowed to cool before placing inside the refrigerator.• Ensure the appliance is set up as per instructions• Ensure that contents are not obstructing ...
Page 30 - BRRR; OK; NOISES
30 www.westinghouse.com 10. NOISES Appliance noise Your new refrigerator may make sounds that your old one didn’t make. Because the sounds are new to you, you might be concerned about them. Most of the new sounds are normal. Hard surfaces, like the floor, walls and cabinets, can make the sounds seem...
Page 31 - Warranty
This document sets out the terms and conditions of the product warranties for Westinghouse Appliances. It is an important document. Please keep it with your proof of purchase documents in a safe place for future reference should there be a manufacturing defect in your Appliance. This warranty is in ...