WELLFOR AMYUA-01 - User Manual
WELLFOR AMYUA-01 Fan – User Manual, read for free online in PDF format. We hope this helps you resolve any issues you may have. If you have further questions, please contact us through the contact form.

Attention
USER MANUAL
1. To avoid potential slectric shock, the home main power supply must be shut off before installation.
2. Please pay attention to check whether the wires were in good condition before installation.
3. All wiring must be carried out under national and specifications,please hire or consult a licensed
electrician to ensure that the live, neutral, and ground wires are connected correctly.
4. Please don’t refit this ceiling fan light fixture,which may damage it.
5. All screws must be checked and re-tightended if necessary before operating the ceiling fan light fixture.
Step1. Loosen the screws which connected the hanging plate and light fixture, but don’t take them off,
then take the hanging plate from the ceiling fan light fixture.
Step2. Marking/locating the hole position on the ceiling by borrowing the hole positon of the hanging plate.
Step3. If you have a wooden ciling, use type 1 screws; if you have a concrete ceiling, use type 2 screws,
then according to the size of the screws type, punch suitabel size holes at the hole marks, then
install the hanging plate.
Step4. Tighten the fan screw.
Step5. Connect wires:
Connect the black live wire marked "L" on the receiver to the live wire (typically
black) on the socket box.Connect the white neutral wire marked "N" on the receiver to the
neutral wire (typically white) on the socket box. Connect the ground wire (bare wire) from the
base of the ceiling fan base with the ground wire (bare wire) of the socket box.
(
Hang the lamp
on the hanging plate with S-hook then connect wires. Take off the S-hook after connect
wires and proceed to the next step.
)
Step6. Assemble the ceiling fan light fixture to the hanging plate, tighten the screws, and complete the
installation.
Installation Steps
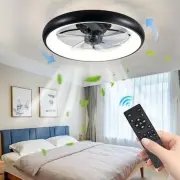
Remote control
Lignt on/off
Fan off
Natural flow
Main switch
Fan speeds
Battery type: AAA(not include)
Fan rotates forward/reverse
Night light
Light brightness control
Color temperature control
Timing for 1/2 hour
Pair key
Warm Tips:
If your remote control does not control the fan and lights, please follow the steps below to undo the fault.
Step 1: Replace the battery of the the remote control.
Step 2: Try to program the remote control.
>
turn off the main switch that controls the ceiling fan light and turn it on again
> press and hold the SETUP button of the remote control panel simultaneously within 5 seconds
> if you hear a beeping sound, the code is matched successfully.
SETUP
SETUP
Wooden ceiling
Concrete ceiling
Stype 1
Stype 2
The ceiling
The ceiling
Tips: Before installation, the lamp should be tested
for electricity. The lampcan be installed to the
ceiling only in normal operation.
"Loading the manual" means you need to wait until the file loads and becomes available for online reading. Some manuals are very large, and the time they take to appear depends on your internet speed.