Page 2 - READ AND SAVE THESE INSTRUCTIONS
2 Table of Contents Table of Contents . . . . . . . . . . . . . . . . . . . . . . . . . . . . . . . . . . . 2Safety Information . . . . . . . . . . . . . . . . . . . . . . . . . . . . . . . . . . 2Warranty . . . . . . . . . . . . . . . . . . . . . . . . . . . . . . . . . . . . . . . . . . 4Pre-Insta...
Page 3 - Safety Information Continued; COOKING SAFETY INFORMATION
3 HOMEDEPOT.COM Please contact 1-855-847-7264 for further assistance. Safety Information Continued WARNING: Attempting to install or service this unit when you do not have the necessary technical or electrical background could result in personal injury. WARNING: The unit has sharp edges. Always wear...
Page 4 - Warranty; ONE YEAR LIMITED WARRANTY
4 Warranty ONE YEAR LIMITED WARRANTY A thorough inspection must be made before installation and any damage must be promptly reported. We will not be liable for failures or damage that could have been discovered or avoided by proper inspection and testing prior to installation. Vissani warrants this ...
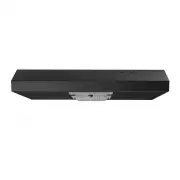
Page 6 - PRODUCT DIMENSIONS
6 Pre-Installation (continued) PACKAGE CONTENTS Carefully check the range hood for damage and for missing parts prior to installation. If there is any damage or if you are missing parts,do not proceed with the installation. Report damage and missing parts immediately. Do not dispose of packaging bef...
Page 7 - PLANNING INSTALLATION; VENTING OPTIONS
7 HOMEDEPOT.COM Please contact 1-855-847-7264 for further assistance. Pre-Installation (continued) PLANNING INSTALLATION Number of people required: 1 □ Before installation, measure all distances to ensure the proper position of the range hood (A). □ The minimum distance (1) from the cooking surface ...
Page 8 - GUIDELINES FOR INSTALLING DUCTWORK:
8 Pre-Installation (continued) GUIDELINES FOR INSTALLING DUCTWORK: □ Your venting system must vent to the outdoors either horizontally through the back wall (13) or vertically through the roof (14) (refer to Fig 5/Fig 6/ Fig 7). □ Use round metal ductwork with a uniform diameter of 7 in. (177 mm). T...
Page 9 - WIRING CONNECTION REQUIREMENTS
9 HOMEDEPOT.COM Please contact 1-855-847-7264 for further assistance. Pre-Installation (continued) WIRING CONNECTION REQUIREMENTS Installation work and electrical wiring must be done by a qualified person(s) in accordance with all applicable codes and standards, including fire-rated construction.OBS...
Page 10 - Installation; Preparing the range hood; Removing the range hood cover; Marking the wiring hole location; Wiring through the top
10 Installation 1 Preparing the range hood □ Remove the filter from the fume hood (A) by removing the screw from the retaining clip. □ Remove the four screws from the cover on the range hood (A). □ Release the upper half of the cover from the range hood (A). A 2 Removing the range hood cover □ Rotat...
Page 11 - Preparing exhaust venting; Installing vent system; Preparing the location
11 HOMEDEPOT.COM Please contact 1-855-847-7264 for further assistance. Installation (continued) 6 Preparing exhaust venting WARNING: Fuel (gas) burning ranges must be vented out- doors using, at minimum, metal ductwork and range hoods of sufficient capacity. Follow your fuel burning equipment manu-f...
Page 12 - Installing power supply cable
12 Installation (continued) 9 Preparing the location (wall mounting) □ Determine de distance from the cooking surface to mounting holes. □ Taking as base the horizontal line and the center line of the wall, mark the location of the four keyhole mounting slots, as shown. 7-3/16 in. (20.12 cm) 13-5/16...
Page 13 - Installing via cabinet mounting; Installing via wall mounting
13 HOMEDEPOT.COM Please contact 1-855-847-7264 for further assistance. Installation (continued) 11 Installing via cabinet mounting □ Lift the range hood (A) up under cabinet. □ Position the range hood (A) so that the large end of the keyhole slots (1) are over the mounting screws (AA). 1 A AA □ Then...
Page 14 - Operation; RECIRCULATION VENT COVER; Care and Cleaning
14 Operation RECIRCULATION VENT COVER □ For installations which are recirculating the air exhaust, the recirculation vent cover must be removed. □ Remove the recirculating vent cover by removing the two mounting screws with a screwdriver. NOTE: F or installations which are venting out the roof or wa...
Page 16 - Troubleshooting
16 Troubleshooting Problem Possible Causes Solutions After installation, the unit doesn’t work. □ The power line and the cable locking connector is not connecting properly. □ Check the power connection with the unit is connected properly. □ The wires from the switches are disconnected or loose. □ Ma...
Page 17 - Wiring Diagram; Carlos Robledo; Eduardo Lara; 2/08/15 1 Motor connector removed J.O. J.O.
17 HOMEDEPOT.COM Please contact 1-855-847-7264 for further assistance. Wiring Diagram Carlos Robledo 01/01/2011 Economy UL Basculante C19 SE116C Carta metallizzata 70X85 Eduardo Lara 12/08/15 1 Motor connector removed J.O. J.O. 06/10/16 11/12/15 2 French labels added Luis Salazar J.O. SE116C FOR SUP...
Page 18 - Service Parts
18 Service Parts If you are missing parts or if you require replacement parts, please contact our customer service team at [email protected] or 1-855-847-7264 between 8:30 am - 5 pm, EST, Monday - Friday. Identify the required part(s) and have the part number(s) ready. Part Description Code Quantity...
Page 21 - GUÍA DE USO Y MANTENIMIENTO; CAMPANA EXTRACTORA; ¿Preguntas, problemas o piezas faltantes?
GRACIAS Agradecemos la confianza que ha depositado en Vissani con la compra de esta campana extractora. Nos esforzamos por crear continuamente productos de calidad diseñados para mejorar su hogar. Visítenos en línea para ver nuestra línea completa de productos disponibles para sus necesidades de mej...
Page 22 - LEA Y CONSERVE ESTAS INSTRUCCIONES
22 Tabla de Contenido Tabla de Contenido . . . . . . . . . . . . . . . . . . . . . . . . . . . . . . . . . . 2Información de Seguridad . . . . . . . . . . . . . . . . . . . . . . . . . . . . 2Garantía. . . . . . . . . . . . . . . . . . . . . . . . . . . . . . . . . . . . . . . . . . . 4Pre-Instalaci...
Page 23 - Información de Seguridad Continuación; INFORMACIÓN DE SEGURIDAD EN LA COCINA
23 HOMEDEPOT.COM Contáctenos al 1-855-847-7264 para obtener más ayuda. Información de Seguridad Continuación ADVERTENCIA: Si intenta instalar o reparar esta unidad sin tener los conocimientos técnicos o eléctricos necesarios, podría sufrir lesiones personales. ADVERTENCIA: La unidad tiene bordes afi...
Page 24 - Garantía; UN AÑO DE GARANTÍA LIMITADA; PROCEDIMIENTO DE RECLAMACIÓN DE GARANTÍA
24 Garantía UN AÑO DE GARANTÍA LIMITADA Antes de la instalación debe realizarse una inspección minuciosa y notificarse inmediatamente cualquier daño. No seremos responsables de fallos o daños que podrían haberse descubierto o evitado mediante una inspección y prueba adecuadas antes de la instalación...
Page 26 - DIMENSIONES DEL PRODUCTO
26 Pre-Instalación (continuación) CONTENIDO DEL PAQUETE Antes de proceder a la instalación, compruebe cuidadosamente que la campana extractora no presenta daños ni piezas faltantes. Si hay algún daño o le faltan piezas no proceda con la instalación.Reporte inmediatamente los daños y la falta de piez...
Page 27 - PLANIFICACIÓN DE LA INSTALACIÓN; OPCIONES DE VENTILACIÓN
27 HOMEDEPOT.COM Contáctenos al 1-855-847-7264 para obtener más ayuda. Pre-Instalación (continuación) PLANIFICACIÓN DE LA INSTALACIÓN Número de personas requeridas 1 □ Antes de la instalación, mida todas las distancias para asegurar la posición correcta de la campana. (A). □ La distancia mínima (1) ...
Page 28 - GUÍA PARA LA INSTALACIÓN DE DUCTOS:
28 Pre-Instalación (continuación) GUÍA PARA LA INSTALACIÓN DE DUCTOS: □ Su sistema de ventilación debe ventilar al exterior horizontalmente a través de la pared trasera (13) o verticalmente a través del techo (14) (consulte Fig 5/Fig 6/ Fig 7). □ Utilice ductos metálicos redondos con un diámetro uni...
Page 29 - REQUISITOS PARA CONEXIÓN DEL CABLEADO; IMPORTANTE
29 HOMEDEPOT.COM Contáctenos al 1-855-847-7264 para obtener más ayuda. Pre-Instalación (continuación) REQUISITOS PARA CONEXIÓN DEL CABLEADO El trabajo de instalación y cableado eléctrico, lo debe realizar personal cualificado, de acuerdo con todos los códigos y normas aplicables, incluida la constru...
Page 30 - Instalación; Preparación de la campana; Cableado por la parte superior; Cableado a través de la pared
30 Instalación 1 Preparación de la campana □ Retire el filtro de la campana extractora (A), quitando el tornillo del clip de sujeción. □ Quite los 4 tornillos que sujetan la cubierta de la campana (A). □ Desprenda la cubierta de la campana comenzando por la parte superior de la campana (A). A 2 Reti...
Page 31 - Preparación de sistema de ventilación; Instalación de sistema de ventilación; Preparación de locación
31 HOMEDEPOT.COM Contáctenos al 1-855-847-7264 para obtener más ayuda. Instalación (Continuación) 6 Preparación de sistema de ventilación ADVERTENCIA: Las cocinas de gas deben ventilarse al exterior utilizando, como mínimo, conductos metálicos y cam-panas extractoras con capacidad suficiente. Siga l...
Page 32 - Instalación cable de alimentación
32 Instalación (continuación) 9 Preparación de locación (montaje en pared) □ Determine la distancia entre la superficie de cocción y los orificios de montaje. □ Tomando como base la línea horizontal y la línea central de la pared, marque la ubicación de las cuatro ranuras de montaje con bocallave, t...
Page 33 - Instalación en gabinete; Instalación en pared
33 HOMEDEPOT.COM Contáctenos al 1-855-847-7264 para obtener más ayuda. Instalación (continuación) 11 Instalación en gabinete □ Levante la campana extractora (A) por debajo del mueble. □ Coloque la campana extractora (A) de modo que el extremo grande de las ranuras de montaje (1) quede sobre los torn...
Page 34 - Funcionamiento; TAPA DE RECIRCULACIÓN; CONTROLES DE LA CAMPANA; Cuidado y limpieza
34 Funcionamiento TAPA DE RECIRCULACIÓN □ Para las instalaciones que recirculan el aire de salida, debe retirarse la cubierta de la rejilla de recirculación. □ Retire la cubierta de ventilación de recirculación quitando los dos tornillos de montaje con un destornillador. NOTA: Para las instalaciones...
Page 36 - Solución de problemas
36 Solución de problemas Problema Posibles causas Soluciones Después de la instalación, la unidad no funciona. □ La línea de alimentación y el conector de bloqueo del cable no están conectados correctamente. □ Compruebe que la conexión eléctrica con la campana está conectada correctamente. □ Los cab...
Page 37 - Diagrama eléctrico
37 HOMEDEPOT.COM Contáctenos al 1-855-847-7264 para obtener más ayuda. Diagrama eléctrico Carlos Robledo 01/01/2011 Economy UL Basculante C19 SE116C Carta metallizzata 70X85 Eduardo Lara 12/08/15 1 Motor connector removed J.O. J.O. 06/10/16 11/12/15 2 French labels added Luis Salazar J.O. SE116C FOR...
Page 38 - Refacciones
38 Refacciones Si le faltan piezas o necesita piezas de repuesto, póngase en contacto con nuestro equipo de atención al cliente en [email protected] o en el 1-855-847-7264 entre las 8:30 am y las 5 pm, EST, de lunes a viernes. Identifique la(s) pieza(s) necesaria(s) y tenga a mano el(los) número(s) ...