Page 2 - INSTRUCTION MANUAL; 0 cm Freestanding Electric Oven with Gas Cooktop; P a g e
INSTRUCTION MANUAL 60 cm Freestanding Electric Oven with Gas Cooktop Models: TRFSEGO600 P a g e | 2 ONLINE: TRINITYAPPLIANCES.COM.AU
Page 5 - PACKAGE; at the delivery time
1 PACKAGE 1.1 IMPORTANT - CHECK FOR ANY DAMAGE OR MARKS Please thoroughly inspect your goods at the delivery time , if you notice any damage to your goods: Please notify the delivery team at the time of delivery and do NOT accept damaged product . Please notify us immediately as the problem can ...
Page 6 - SAFETY WARNINGS; To maintain; Always use original Spare Parts.
2 SAFETY WARNINGS 2.1 IMPORTANT INFORMATIONTHESE WARNINGS ARE PROVIDED IN THE INTEREST OF SAFETY, PLEASE READTHEM CAREFULLY BEFORE INSTALLING OR USING THE APPLIANCE To maintain the EFFICIENCY and SAFETY of this appliance, we recommend: Call the Service Centers authorized by the store where you buy...
Page 9 - OR THE USER AND INSTALLER; Disconnect the range before cleaning or maintenance.; ARE WITH FOOD AND COOKWARE; To handle or remove food, please use the cooking gloves.; Flat-bottom saucepans
2.2 F OR THE USER AND INSTALLER Disconnect the range before cleaning or maintenance. Never unplug the range by pulling on the power cord. Do not manipulate your gasrange plug. Do not bite, twist or tie the power cord. It is dangerous to modify your gas range specifications and characteristics....
Page 10 - NSTALLATION INSTRUCTION
3 I NSTALLATION INSTRUCTION 3.…. Installation accessories Accessory Name Image (for reference only, actualmay differ) Quantity Application Anti-tilt Bracket 1 To prevent tipping of the cooker Washer Gas-type fitting (G1-2 R1/2 , 21mm) 11 P r o v i d e d w i t h p r e s s u r e r e g u l a t o r Natu...
Page 11 - Check the condition of the appliance after unpacking it.
3.1 B EFORE INSTALLING Read the following information about the appliance and the guidelines for ventilation. 3.2 A PPLIANCE U NPACKING Check the condition of the appliance after unpacking it. Do not connect the appliance if it has been damaged in transport. Dispose ofpackaging in an environme...
Page 12 - Remove the accessories from the oven.Proceed as follows:
910 3.5 F ITTING THE ADJUSTABLE FEET Remove all parts that are not permanently fixed, especially the pan supports andburners. Remove the accessories from the oven.Proceed as follows: Tilt the appliance by raising one side slightly from the floor. With the plates in position, screw the adjust...
Page 13 - the cable is not trapped or squashed
3.6 G AS APPLIANCE INSTALLATION 1. Leave at least 80 to 85cm between the top ofthe gas appliance and any cabinet or appliancehood installed above or to be installed .2. Leave at least 5cm in the back and 2cm eachside of the gas appliance to allow the heat to getout.3. When installing the oven, be su...
Page 14 - NG corrugated tube; Push the cooker back and install the anti-tilt bracket.
3.9 G AS CONNECTION The appliance must be connected in accordance with the currently applicableregulations. Before installing the appliance, check that the local conditions (type ofgas and pressure) are compatible with the appliance settings. The permissibleappliance settings can be found on the r...
Page 15 - nd to leave the instruction book with the; Test point for Natural gas; Be certified as conforming with AS/NZS 1869, and
4 burner models: set the burner pressure to 2.75kPa for ULPG, set the burner pressure to1kPa for Natural Gas. For commissioning of the appliance with the regulator forNatural Gas, the test point pressure should be 1.00kPa with all burners operating onHIGH. Apply a manometer to the test nipple an...
Page 17 - Remove the burner caps; Switch on the gas burner.
3.15 R EPLACING THE NOZZLES (H OTPLATE BURNERS ) Remove the burner caps ( A ) and burner ( B ) from the burners ( C ) . Remove the nozzle (D) and replace it with an appropriate nozzle for a new type ofgas. Replace the gas label with the new gas label that was supplied with the nozzle set. Pl...
Page 19 - SING INSTRUCTION
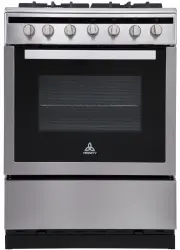
4 U SING INSTRUCTION 4.1 Y OUR NEW APPLIANCE Get to know your appliance. You will find information about the control panel andhob, as well as the oven, types of heating and accessories. 1. Pot rack 2. Burners knobs 3. Timer knob 4. Function knob 5. Temperature knob 6. Baking rack 7. Oven door 8. D...
Page 20 - Timer
Control knobsOven function Timer Control knobsGas burners Control knobs Oventemperature 4.2 THE CONTROL PANEL 4.3 T HE HOB 4.4 C ONTROL KNOBS FOR GAS BURNERS Adjust the heat setting of the gas burners using the control knobs. The symbol abovethe control knob shows you to which gas burner the contr...
Page 22 - Use this control knob to the function
4.9 C ONTROL KNOB FOR OVEN Use this control knob to the function Symbol Power W Function 25 The oven light 58 Defrosting mode, when the light is on and circulation motor operates 2600 The top heating element,grill heating element, circulation motor andlight are ON 2580 The top heating element ,grill...
Page 23 - OFF
And then, use this control knob to the temperature There is a limit stop between settings 250 and 0. Do not turn the knob beyond this point. 4.10 O PERATE YOUR OVEN Please note that, in the case of appliances with a hob cover, the burners in the ovenmay only be switched on if the hob cover is op...
Page 24 - Off; Cooking time in minutes; A signal sounds once the time has elapsed.
4.12 C ONTROL KNOB FOR MINUTE MINDER Off 20 - 120 Cooking time in minutes 4.13 S ETTING A COOKING TIME Turn the control knob once round clockwise, as far as the limit stop, and then turn itanti-clockwise to set it to the required time. 4.14 T HE COOKING TIME HAS ELAPSED A signal sounds once the ...
Page 27 - Dry the parts off well.
4.22 C LEANING THE BURNER LIDS AND CUPS Proceed as follows: Clean the burner lids (A) and cups (B) with water and washing-up liquid. Dry the parts off well. Place the burner sprayer (B) on the burner (C). Place the burner lid (A) exactly on top of the burner cup (B). 4.23 C LEANING ACCESSORI...
Page 28 - Never use high-pressure cleaners or steam jets.; You can remove the appliance door for easier cleaning.; Do not reach inside the hinge.; Open the appliance door.
4.25 W ARNING Never use high-pressure cleaners or steam jets. 4.26 R ISK OF SHORT CIRCUIT . Never use caustic or abrasive cleaning agents. These could damage the surface. Ifsuch an agent gets on the front of the appliance, wipe it off immediately with water.Do not clean any surfaces of the appli...
Page 32 - ECHNICAL DATA; TECHNICAL DATA SHEET; ULPG
5 T ECHNICAL DATA 5.1 TECHNICAL DATA SHEET PRODUCT GAS/ELECTRIC COOKER MODEL NO. TRFSEGO600 VOLTAGE /FREQUENCY 220-240V~ 50Hz-60Hz ELECTRIC POWER 3.0kW TYPES OF GAS Natural Gas/ ULPG GAS PRESSURE Natural Gas:1.0 kPa/ ULPG:2.75 kPa TOTAL HEATINPUT(NG) 29.2MJ/h 772l/h ( hotplate burners ) TOTAL HEATIN...
Page 34 - ROBLEM SOLVER
6 P ROBLEM SOLVER 6.1 PROBLEM MIGHT OCCURRED Any of the following are considered to be abnormal operation and may requireservicing: Yellow tipping of the hob burner flame. Sooting up of cooking utensils. Burners not igniting properly. Burners failing to remain alight. Burners extinguished by oven ...
Page 37 - DISPOSAL; The packaging materials are recyclable.
7 DISPOSAL This appliance requires special waste disposal. For further informationregarding the treatment, recovery and recycling of this product pleasecontact your local council, household waste disposal service or the storewhere you purchased it. The packaging materials are recyclable. P a g e | 3...
Page 38 - CUSTOMER CARE; For your own protection, please record installer’s details:
8 CUSTOMER CARE Please be advised that without the proof of purchase, your warranty may notbe valid, keep the receipt. For your convenience, please record: STORE NAME/CONTACT DETAILS: ............................................... PURCHASE DATE: ......................................................