Page 2 - P a g e; INSTRUCTION MANUAL; 5 cm Freestanding Dishwasher
ONLINE: TRINITYAPPLIANCES.COM.AU P a g e | INSTRUCTION MANUAL 45 cm Freestanding Dishwasher Models: TRDWFS4510 2
Page 5 - PACKAGE; at the delivery time
ONLINE: TRINITYAPPLIANCES.COM.AU P a g e | 1 PACKAGE 1.1 IMPORTANT - CHECK FOR ANY DAMAGE OR MARKS Please thoroughly inspect your goods at the delivery time , if you notice any damage to your goods: Please notify the delivery team at the time of delivery and do NOT accept damaged product . Pleas...
Page 6 - SAFETY WARNINGS; To maintain; This appliance is for indoor household use only.
ONLINE: TRINITYAPPLIANCES.COM.AU P a g e | 2 SAFETY WARNINGS 2.1 IMPORTANT INFORMATIONTHESE WARNINGS ARE PROVIDED IN THE INTEREST OF SAFETY, PLEASE READTHEM CAREFULLY BEFORE INSTALLING OR USING THE APPLIANCE To maintain the EFFICIENCY and SAFETY of this appliance, we recommend: Installation and re...
Page 7 - ARTHING; Have a proper outlet installed by a qualified electrician.
ONLINE: TRINITYAPPLIANCES.COM.AU P a g e | 2.2 E ARTHING I NSTRUCTIONS This appliance must be earthed. In the event of a malfunction or breakdown, earthingwill reduce the risk of an electric shock by providing a path of least resistance ofelectric current. This appliance is equipped with an earthi...
Page 8 - NSTALLATION INSTRUCTION; Disconnect electrical power before installing dishwasher.; ARNING; Electrical requirements
ONLINE: TRINITYAPPLIANCES.COM.AU P a g e | 3 I NSTALLATION INSTRUCTION 3.1 E LECTRICAL S HOCK H AZARD Disconnect electrical power before installing dishwasher. Failure to do so could result in death or electrical shock. Attention: The installation of the pipes and electrical equipments should ...
Page 10 - OSITION; Drain hose
ONLINE: TRINITYAPPLIANCES.COM.AU P a g e | 10 How to drain excess water from hoses If the sink is 1000 higher from the floor, the excess water in hosescannot be drained directly into the sink. It will be necessary to drainexcess water from hoses into a bowl or suitable container that isheld outsid...
Page 11 - Only apply to the free standing dishwasher.; REE; Fitting between existing carbinets
ONLINE: TRINITYAPPLIANCES.COM.AU P a g e | 1 Levelling the appliance Once the appliance is positioned for levelling, the height of thedishwasher may be altered viaadjustment of the screwing level of the feet.In any case, the appliance should not be inclined more than 2°. NOTE: Only apply to the fr...
Page 12 - UILT; Step 1. Selecting the best location for the dishwasher
ONLINE: TRINITYAPPLIANCES.COM.AU P a g e | case remove the work top of the dishwasher by unscrewing thescrews under the rear edge of the top (a). Attention After removing the work top, the screws must be screwed again underthe rear edge of the top (b). The height will then be reduced to 815 mm, as...
Page 14 - Full-integrated model
ONLINE: TRINITYAPPLIANCES.COM.AU P a g e | A B 1 . Take away the four short screws 2 . Pin up the four long screws Full-integrated model Install the hook on the aesthetic wooden panel and put the hook intothe slot of the outer door of dishwasher (see figure A). After positioningof the panel, fix t...
Page 15 - Connect the inlet hose to the cold water supply.
ONLINE: TRINITYAPPLIANCES.COM.AU P a g e | Please refer to the specified installation steps in theinstallation drawings. Step 4. Dishwasher installation steps 1. Affix the condensation strip under the work surface of cabinet. Pleaseensure the condensation strip is flush with edge of work surface. ...
Page 16 - The maximum adjustment height of the feet is 50 mm.
ONLINE: TRINITYAPPLIANCES.COM.AU P a g e | A B Step 5. Levelling the dishwasher Dishwasher must be level for proper dish rack operation and washperformance. 1. Place a spirit level on door and rack track inside the tub as shown tocheck that the dishwasher is level. 2. Level the dishwasher by adjus...
Page 17 - SING INSTRUCTION; OUR NEW APPLIANCE; upper spray arm
ONLINE: TRINITYAPPLIANCES.COM.AU P a g e | 4 U SING INSTRUCTION 4.1 Y OUR NEW APPLIANCE To get the best performance from your dishwasher, read all operating instructionsbefore using it for the first time. NOTE: Pictures are only for reference, different models may be different. Pleaseprevail in ...
Page 18 - EFORE USING YOUR DISHWASHER; Loading the basket; ASKET; Adjusting the upper basket
ONLINE: TRINITYAPPLIANCES.COM.AU P a g e | 1. Pull out the upper basket. 2.Remove the upper basket. 4.2 B EFORE USING YOUR DISHWASHER Inside Outside 1. Loading the basket 2. Fill the rinse aid dispenser (Please check the section 1 of PART Ⅱ : Special Version) 3. Fill in detergent (Please check the s...
Page 20 - MAINTENANCE AND CLEANING; XTERNAL; The door and the door seal; NTERNAL; Filtering system
ONLINE: TRINITYAPPLIANCES.COM.AU P a g e | 2 5 MAINTENANCE AND CLEANING 5.1 E XTERNAL C ARE The door and the door seal Clean the door seals regularly with a soft damp cloth to remove fooddeposits.When the dishwasher is being loaded, food and drink residues may driponto the sides of the dishwasher ...
Page 22 - will clog the spray arm jets and bearings.; ARING; Frost precaution
ONLINE: TRINITYAPPLIANCES.COM.AU P a g e | Spray arms It is necessary to clean the spray arms regularly for hard water chemicals will clog the spray arm jets and bearings. To clean the spray arms, follow the instructions below: 5.3 C ARING F OR T HE D ISHWASHER Frost precaution Please take frost...
Page 23 - Reconnect the water inlet pipe to the water valve.
ONLINE: TRINITYAPPLIANCES.COM.AU P a g e | 4. Reconnect the water inlet pipe to the water valve. 5. Remove the filter at the bottom of the tub and use a sponge to soakup water in the sump. After every wash After every wash, turn off the water supply to the appliance and leavethe door slightly open...
Page 24 - LOADING THE BASKETS ACCORDING TO AS/NZS 2007.1; PPER BASKET; OWER BASKET; Number
ONLINE: TRINITYAPPLIANCES.COM.AU P a g e | 6 LOADING THE BASKETS ACCORDING TO AS/NZS 2007.1 6.1 U PPER BASKET : Number Item 1 Cups 2 Saucers 3 Glasses 6.2 L OWER BASKET : Number Item 4 Dessert dishes 5 Dinner plates 6 Soup plates 3 3 3 3 1 1 1 1 2 2 5 5 4 4 6 6 4 4 5 5 24
Page 26 - PECIAL
ONLINE: TRINITYAPPLIANCES.COM.AU P a g e | Inside Outsid e 7 S PECIAL V ERSION 7.1 QUICK USER GUIDE Please read the corresponding content on the instruction manual fordetailed operating method. 3.Loading the baskets 2.Removing the larger residue on the cutlery 1.Install the dishwasher (Please check ...
Page 27 - ONTROL; Extra Drying
ONLINE: TRINITYAPPLIANCES.COM.AU P a g e | 7.2 C ONTROL P ANEL Operation (Button) 1 2 3 4 5 6 7 6 8 1 1 1 0 1 2 9 Power Alt Press this button to turn on your dishwasher, the screen lights up. 1 4 press the button to select either upper basket or lower basket loaded. And the response indicator will...
Page 28 - REPARING; For washing the following cutlery/dishes; Pewter or cooper items Crystal glass; Alt indicator; Display
ONLINE: TRINITYAPPLIANCES.COM.AU P a g e | 7.3 P REPARING A ND L OADING D ISHES Consider buying utensils which are identified as dishwasher-proof. For particular items, select a program with the lowest possible temperature. To prevent damage, do not take glass and cutlery out of the dishwasher...
Page 29 - All utensils are stacked securely and can not tip over.; EMOVING THE DISHES; Are of limited suitability; Glazed pattern s may fade if machine washed frequently; Recommendations for loading the dishwasher
ONLINE: TRINITYAPPLIANCES.COM.AU P a g e | Scrape off any large amounts of leftover food. Soften remnants of burntfood in pans. It is not necessary to rinse the dishes under running water.For best performance of the dishwasher, follow these loadingguidelines. (Features and appearance of baskets and ...
Page 30 - OADING THE UPPER BASKET; Cutlery should be placed in the cutlery rack separately from each
ONLINE: TRINITYAPPLIANCES.COM.AU P a g e | Warnings: Items will be hot! To prevent damage, do not take glass and cutleryout of the dishwasher for around 15 minutes after the program hasended. 7.5 L OADING THE UPPER BASKET The upper basket is designed to hold more delicate and lighterdishware such ...
Page 31 - UNCTION; When to refill the rinse aid dispenser; Function of detergent
ONLINE: TRINITYAPPLIANCES.COM.AU P a g e | 3 other in the appropriate positions, and do make sure the utensils donot nest together, this may cause bad performance. Warnings: Do not let any item extend through the bottom.Always load sharp utensils with the sharp point down! For the best washing eff...
Page 32 - ILLING; Adjusting the rinse aid reservoir
ONLINE: TRINITYAPPLIANCES.COM.AU P a g e | to remove, crush and dispense all dirt out of the dishwasher. Most ofthe commercial quality detergents are suitable for this purpose. Warnings: Proper Use of Detergent Use only detergent specifically made for dishwashers use. Keep your detergent fresh and...
Page 34 - P r e w a s h
ONLINE: TRINITYAPPLIANCES.COM.AU P a g e | 7.11 PROGRAMMING THE DISHWASHER Wash Cycle Table The table below shows which programs are best for the levels of food residueon them and how much detergent is needed. It also show various information aboutthe programs. ( )Means: need to fill rinse int...
Page 36 - Open circuit or break of distributary valve.; Codes; Malfunction of heating element.
ONLINE: TRINITYAPPLIANCES.COM.AU P a g e | Warnings: It is dangerous to open the door mid-cycle, as hot steam may scald you. 7.15 ERROR CODES If there is a malfunction, the dishwasher will display error codes to identify these: Warnings: If overflow occurs, turn off the main water supply b...
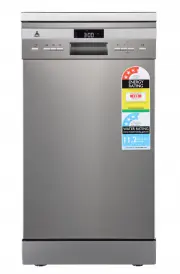
Page 37 - ECHNICAL DATA; TECHNICAL DATA SHEET
ONLINE: TRINITYAPPLIANCES.COM.AU P a g e | 8 T ECHNICAL DATA 8.1 TECHNICAL DATA SHEET 8.2 P RODUCT FICHE W H D1 D2 Height (H) Width (W) Depth (D1) Depth (D2) 845mm 448mm 600mm (with the door closed) 1175mm (with the door opened 90 ° ) Manufacturer Type / Description Standard place settings Energy ef...
Page 38 - ROBLEM SOLVER; EFORE
ONLINE: TRINITYAPPLIANCES.COM.AU P a g e | 9 P ROBLEM SOLVER 9.1 B EFORE C ALLING F OR S ERVICE Reviewing the charts on the following pages may save you from calling for service. Problem Possible Causes What To Do Dishwasher doesn'tstart Fuse blown, or thecircuit breaktripped. Replace fuse or rese...
Page 42 - 1 CUSTOMER CARE; For your own protection, please record installer’s details:
ONLINE: TRINITYAPPLIANCES.COM.AU P a g e | 11 CUSTOMER CARE Please be advised that without the proof of purchase, your warranty may notbe valid, keep the receipt. For your convenience, please record: STORE NAME/CONTACT DETAILS: ............................................... PURCHASE DATE: ..........