Thor Kitchen MK04SS304 - User Manual
Thor Kitchen MK04SS304 Grill – User Manual, read for free online in PDF format. We hope this helps you resolve any issues you may have. If you have further questions, please contact us through the contact form.


Table of Contents:
- Page 2 – USE AND CARE MANUAL
- Page 3 – Warnings; These are the most critical warnings summarized below.
- Page 4 – Welcome; Thor Group
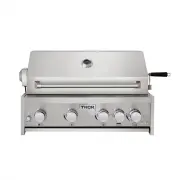
- Page 5 – Parts Explosive Pictures
- Page 10 – Product Dimension
- Page 12 – Cabinet Installation
- Page 23 – Outdoor Grill Installation
- Page 35 – Do not over-tighten all the screws until parts are lined up.
- Page 36 – Do not over-tighten all the screws until parts are lined up.
- Page 40 – Take out 3M double sided tape from the edge of the water sink.
- Page 53 – Do not over-tighten all the screws until parts are lined up.
- Page 79 – and adjust the supporting legs to suitable position
- Page 86 – Maximum Temperature inside the Pizza Oven Cavity is 800 F.
- Page 87 – Do not over-tighten all the screws until parts are lined up.
- Page 89 – Detailed Installation Pictures for Door hinge is shown below:
- Page 93 – Warranty and Service
- Page 94 – WARRANTY REGISTRATION; WELCOME
USE AND CARE MANUAL
COOK
LIKE
A
GOD
OUTDOOR KIT
CHEN
MK01S
S304 | MK02S
S304 | MK03S
S304 | MK04S
S304 | MK06S
S304 | MK07S
S304
"Loading the manual" means you need to wait until the file loads and becomes available for online reading. Some manuals are very large, and the time they take to appear depends on your internet speed.
Summary
OUTDOOR KITCHEN SUITE USE AND CARE MANUAL MK01SS304 | MK02SS304 | MK03SS304 MK04SS304 | MK06SS304 | MK07SS304
[email protected] +1 877-288-8099 Warnings These are the most critical warnings summarized below. ***WARNING*** • If the instructions in this manual are not followed exactly, a fire or explosionmay result, causing property damage, personal injury or death.• Do not store or use gasoline or other flam...
[email protected] +1 877-288-8099 Welcome Thank you for purchasing your Thor Kitchen Appliance! We appreciate yourbusiness and we recommend that you read this entire User’s Manual beforeoperating your new appliance for the first time.This manual contains instructions on how to properly install and s...