SUNHEAT TW1500-UV Modern Oak - User Manual
SUNHEAT TW1500-UV Modern Oak Heater – User Manual, read for free online in PDF format. We hope this helps you resolve any issues you may have. If you have further questions, please contact us through the contact form.


Table of Contents:
- Page 2 – Read ALL instructions before using this unit.
- Page 3 – Tip-Over Safety Feature
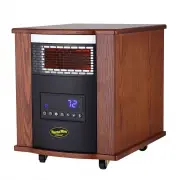
- Page 5 – Control Panel
- Page 6 – PREPARATION; and; Remote Control; Temp down button: To make set temperature decline.
- Page 7 – Setting Desired Temperature; . Once you have chosen the desired temperature,
- Page 8 – locking mechanism can be set in both the ON and OFF modes.
- Page 9 – MAINTENANCE; Turn off the power switch in the rear of the unit.; ) Remove Air filter
- Page 10 – PUSH; lid
- Page 11 – LIMITED 90 DAY WARRANTY; Any product that proves to be defective within the warranty; Thermal Wave Warranty Registration; THANK YOU
INFRARED ZONE HEATING SYSTEM
OWNER’S MANUAL
Model No. TW1500
"Loading the manual" means you need to wait until the file loads and becomes available for online reading. Some manuals are very large, and the time they take to appear depends on your internet speed.
Was this manual helpful?
About this manual
- Brand
- SUNHEAT
- Model
- TW1500-UV Modern Oak
- Document type
- User Manual
- Category
- Heater
- Language(s)
- English
- Pages
- 11
- File size
- 830.7 KB
- Format
Summary
2 PLEASE SAVE THESE INSTRUCTIONS WARNING: READ THIS OWNER’S MANUAL CAREFULLY BEFORE USE. Thank you for choosing a Thermal Wave by SUNHEAT Infrared Zone Heating System. This owner’s manual will provide you with valuable information necessary for the proper care and maintenance of your new product. Pl...
3 15. To disconnect heater, turn controls to OFF, then remove plug from outlet. Pull firmly on the plug, DO NOT unplug by pulling on the cord. 16. Always unplug the unit before moving or cleaning, or whenever the heater is not in use. 17. Use only for intended household use as described in this manu...
5 1 、 Power indication light: Indicates when the unit connects to power supply. 2 、 Timer indication light : The light’s on when timer is functioning. 3 、 Fan indicator light: The light’s on when cooling fan is functioning. 4 、 Signal-receiving window: Receives remote control signal. 5 、 Digital dis...