Page 2 - Instructions; General safety instructions; Risk of personal injury
Instructions 28 1 Instructions 1.1 General safety instructions Risk of personal injury • Keep children under eight years of age at a safe distance if they are not constantly supervised. • Children must never play with the appliance. • Never try to put out a fire or flames with water: turn off the ap...
Page 3 - Manufacturer liability
Instructions 29 EN • Do not use steam jets to clean the appliance. • Do not obstruct ventilation openings and heat dispersal slots. • Do not use electrical appliances inside food storage compartments unless these are of the type recommended by the manufacturer. • Do not use the appliance to cool roo...
Page 4 - other working environments
Instructions 30 The appliance is designed for use in a domestic or similar environment, for instance:• Staff kitchen areas in shops, offices and other working environments; • Farm houses and by guests in hotels, motels and other residential type environments; • Bed and breakfast establishments;• Cat...
Page 5 - Identification plate; Danger of suffocation
Instructions 31 EN Our appliances are packed in non-polluting and recyclable materials.• Deliver the packing materials to the appropriate recycling centre. 1.5 Identification plate The identification plate bears the technical data, serial number and brand name of the appliance. Do not remove the ide...
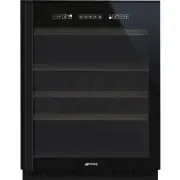
Page 6 - Description; General Description
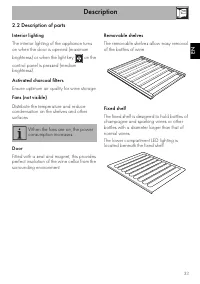
Description 32 2 Description 2.1 General Description 1 Upper compartment interior lighting 2 Fan (not visible) 3 Activated charcoal filter 4 Lower compartment interior lighting 5 Control panel 6 Door 7 Door seal 8 Magnet 9 Ventilation grille Removable shelf
Page 7 - Description of parts; Interior lighting
Description 33 EN 2.2 Description of parts Interior lighting The interior lighting of the appliance turns on when the door is opened (maximum brightness) or when the light key on the control panel is pressed (medium brightness). Activated charcoal filters Ensure optimum air quality for wine storage....
Page 8 - Turns the appliance on and off.
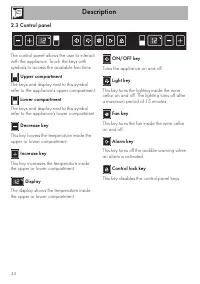
Description 34 2.3 Control panel The control panel allows the user to interact with the appliance. Touch the keys with symbols to access the available functions. Upper compartment The keys and display next to this symbol refer to the appliance's upper compartment. Lower compartment The keys and disp...
Page 9 - Use; Preliminary operations; Improper use
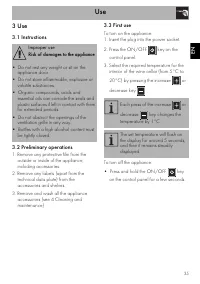
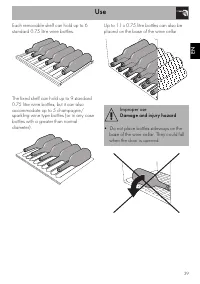
Use 35 EN 3 Use 3.1 Instructions 3.2 Preliminary operations 1. Remove any protective film from the outside or inside of the appliance, including accessories. 2. Remove any labels (apart from the technical data plate) from the accessories and shelves. 3. Remove and wash all the appliance accessories ...
Page 10 - Using the control panel
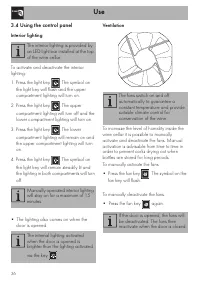
Use 36 3.4 Using the control panel Interior lighting To activate and deactivate the interior lighting: 1. Press the light key . The symbol on the light key will flash and the upper compartment lighting will turn on. 2. Press the light key . The upper compartment lighting will turn off and the lower ...
Page 11 - Alarms
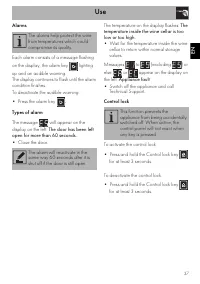
Use 37 EN Alarms Each alarm consists of a message flashing on the display, the alarm key lighting up and an audible warning.The display continues to flash until the alarm condition finishes.To deactivate the audible warning: • Press the alarm key . Types of alarm The message will appear on the displ...
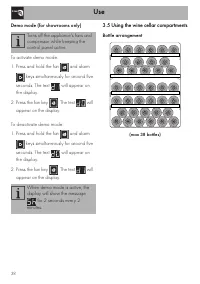
Page 12 - Using the wine cellar compartments; Bottle arrangement
Use 38 Demo mode (for showrooms only) To activate demo mode: 1. Press and hold the fan and alarm keys simultaneously for around five seconds. The text will appear on the display. 2. Press the fan key . The text will appear on the display. To deactivate demo mode: 1. Press and hold the fan and alarm ...
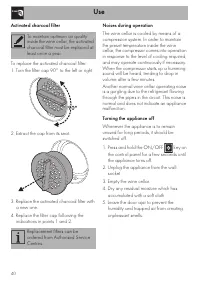
Page 14 - Activated charcoal filter
Use 40 Activated charcoal filter To replace the activated charcoal filter:1. Turn the filter cap 90° to the left or right. 2. Extract the cap from its seat. 3. Replace the activated charcoal filter with a new one. 4. Replace the filter cap following the indications in points 1 and 2. Noises during o...
Page 15 - Food storage advice; Storage temperatures
Use 41 EN 3.6 Food storage advice Storage temperatures To enjoy the flavour and bouquet of each wine at its best, it should be stored and drunk at a specific temperature. The recommended temperatures for different kinds of wines are given below. White wines White wines are generally more acidic than...
Page 16 - Red wines
Use 42 Red wines The serving temperature for red wines depends on a great deal of factors, but in view of their higher tannin and lower acidity than whites, they are usually served at higher temperatures. Young red wines with low tannin are usually served between 14° and 16°C, while for more full-bo...
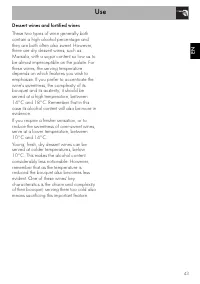
Page 17 - Dessert wines and fortified wines
Use 43 EN Dessert wines and fortified wines These two types of wine generally both contain a high alcohol percentage and they are both often also sweet. However, there are dry dessert wines, such as Marsala, with a sugar content so low as to be almost imperceptible on the palate. For these wines, th...
Page 18 - Cleaning and maintenance; Cleaning the appliance; Cleaning the outside of the appliance
Cleaning and maintenance 44 4 Cleaning and maintenance 4.1 Instructions 4.2 Cleaning the appliance A special antibacterial protection on the appliance's interior walls prevents bacterial growth and keeps them clean. They must nevertheless be cleaned regularly in order to keep them in good condition....
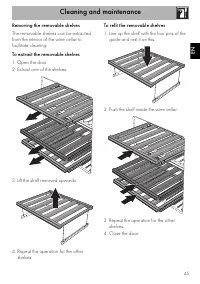
Page 19 - Removing the removable shelves
Cleaning and maintenance 45 EN Removing the removable shelves The removable shelves can be extracted from the interior of the wine cellar to facilitate cleaning. To extract the removable shelves 1. Open the door.2. Extract one of the shelves. 3. Lift the shelf removed upwards. 4. Repeat the operatio...
Page 20 - in and that the main switch is turned on.
Cleaning and maintenance 46 4.3 What to do if... The appliance does not work:• Make sure that the appliance is plugged in and that the main switch is turned on. The compressor starts to function too often or functions continuously:• The room temperature is too high.• The door is being opened too oft...
Page 21 - Installation; Electrical connection; Power voltage
Installation 47 EN 5 Installation 5.1 Electrical connection General information • Check the grid characteristics against the data indicated on the plate. The identification plate bearing the technical data, serial number and brand name is visibly positioned inside the appliance. Do not remove this p...
Page 22 - • Install the appliance at least 3 cm away
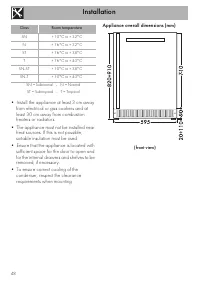
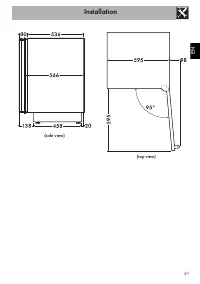
Installation 48 SN = Subnormal - N = Normal ST = Subtropical - T = Tropical • Install the appliance at least 3 cm away from electrical or gas cookers and at least 30 cm away from combustion heaters or radiators. • The appliance must not be installed near heat sources. If this is not possible, suitab...
Page 24 - Positioning
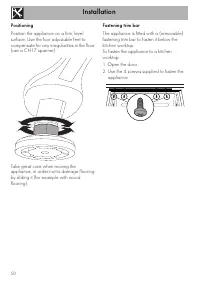
Installation 50 Positioning Position the appliance on a firm, level surface. Use the four adjustable feet to compensate for any irregularities in the floor (use a CH17 spanner). Take great care when moving the appliance, in order not to damage flooring by sliding it (for example with wood flooring)....