Samsung RS65DG54M3SL - Quick Guide
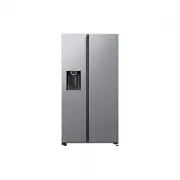
A user manual for Samsung’s free-standing refrigerators with dispenser features–such as water and ice–covers essential topics like installation requirements, interior layout, and safety guidelines. The document details proper placement (level surface, temperature range, ventilation) and clearance specifications to ensure safe operation. It also includes setup instructions for water and filtration systems, including connections, warnings about warranty limitations, and troubleshooting steps for connectivity issues with the SmartThings app integration. Safety precautions emphasize avoiding modifications that could damage components or void warranties.


Table of Contents:
- Page 1 – Product Identification and Model Information
- Page 2 – Refrigerator Interior Layout and Installation Warnings
- Page 3 – Internal Component Labeling and Protection
- Page 4 – Site Requirements and Installation Dimensions
- Page 5 – Refrigerator Unit Placement and Leveling
- Page 6 – Water Dispenser Line Connection
- Page 7 – Water Filtration System Installation
- Page 8 – Water Line Security and Filter Maintenance
- Page 9 – Final Setup and Power-On Procedure
- Page 10 – SmartThings App Integration and Setup
Refrigerator
Simple User manual
RS62**5*****/RS64**5*****/RS65**5*****/RS6E**5*****/RS6F**5*****
Free Standing Appliance
"Loading the manual" means you need to wait until the file loads and becomes available for online reading. Some manuals are very large, and the time they take to appear depends on your internet speed.
Was this manual helpful?
About this manual
- Brand
- Samsung
- Model
- RS65DG54M3SL
- Document type
- Quick Guide
- Language(s)
- English
- Pages
- 10
- File size
- 1.9 MB
- Format
Other Manuals for Samsung RS65DG54M3SL
Summary
Identification details for free-standing refrigerator models including model numbers RS625, RS645, RS655, RS6E5, and RS6F5.
Installation instructions, interior layout diagram, and warnings regarding proper use and servicing of the refrigerator.
Identification and labeling of internal components such as freezer shelves, bins, drawers, water tank, and cautions against altering freezer shelf positions.
Ask a question
Related manuals
Popular Samsung Other


More Samsung Other models
 Samsung RS62K6198SL User Manual
 Samsung RS64DG53R3B1 Quick Guide
 Samsung RS64DG53R3S9 Quick Guide
 Samsung RS64DG5303B1 Quick Guide
 Samsung RS64DG5303S9 Quick Guide
 Samsung RS65DG54M3B1 Quick Guide
 Samsung RS65DG54M32C User Manual
- Samsung RS65DG54R3B1 Quick Guide
 Samsung RS65DG54R3S9 Quick Guide
- Samsung RS65DG5403B1 Quick Guide
 Samsung RS65DG5403S9 Quick Guide
 Samsung RS65R5411M9 User Manual