Samsung LE32D450G1W - Quick Guide

Samsung LE32D450G1W TV – Quick Guide, read for free online in PDF format. We hope this helps you resolve any issues you may have. If you have further questions, please contact us through the contact form.


Table of Contents:
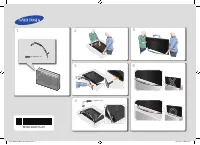
- Page 2 – Installation with a stand.
- Page 3 – SOURCE
- Page 4 – Viewing the Remote Control; SRS
- Page 5 – Connecting to an Antenna; POWER
- Page 6 – Connecting to an AV devices; HDMI connection
- Page 8 – Connecting to a PC and Audio device; Audio connection; Using an Optical (Digital) cable or Headphone Connection
- Page 9 – PC connection; Using an HDMI cable or HDMI to DVI cable or a D-sub cable
- Page 10 – NOTE
- Page 11 – Changing the Input Source; Source List; How to use Edit Name; Connecting to a COMMON INTERFACE slot; Using the “CI or CI+ CARD”
- Page 12 – How to view the e-Manual; Try Now; ENTER; You can find instructions about your TV’s features in the
- Page 13 – Viewing the Contents; Using the Zoom mode; How to search for a topic on the index page
- Page 14 – Installing the Wall Mount; Wall mount kit is not supplied but sold separately.
- Page 15 – Troubleshooting; Issues; Licence; My Downloads
- Page 16 – Securing the TV to the Wall; Caution; Storage and Maintenance; Wall
- Page 17 – Specifications
- Page 18 – Warning! Important Safety Instructions
- Page 19 – Wiring the Mains Power Supply Plug (UK Only); IMPORTANT NOTICE; Warranty Card; WARRANTY CONDITIONS; UNITED KINGDOM
LCD TV
User Manual
imagine the possibilities
Thank you for purchasing this Samsung product.
To receive more complete service, please register
your product at
www.samsung.com/register
Model _____________ Serial No. _____________
E-MANUAL
[LD450-XU]BN68-03394J-Eng.indd 1
2011-03-08 �� 2:09:40
"Loading the manual" means you need to wait until the file loads and becomes available for online reading. Some manuals are very large, and the time they take to appear depends on your internet speed.
Was this manual helpful?
About this manual
- Brand
- Samsung
- Model
- LE32D450G1W
- Document type
- Quick Guide
- Category
- TV
- Language(s)
- English
- Pages
- 20
- File size
- 4.4 MB
- Format
Other Manuals for Samsung LE32D450G1W
Summary
For more information on how to use e-Manual (P. 12) Figures and illustrations in this User Manual are provided for reference only and may differ from actual product appearance. Product design and specifications may be changed without notice. Important Warranty Information Regarding Television Format...
English - 3 Accessories ✎ Please make sure the following items are included with your TV. If any items are missing, contact your dealer. ✎ The items’ colours and shapes may vary depending on the models. ✎ Cables not included in the package contents can be purchased separately. ✎ Check that there is ...
English - 4 Viewing the Remote Control ✎ This is a special remote control for the visually impaired persons and has Braille points on the Power, Channel, and Volume buttons. A B C D E-MANUAL DUAL I-II SRS AD/SUBT. CONTENT Turns the TV on and off. Displays and selects the available video sources. Ret...
Ask a question
Related manuals
Popular Samsung TVs


More Samsung TVs models
 Samsung LA32C350D1 User Manual
 Samsung LE22C450E1W Quick Guide
 Samsung LE26C450E1W User Manual
 Samsung LE32C450E1W Quick Guide
- Samsung LE32C530F1W User Manual
 Samsung LE32D404E2W Quick Guide
 Samsung LE40C530F1W Quick Guide
 Samsung LE40C750R2W Quick Guide
 Samsung LE40C750R2Z Quick Guide
 Samsung LE40D503F7W Quick Guide
- Samsung LE40D504F7W Quick Guide
 Samsung LE40D550K1W Quick Guide