Samsung HG40EC770SK - Quick Guide
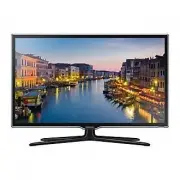
Samsung HG40EC770SK TV – Quick Guide, read for free online in PDF format. We hope this helps you resolve any issues you may have. If you have further questions, please contact us through the contact form.


Installing the LED TV Stand
Stand Parts
A
B
C
(M4 X L12)
Stand x 1
Guide Stand x 1
Screws
Follow the steps below to connect the TV to the stand. For more detailed instructions,
see the separate stand installation guide.
B
A
C
1
Top View
ATTENTION
2
✎
Place a soft cloth over a table to protect the TV, and then
place the T V on the cloth screen side down.
✎
Insert the Stand Guide into the slot on the T V's bottom.
3
Side View
(Correct assembly)
(Incorrect assembly)
4
C
x4 (M4 X L12)
Wall Mount Kit Specifications (VESA)
Install your wall mount on a solid wall perpendicular to the floor. When attaching to
other building materials, please contact your nearest dealer. If installed on a ceiling
or slanted wall, TV may fall and result in severe personal injury.
➣
Standard dimensions for wall mount kits are shown in the table below.
➣
Samsung wall mount kits contain a detailed installation manual. All parts necessary
for assembly are provided.
➣
Do not use screws that do not comply with the VESA standard screw
specifications.
➣
Do not use screws that are longer than the standard dimension or do not comply
with the VESA standard screw specifications. Screws that are too long may cause
damage to the inside of the TV set.
➣
For wall mounts that do not comply with the VESA standard screw specifications,
the length of the screws may differ depending on the wall mount specifications.
➣
Do not fasten the screws too firmly. This may damage the product or cause the
product to fall, leading to personal injury. Samsung is not liable for these kinds of
accidents.
➣
Samsung is not liable for product damage or personal injury when a non-VESA
or non-specified wall mount is used or the consumer fails to follow the product
installation instructions.
➣
Do not mount the TV at more than a 15 degree tilt.
➣
Always have two people mount the TV on a wall.
To register this product please visit
www.samsung.com/register.
Quick Setup Guide
Viewing the Connection Panel
2
1
3
4
5
6
7
8
9
0
!
@
HDMI IN 1
VOL-CTRL
RJP
HDMI IN
2 (ARC)
PC/DVI
AUDIO IN
HDMI IN
3 (DVI)
USB
(5V 0.5A)
/CLONING
VARIABLE
AUDIO OUT
Hotel Plug & Play
Hotel Plug & Play is a function that automatically performs the Hotel mode selection,
Country Setup, Clock Setup and Picture mode Setup once.
–
Hotel Plug & Play is available only one time when power is first turned ON.
–
After setting up first TV and Clone TV to USB
–
Next TV only needs to exit Hotel Plug & Play, connect USB, then Clone USB to TV.
♦
UI Scenario
To receive channels, configure the options
below then select Scan.
Auto Tuning
Aerial
Air
Channel Type Digital & Analogue
Scan
Select the connected aerial
that you want to use to get
channels.
Auto Tuning Complete.
Auto Tuning
Digital
TV
Radio
Data/Other
Analogue
0
0
0
0
Change Settings
Scan Again
0
Clock
Clock Mode
Date
Time
Time Zone
DST
Auto
--/--/----
--:--
Auto
Off
--:--
You can adjust your time to set DST, Time
Zone and clock mode
Set current date and time
Select your information in the
categories below.
Configure your TV
Country
Picture Mode
Bulgaria
Standard
Select the country that
you're in now
Easy Set up
Interactive
(Hotel Menu)
Standalone Setup
(Continue Setup)
Standalone Only
(End Setup)
If you select this, the
setup process will be
completed and go to
hotel menu
c
Hospitality Mode
Standalone
System
SI Vendor
OFF
Power On
Channel
Menu OSD
Clock
Music Mode
Remote Jack Pack
External Source
Bathroom Speaker
Eco Solution
Logo/Message
Cloning
REACH Solution
Security
Local Set
Change Local Set if Located in North America, Latin America and Europe.
In other regions, Please press SKIP button move to the next step.
Current Localset : EU
Change
Skip
Select your language to start the on screen setup.
English
Eesti
Suomi
Français
Deutsch
Select your Language
Press the ▲▼◄►
buttons to move the
highlight.
Press the enter button
to select.
The Language Setting will be applied to Main Menu and not Plug and Play.
TV Setup Complete!
Your TV is now ready to use.
Ok
Standalone mode is set
TV will enter the RF mode
After Searching
the channels.
When pressing OK
button, the hotel
menu appears as
shown on the left.
Complete the hotel
menu settings, and
then reset the TV.
You can use your TV.
If Standalone
Plug & Play is
selected
<Depending on Region, this
step may not exist.> After
selecting the country in the
country menu, some models
may proceed with an additional
option to setup the pin number.
If you forget the PIN code, in
the Hotel menu, select the
SERVICE
→
TV
Reset. And
set the pin code again in the
Plug & Play.
If Standalone
Only is Selected
Mixed Channel Map
Mixed Channel Map is a function to mix Air and Cable channels.
[ If there are no Cable channels, you can use this item as channel sorting. ]
–
Mixed channel Map, Channel Editor and Channel Auto Store are newly placed in Hotel
Option Menu.
–
Mixed channel Map should be ON in order to mix Air and Cable channels.
–
Use Channel Editor to sort the channels as user-desired channel numbers.
Hospitality Mode
Standalone
System
SI Vendor
OFF
Power On
Channel
Menu OSD
Clock
Music Mode
Remote Jack Pack
External Source
Bathroom Speaker
Eco Solution
Logo/Message
Cloning
REACH Solution
Security
<Depending on model and region,
some menu items may not exist>
Simple Steps for channel mixing under Stand-alone Mode
Step
Broad Outline
1
Turn on ‘Mixed Channel Map’ in Hotel Option Menu
2
Operate ‘Channel Auto Store’ in Hotel Option Menu (Antenna Source : Air + Cable)
3
Enter ‘Channel Editor’ in Hotel Option Menu
4
Compile a table related to the final channel lists you want to have
5
Rearrange channels with
TOOLS
Button based on the table you compiled
6
Press
EXIT
or
RETURN
Button to exit.
List of Parts
➣
The provided accessories may vary depending on the model.
1
2
3
4
5
6
7
8
9
1
Remote Control & Batteries (AAA x 2)
2
Quick Setup Guide / Safety Guide
3
Data Cable
4
Power Cord
5
Holder-Wire Stand
6
Component Adapter
7
AV Adapter
8
CI Card Adapter
9
Holder-Ring
Product
Family
TV size in
inches
VESA screw hole
specs (A * B) in
millimeters
Standard Screw
(Length *
Pitch in mm)
Quantity
HG**EC770
32~40
200 X 200
M8
4
46
400 X 400
Do not install your Wall Mount Kit while your TV is turned on.
It may result in personal injury due to electric shock.
➣
Whenever you connect an external device to your TV, make sure that power on the unit is
turned off.
➣
When connecting an external device, match the color of the connection terminal to the
cable.
1
RJP
2
VARIABLE AUDIO OUT
3
VOL-CTRL
4
USB (5V/0.5A) / CLONING
5
HDMI IN 1, 2(ARC), 3(DVI)
6
PC/DVI AUDIO IN
7
HEADPHONE JACK
8
HP-ID
9
ANT IN
0
PC IN
!
COMPONENT IN / AV IN
@
DATA
DO NOT USE
CHEMICALS
DO NOT USE
GREASE
DO NOT USE
OIL
x4 (M4 X L12)
BN68-05850D-01
[QSG-HC770-EU]BN68-05850D-01ENG.indd 1
2014-03-05 4:40:56
"Loading the manual" means you need to wait until the file loads and becomes available for online reading. Some manuals are very large, and the time they take to appear depends on your internet speed.
Was this manual helpful?
About this manual
- Brand
- Samsung
- Model
- HG40EC770SK
- Document type
- Quick Guide
- Category
- TV
- Language(s)
- English
- Pages
- 2
- File size
- 2.6 MB
- Format
Ask a question
Related manuals
Popular Samsung TVs


More Samsung TVs models
 Samsung HG32EE694DK Installation Manual
 Samsung HG32EJ470NK Quick Guide
 Samsung HG39EB460HW Installation Manual
 Samsung HG40EC670CW Quick Guide
 Samsung HG40EC675CB User Manual
 Samsung HG40EC690DB User Manual
 Samsung HG40ED590BB User Manual
 Samsung HG40ED670CK Quick Guide
 Samsung HG40ED690DB User Manual
 Samsung HG40EE470SK User Manual
 Samsung HG40EE590SK User Manual
- Samsung HG40EE670DK User Manual