Page 2 - English; Contents; Safety Information; Cleaning and Maintenance; Installation Procedure
2 English Contents Correct Disposal of This Product (Waste Electrical & Electronic Equipment) (Applicable in countries with separate collection systems) This marking on the product, accessories or literature indicates that the product and its electronic accessories (e.g. charger, headset, USB ca...
Page 3 - FOR INSTALLATION; WARNING; Extending the power line may result in electric shock or fire.
3 English Safet y Informat ion Before using your new air conditioner, please read this manual thoroughly to ensure that you know how to safely and efficiently operate the extensive features and functions of your new appliance.Because the following operating instructions cover various models, the cha...
Page 4 - technician or service company.
4 English Safety Information Safety Information Safet y Informat ion The installation of this appliance must be performed by a qualified technician or service company. • Failing to do so may result in electric shock, fire, explosion, problems with the product, or injury. Install a switch and circuit...
Page 5 - that draining is performed correctly.; FOR POWER SUPPLY; the power line into the space behind the appliance.; CAUTION; thunder/lightning storm, cut the power at the circuit breaker.; FOR USING
5 English Safet y Informat ion When installing the outdoor unit, make sure to connect the drain hose so that draining is performed correctly. • The water generated during the heating operation in the outdoor unit may overflow and result in property damage. In particular, in winter, if a block of ice...
Page 6 - Do not touch the circuit breaker with wet hands.
6 English Safety Information Safety Information Safet y Informat ion In the event of a gas leak (such as propane gas, LP gas, etc.), ventilate immediately without touching the power line. Do not touch the appliance or power line. • Do not use a ventilating fan. • A spark may result in an explosion o...
Page 9 - maintenance shall not be made by children without supervision.; FOR CLEANING; wait until the fan stops.; Failing to do so may result in electric shock or fire.; unit since it has sharp edges.; and Maintaining’ section.
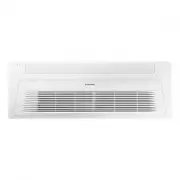
9 English Safet y Informat ion For use in Europe: This appliance can be used by children aged from 8 years and above and persons with reduced physical, sensory or mental capabilities or lack of experience and knowledge if they have been given supervision or instruction concerning use of the applianc...
Page 10 - At; Indoor Unit Overview; At a Glance; Indication
10 English Indoor Unit Overview At a Glanc e Indoor Unit Overview At a Glance Main parts The indoor unit and its display may look slightly different from the illustration shown below, depending on the model and the panel type. PC1*WFMAN / PC1*WCMAN 02 01 04 05 03 01 Display 02 Remote control sensor ...
Page 11 - Panel
11 English At a Glanc e PC1NUSMAN/PC1NUPMAN/PC1MWSKAN/PC1NWSMAN/PC1BWSMAN 02 03 04 01 01 Display 02 Air flow blade 03 Panel 04 Air intake Indication Function Remote control sensorOperation indicator • Heating and cooling model: Operation(Blue) / Defrost(Yellow) • Cooling only model: Operation indica...
Page 12 - Operation Features; Operating temperature and humidity; Mode; Pairing an indoor unit with a remote control; NOTE
12 English Operation Features At a Glanc e Operation Features Operating temperature and humidity When using the air conditioner follow the operating temperature and humidity ranges. Mode Outdoor temperature Indoor temperature Indoor humidity Cool mode Depending on the outdoor unit specifications 18°...
Page 13 - Cleaning and Maintaining; Cleaning the indoor unit exterior; Cleaning the outdoor unit heat exchanger; Spray water to clean the dust.
13 English Cl eaning and Maint enanc e Cleaning and Maintaining Cleaning the indoor unit exterior Wipe the surface of the indoor unit with a tepid damp cloth.Remove the dust accumulated in the narrow gaps of the product with a soft brush. CAUTION • Do not use alkaline detergent, sulphuric acid, hydr...
Page 14 - Cl; Detaching the air filter; Press the; Push; signs on the front panel, then
14 English Cleaning and Maintaining Cleaning and Maintaining Cl eaning and Maint enanc e Cleaning the air filter CAUTION • Before cleaning the indoor unit, be sure to turn off the auxiliary power switch. • Be sure to hold the grille with a hand to prevent dropping from the opening of the front grill...
Page 18 - Periodical maintenance; Unit
18 English Cleaning and Maintaining Cleaning and Maintaining Cl eaning and Maint enanc e Periodical maintenance Unit Maintenance item Interval Requires qualified technicians Indoor unit Clean the air filter. At least once a month Clean the condensate drain pan. Once a year Required Clean the heat ex...
Page 19 - Troubleshooting; conditioner will start in 3 minutes.
19 English Cl eaning and Maint enanc e Troubleshooting Refer to the following chart if the air conditioner operates abnormally. This may save time and unnecessary expense. Problem Solution The air conditioner does not operate immediately after it has been restarted. • Because of the protective mecha...
Page 20 - set temperature (minimum: 18°C) is set to lower than the current
20 English Cleaning and Maintaining Cleaning and Maintaining Cl eaning and Maint enanc e Problem Solution The wired remote control does not operate. • Check whether the indicator is displayed at the bottom right of the remote control display. In this case, turn off both the air conditioner and the a...
Page 21 - conditioner in the Clean or Fan mode for 1 to 2 hours.
21 English Cl eaning and Maint enanc e Problem Solution The air is not cool or warm enough. • Close the windows and doors to maximize the cooling and heating efficiencies. • If the Cool mode is stopped and then started immediately, cool air comes out after about 3 minutes to protect the compressor o...
Page 22 - Type; Information about refrigerant; Refrigenat type; Technical specifications
22 English Technical specifications Cl eaning and Maint enanc e Type Model New weight Net dimension(W x D x H) Indoor unit AM017NN1PEH 8.0 kg 740 mm x 360 mm x 135 mm AM022NN1PEH 8.0 kg 740 mm x 360 mm x 135 mm AM022NN1DEH 10.0 kg 970 mm x 410 mm x 135 mm AM028NN1DEH 10.0 kg 970 mm x 410 mm x 135 mm...
Page 23 - Instal; Step 1 Installing the indoor unit
23 English Instal lation Pr oc edure Step 1 Installing the indoor unit When deciding on the location of the air conditioner the following restrictions must be taken into account. 1 Place the pattern sheet on the ceiling at the spot where you want to install the indoor unit. NOTE • Since the diagram ...
Page 24 - Step 2 Performing the gas leak test
24 English Installation Procedure Instal lation Pr oc edure 7 Adjust the unit to the appropriate position, taking into account the installation area for the front panel. • Place the pattern sheet on the indoor unit. • Adjust the space between the ceiling and the indoor unit by using a dimension gaug...
Page 28 - Step 4 Connecting the power and; Power and communication cable connection
28 English Installation Procedure Instal lation Pr oc edure Step 4 Connecting the power and communication cables Power and communication cable connection • Before wiring work, you must turn off all power source. • Connect the power and communication cable among the units within maximum length to set...
Page 29 - Selecting the crimping terminal lug
29 English Instal lation Pr oc edure Selecting the crimping terminal lug 1 Select the crimping terminal lug based on the norminal dimension of the power cable. 2 Cover the connection part of the power cable and crimping terminal lug to insulate it. Silver solder F E L D d1 B d2 t B 2 R Norminal dime...
Page 30 - Specifications of the terminal blocks
30 English Installation Procedure Instal lation Pr oc edure Specifications of the terminal blocks (Unit: mm) AC power: M4 screw Communication: M3.5 screw 11 13 7.5 9.0 18 13 .8 Power supply (single phase) MCCB ELB Min : 198V Max : 242V XA XA, 30 mA 0.1 s Power cable Earth cable Communication cable 2...
Page 31 - Step 5 Setting the indoor unit; Common steps for setting the addresses and
31 English Instal lation Pr oc edure Step 5 Setting the indoor unit addresses and the installation options You cannot set both of the indoor unit addresses and the installation options in a batch: set both of them respectively. Common steps for setting the addresses and options Low Temp button High ...
Page 37 - Setting the indoor unit installation option
37 English Instal lation Pr oc edure Option SEG7 SEG8 SEG9 SEG10 SEG11 SEG12 Function Page - Setting RMC address - Group channel (x16) Group address Indication and details Indication Details - Indication Details - Indication Details Indication Details 1 0 No RMC address RMC1 0 to F RMC2 0 to F 1 RMC...
Page 47 - Changing the addresses and options individually; Emergency Temperature Output (ETO) function
47 English Instal lation Pr oc edure Changing the addresses and options individually When you want to change the value of a specific option, refer to the following table and follow the steps in Common steps for setting the addresses and options on page 31 . Option SEG1 SEG2 SEG3 SEG4 SEG5 SEG6 Funct...
Page 48 - Setting up the ETO; Main indoor unit
48 English Installation Procedure Instal lation Pr oc edure Setting up the ETO Communication between indoor and outdoor units (F1 and F2) Error output port (1, 2) Contact input port (5, 6) Main indoor unit Sub indoor unit External contact interface module MIM-B14 Main indoor unit 1 Disable the exter...
Page 50 - QUESTIONS OR COMMENTS?
COUNTRY CALL OR VISIT US ONLINE AT UK 0333 000 0333 www.samsung.com/uk/support IRELAND (EIRE) 0818 717100 www.samsung.com/ie/support GERMANY 06196 77 555 77 www.samsung.com/de/support FRANCE 01 48 63 00 00 www.samsung.com/fr/support SPAIN 91 175 00 15 www.samsung.com/es/support PORTUGAL 210 608 098 ...