Samsung AM022HN1DEH/EU - Installation Manual
Samsung AM022HN1DEH/EU Air Conditioner – Installation Manual, read for free online in PDF format. We hope this helps you resolve any issues you may have. If you have further questions, please contact us through the contact form.


Table of Contents:
- Page 2 – Contents; Safety Precautions; WARNING; accessing its internal components.
- Page 4 – Indoor Unit; As a rule, the unit cannot be installed at a height of less than 2.5 m.; AM
- Page 5 – Selecting the Installation Location (Continued); Space Requirements for Indoor Unit; carry the indoor unit.
- Page 6 – Insulation Guide; Indoor unit; Name; Dimension of the indoor unit
- Page 10 – Selecting the Installation Location
- Page 11 – Indoor Unit Installation; Note
- Page 12 – Purging the Unit; Result
- Page 13 – Connecting the Refrigerant Pipe; There are two refrigerant pipes of differing diameters:; Connect the indoor and outdoor units using pipes with flared
- Page 14 – Cutting/Flaring the Pipes; In case of needing brazing, you must work with Nitrogen gas blowing.
- Page 15 – Performing Leak Test & Insulation; Leak test; To avoid condensation problems, place; T13.0 or thicker Acrylonitrile; separately around each refrigerant pipe.
- Page 16 – Select the insulation of the refrigerant pipe.; Pipe; Install the gas side and liquid side pipes, leave 10mm of space.
- Page 17 – Drain pipe and Drain Hose Installation; Indoor; that condensate water is drained correctly outside.; Fix the flexible hose to the drainpipe.
- Page 18 – Drainpipe Connection; lift up from 100mm to 550mm and lift down 20mm or more.; Centralized Drainage; drain when installed indoor units are more than 3.; Drain pipe and Drain Hose Installation (Continued)
- Page 19 – Testing the Drainage; You should test drainage after completing the installation.; When maintaining the air conditioner, remove condensate water
- Page 20 – ELB : Essential Installation; Selecting compressed ring terminal; Before wiring work, you must turn off all power source.; Power and communication cable connection; Wiring Work
- Page 21 – Specification of electronic wire; The capacity of ELB, MCCB
- Page 23 – Method 1; How to connect your extended power cables
- Page 25 – Setting an indoor unit address and installation option; The procedure of option setting; Step 1. Entering mode to set option
- Page 27 – Step 5. Check operation
- Page 28 – Option; You cannot set SEG11 and SEG12 as F value at the same time.
- Page 29 – EEV Step of; 2 series installation option
- Page 31 – Do not install the
- Page 32 – 5 series installation option
- Page 35 – Changing a particular option
- Page 36 – Final Checks and User Tips; that the air conditioner operates correctly.
- Page 37 – Troubleshooting; Way cassette / 2 Way cassette; Detection of errors; LED Display on the receiver & display unit; LED Display; Abnormal condition; Green; On Flickering Off
- Page 38 – Error on indoor temperature sensor (Short or Open)
- Page 39 – Operation Defrost; EEPROM error
- Page 40 – This product is RoHS compliant
Air Conditioner
installation manual
imagine
the possibilities
Thank you for purchasing this Samsung product.
Cassette Type Series
1 Way cassette : AM
FN1DEH
AM
HN1DEH
AM
JN1DEH
2 Way cassette : AM
FN2DEH
4 Way cassette : AM
FN4DEH
AM
KN4FEH
DB68-03565A-09
EN
DVM S CASSETTE_IM_03565A-09_EN.indd 1
2017-06-07 오전 8:58:44
"Loading the manual" means you need to wait until the file loads and becomes available for online reading. Some manuals are very large, and the time they take to appear depends on your internet speed.
Was this manual helpful?
About this manual
- Brand
- Samsung
- Model
- AM022HN1DEH/EU
- Document type
- Installation Manual
- Category
- Air Conditioner
- Language(s)
- English
- Pages
- 40
- Format
Summary
2 Contents Safety Precautions ......................................................................................... 2 Accessories ........................................................................................................ 4 Selecting the Installation Location ....................
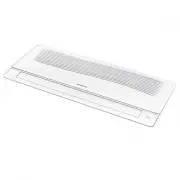
4 Accessories Selecting the Installation Location The following accessories are supplied with the indoor unit. The type and quantity may differ depending on the specifications. Indoor Unit There must be no obstacles near the air inlet and outlet. Install the indoor unit on a ceiling that can sup...
5 Selecting the Installation Location (Continued) Space Requirements for Indoor Unit AM FN1DEH /AM HN1DEH /AM JN1DEH / AM FN2DEH AM FN4DEH /AM KN4FEH The units must be installed according to distances declared, in order to permit accessibility from each side, ei...
Ask a question
Related manuals
Popular Samsung Air Conditioners
 Samsung AM060BXMDER/EU Installation Manual
 Samsung AR12MSPXBWKNEU Installation Manual
 Samsung AM022TNVDKH/EU Installation Manual
 Samsung AM160AXVGGH/EU Installation Manual
 Samsung AC071RN4DKG/EU Installation Manual
- Samsung AM080BXMWGH/EU Installation Manual
 Samsung AC035RN1DKG/EU Installation Manual
 Samsung AC100BXAPKG/EU Installation Manual
More Samsung Air Conditioners models
 Samsung AM015JNADKH/EU User Manual
 Samsung AM015TNVDKH/EU Installation Manual
 Samsung AM017ANLDKH/EU User Manual
 Samsung AM017HN1DEH/EU Installation Manual
 Samsung AM017KNLDEH/EU User Manual
 Samsung AM017NN1PEH Installation Manual
 Samsung AM022KNLDEH/EU Installation Manual
 Samsung AM022KNMDEH/EU User Manual
 Samsung AM022KNQDEH/EU User Manual
 Samsung AM022NN1DEH Installation Manual
 Samsung AM022NN1DKH/EU User Manual
 Samsung AM028AN4PKH/EU User Manual