Page 2 - Contents
2 Contents Safety precautions . . . . . . . . . . . . . . . . . . . . . . . . . . . . . . . . . . . . . . . . . . . . . . . . . . . . . . . . . . . . . . . . . . . . . . . . . . . . . . . . . . . . . . . . . . . . . . . . . . . . . . . . . .3Product specifications . . . . . . . . . . . . . . . . . ....
Page 3 - ENGLISH; Safety precautions; WARNING; Warning
3 ENGLISH Safety precautions Carefully follow the precautions listed as below because they are essential to guarantee the safety of SAMSUNG product. WARNING t Always disconnect a power supply of Air-Water Heat Pump before servicing it or accessing components inside the unit. t Verify that installati...
Page 5 - Product specifications; Accessories
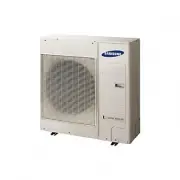
5 ENGLISH Product specifications Product line-up Line-up Remark Heat pump units Chassis - Model name AE090JXYDEH AE090JXYDGH AE120JXYDEH AE120JXYDGH AE140JXYDEH AE140JXYDGH AE160JXYDEH AE160JXYDGH Auxiliary parts Control kit MIM-E03AN Requisite Accessories f Keep supplied accessories until the insta...
Page 6 - Outdoor unit specification
6 Outdoor unit specification Type Unit AE090JXYDEH AE090JXYDGH AE120JXYDEH AE120JXYDGH AE140JXYDEH AE140JXYDGH AE160JXYDEH AE160JXYDGH Power source - 1Φ, 220~240VAC 50Hz 3Φ, 380~415VAC 50Hz 1Φ, 220~240VAC 50Hz 3Φ, 380~415VAC 50Hz 1Φ, 220~240VAC 50Hz 3Φ, 380~415VAC 50Hz 1Φ, 220~240VAC 50Hz 3Φ, 380~41...
Page 7 - Application examples; Mono outdoor + Control kit
7 ENGLISH Application examples t The application examples given below are for illustration purposes only. t When the SAMSUNG Air-to-Water Heat Pump system is used in series with another heat source (e.g. gas boiler), ensure that the return water temperature not exceed 55°C. t The unit is only to be ...
Page 8 - Main components
8 Main components Dimensions(Overall) Heat pump for R-410A. 1-Fan chassis f AE090JXYD ✴ 620 330 360 384 940 973 998 (Unit : mm) 2-Fan chassis f AE120JXYD ✴ /AE140JXYD ✴ /AE160JXYD ✴ 620 330 360 384 940 1395 1420 (Unit : mm)
Page 12 - Functional diagram
12 Functional diagram AE090JXYD ✴ /AE120JXYD ✴ /AE140JXYD ✴ /AE160JXYD ✴ PHE T/S #3 Charging port Charging port 4WAY v/v T/S #4 Comp Filter HP s/w Filter Exp. v/v Accum T/S #5 T/S #6 T/S #2(TW2) T/S #1(TW1) Part Description PHE Plate heat exchanger T/S #1 For water inlet temp sensor T/S #2 For water...
Page 13 - Installing the unit; Moving the outdoor unit; Moving the outdoor unit by wire rope; Moving the outdoor unit with a fork lift
13 ENGLISH Installing the unit Moving the outdoor unit f Select the moving route in advance. f Be sure that moving route is safe from weight of the outdoor unit. f Do not slant the product more than 30˚when carrying it. (do not lay the product down sideways) f The surface of the heat exchanger is sh...
Page 14 - Deciding on where to install the outdoor unit
14 Installing the unit Deciding on where to install the outdoor unit Decide the installation location regarding the following condition and obtain the user’s approval. f The outdoor unit must not be placed on its side or upside down, as the compressor lubrication oil will run into the cooling circui...
Page 16 - Space requirements for outdoor unit; When installing 1 outdoor unit
16 Installing the unit Space requirements for outdoor unit When installing 1 outdoor unit (Unit : mm) 300 or mor e 1,500 or mor e ❋ When the air outlet is opposite the wall ❋ When the air outlet is towards the wall 300 or mor e 300 or more 600 or more 1,500 or mor e 2,000 or more ❋ When 3 sides of t...
Page 17 - When installing more than 1 outdoor unit
17 ENGLISH When installing more than 1 outdoor unit (Unit : mm) 1500 or mor e ❋ When the air outlet is towards the wall 300 or mor e 300 or more 600 or more 600 or more 600 or more ❋ When 3 sides of the outdoor unit are blocked by the wall 300 or mor e 1500 or mor e 600 or more 600 or more 500 or mo...
Page 18 - Outdoor unit installation; Outdoor unit support; OUTDOOR UNIT INSTALLED ON THE WALL BY RACK; When installing air guide duct
18 Installing the unit Outdoor unit installation The outdoor unit must be installed on a rigid and stable base to avoid any increase in the noise level and vibration, particularly if the outdoor unit is to be installed in a location exposed to strong winds or at a height, the unit must be fixed to a...
Page 19 - Drain work; General area; Drain hole Φ20 x 4 ea
19 ENGLISH Drain work t General area While Air-Water Heat Pump is running in heating mode, Ice can begin accumulate on the surface of condenser. To prevent Ice from growing, system go into De-frost mode and then Ice on the surface changes to water.Dropped water from condenser shall be eliminated thr...
Page 21 - Selecting a location in cold climates
21 ENGLISH Selecting a location in cold climates t When operating the unit in a low outdoor ambient temperature, be sure to follow the instructions described below. NOTE f To prevent exposure to wind, install the unit with its suction side facing the wall. f Never install the unit at a site where th...
Page 22 - Piping work; Flushing and air-purging
22 Piping work Water connections must be made in accordance with the outlook diagram delivered with the unit, respecting the water in- and outlet. If air, moisture or dust gets in the water circuit, problems may occur. Therefore, always take into account the following when connecting the water circu...
Page 24 - Freeze protection; Setting capacity and pre-pressure of the expansion vessel
24 Piping work Freeze protection Freeze protection solutions must use propylene glycol with a toxicity rating of Class 1 as listed in Clinical Toxicology of Commercial Products, 5th Edition. t Ethylene glycol is toxic and must not be used in the primary water circuit in case of any cross-contaminati...
Page 25 - Unit resistance and PHE resistance by glycol concentrate
25 ENGLISH Calculating the pre-pressure of the expansion vessel f The pre-pressure(Pg) to be set depends on the maximum installation height difference(H) and is calculated as below : Pg=(H/10+0.3) bar Unit resistance and PHE resistance by glycol concentrate The unit is composed of water pipes and PH...
Page 26 - Charging water
26 Piping work Flow switch Flow switch is not integrated part in MONO Unit. But the installation is essential to operate MONO Unit.Flow switch is provided by Samsung control kit as a sub component. t Flow switch shall be installed described by installation manual of Mono unit or Control kit. t All e...
Page 27 - Pressure relief valve; Piping insulation
27 ENGLISH Pressure relief valve MONO Unit does not have a pressure relief valve. The valve shall prevents abnomal water pressure from damaging the the system by opening at 3.0 bar. t Make certain that the discharged water out of drain pan does not affect other elements. CAUTION Filter / Strainer In...
Page 28 - Wiring; Example of EHS system
28 Wiring Two electronic cables must be connected to the outdoor unit. f The connection cord between indoor unit and outdoor unit. f The power cable between outdoor unit and auxiliary circuit breaker. f Specially for Russian and European market, before installation, the supply authority should be co...
Page 29 - Power Cable Specifications; phase; Phase
29 ENGLISH Power Cable Specifications 1 phase Outdoor unit Rated Voltage Range MCA MFA Hz Volts Min Max Min. Circuit Amps. Max. Fuse Amps. AE090JXYDEH 50 220-240 198 264 22 A 27.5 A AE120JXYDEH 50 220-240 198 264 28 A 35 A AE140JXYDEH 50 220-240 198 264 30 A 37.5 A AE160JXYDEH 50 220-240 198 264 32 ...
Page 30 - Communication : M4 screw; Communication : M4 screw
30 Wiring Between indoor unit and outdoor unit connection cable specifications(Common in use) Communication cable Home server 0.75mm², 2wires 0.75mm², 2wires f For the power Cable, use the grade H07RN-F or H05RN-F materials. When installing the control kit in a computer room or network room, use the...
Page 31 - Wiring diagram of power cable; When using ELB for 1 phase and 3 phase; MCCB
31 ENGLISH Wiring diagram of power cable When using ELB for 1 phase and 3 phase ELB MCCB MCCB N L N L3(T) L2(S) L1(R) 2(N) 1(L) 2(N) 1(L) Power Supply Electrical component box Control kit f 1 phase f 3 phase Communication cable Main power cable f The appearance of the unit may be different from the ...
Page 32 - Wiring diagram of connection cord; Connecting the power terminal
32 Wiring Wiring diagram of connection cord 1 phase 3 phase N L 1(L) 2(N) Control kit Main power cable Communication cable Cable tie NOT USE L F2F1 N N L3(T) L2(S) L1(R) F2 F1 1(L) 2(N) NOT USE Control kit Communication cable Cable tie L F2F1 N Main power cable t Lay the electrical wiring so that th...
Page 34 - How to connect your extended power cables; Method 1
34 Wiring How to connect your extended power cables 1. Prepare the following tools. Tools Crimping pliers Connection sleeve (mm) Insulation tape Contraction tube (mm) Spec MH-14 20xØ6.5(HxOD) Width 19mm 70xØ8.0(LxOD) Shape 2. As shown in the figure, peel off the shields from the rubber and wire of t...
Page 36 - Testing operations
36 Testing operations 1. Check the power supply between the outdoor unit and the auxiliary circuit breaker. - 1 phase power supply : L, N - 3 phases power supply : R,S,T,N 2. Check the CONTROL KIT 1) Check that you have connected the power and communication cables correctly. (If the power cable and ...
Page 38 - Error codes
38 Error codes If the unit has some problems and does not work normally, error code is shown on the OUTDOOR UNIT main PBA or LCD of the wired remote controller. Display Explanation Error Source 101 CONTROL KIT / OUTDOOR UNIT wire connection error CONTROL KIT, OUTDOOR UNIT 162 EEPROM Error CONTROL KI...
Page 40 - Maintenance
40 Maintenance Listed checks and inspections shall be implemented regularly so that the unit can operate as design intention in production site. Always switch off the unit and remove power cable from the electric source before carrying out any maintenance or repair works. Mentioned actions shall be ...
Page 41 - Adding refrigerant; Adding refrigerants in running condition
41 ENGLISH Adding refrigerant The Heat Pump unit is provided to users with basic amounts of refrigerants as initial setting values. While using the unit or doing refrigerant piping works, there can be some loss of refrigerants compared to initial amounts. To run the units properly, keep the amount o...
Page 42 - Tundish
42 Maintenance It is recommended that annually a competent persona Inspects and cleans the line strainer.b Checks the operation of the expansion relief valve and temperature & pressure relief valve.c Recommissions the cylinder in accordance with the instructions. Tundish Install the Tundish in a...
Page 43 - Charging refrigerant
43 ENGLISH Charging refrigerant f The R-410A refrigerant is blended refrigerant. Add only liquid refrigerant. f Measure the quantity of the refrigerant according to the length of the liquid side pipe. Add quantity of the refrigerant using a scale. Important information: regulation regarding the refr...
Page 44 - Troubleshooting
44 Troubleshooting FAULT POSSIBLE CAUSE REMEDY No water flow from hot taps. 1. Mains supply off. 2. Strainer blocked. 3. Cold water inlet Pressure Reducing Valve incorrectly fitted. 1. Check and open stopcock. 2. Turn off water supply. Remove strainer and clean. (See Pressure Reducing Valve page 6 I...
Page 46 - If problem still persists contact a
46 Hot water from taps is cold Excessive Hot water from taps Immersion Heater Are immersion heaters switched on Switched on immersion heaters Is the programmer set to central heating or not switched on Cylinder Thermostat set to high Is Thermostat wired as per layouts for “S” or “Y” plan installatio...
Page 47 - Commissioning; Filling up; Recommissioning instructions; Hot water discharge from tundish
47 ENGLISH Commissioning Filling up 1. Open a hot tap.2. Open the cold water supply valve.3. When water flows from hot tap, close the tap.4. Allow the system to stabilize for 5 minutes.5. Open each hot water tap in turn to expel air from the system pipe work.6. Check for leaks.7. Manually operate Te...
Page 48 - ECODESIGN REQUIREMENTS FOR SPACE HEATER
48 COMMISSION REGULATION (EU) No 813/2013 I) ECODESIGN REQUIREMENTS FOR SPACE HEATER II) A Model(s) : AE090JXYDEH B Air-to-water heat pump : yes C Water-to-water heat pump : no D Brine-to-water heat pump : no E Low-temperature heat pump : no F Equipped with a supplementary heater : no G Heat pump co...
Page 68 - PRODUCT FICHE (ENERGY LABELLING OF SPACE HEATERS)
68 COMMISSION DELEGATED REGULATION (EU) No 811/2013 i) PRODUCT FICHE (ENERGY LABELLING OF SPACE HEATERS) ii) a Supplier's name or trademark Samsung Electronics Co., Ltd. Samsung Electronics Co., Ltd. Samsung Electronics Co., Ltd. Samsung Electronics Co., Ltd. b Supplier's model identifier AE090JXYDE...
Page 69 - PRODUCT FICHE (ENERGY LABELLING OF PACKAGES OF SPACE HEATER); PRODUCT FICHE (ENERGY LABELLING OF TEMPERATURE CONTROLS)
69 ENGLISH PRODUCT FICHE (ENERGY LABELLING OF PACKAGES OF SPACE HEATER) iii) a Supplier's name or trademark Samsung Electronics Co., Ltd. Samsung Electronics Co., Ltd. Samsung Electronics Co., Ltd. Samsung Electronics Co., Ltd. b Supplier's model identifier AE090JXYDEH AE090JXYDGH AE120JXYDEH AE120J...
Page 76 - Samsung Electronics
SAMSUNG ELECTRONICS CO., LTD. 10 7 , Hanamsandan 6beon-ro, Gwangsan-gu, Gwangju-si, Korea 6221 8 Samsung Electronics Service DepartmentPO Box 129 87 , Blackrock, Co. Dublin. Ireland orBlackbushe Business Park, Yateley, GU46 6GG. UK