Ryobi RY34005- User Manual

Ryobi RY34005– User Manual, read for free online in PDF format. We hope this helps you resolve any issues you may have. If you have further questions, please contact us through the contact form.
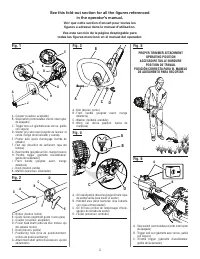
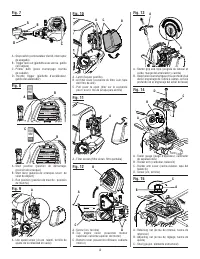
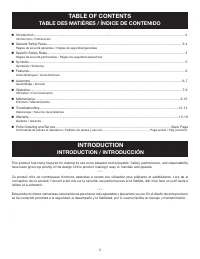


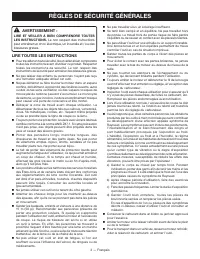

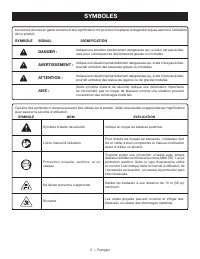
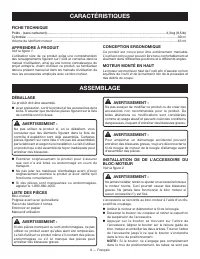
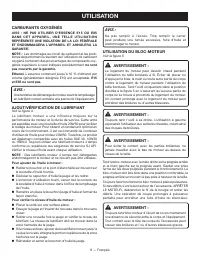
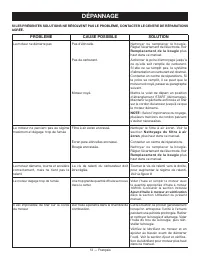
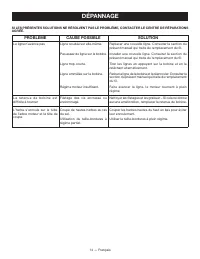
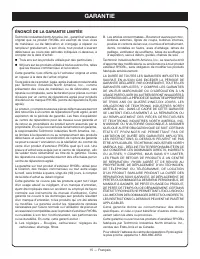
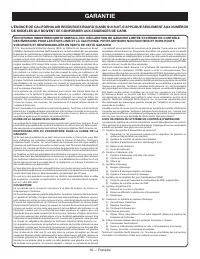


Table of Contents:
- Page 2 – See this fold-out section for all the figures referenced; Voir que cette section d’encart pour toutes les
- Page 4 – TABLE OF CONTENTS; TABLE DES MATIÈRES / ÍNDICE DE CONTENIDO; INTRODUCTION; INTRODUCTION / INTRODUCCIÓN
- Page 5 – GENERAL SAFETY RULES; READ AND UNDERSTAND ALL INSTRUCTIONS.; READ ALL INSTRUCTIONS
- Page 6 – SPECIFIC SAFETY RULES; SPECIFIC SAFETY RULES FOR TRIMMER USE; NOTE: ADDITIONAL SPECIFIC SAFETY RULES CAN BE FOUND
- Page 7 – SYMBOLS
- Page 9 – ATTACHING THE FRONT HANDLE; ASSEMBLY; REMOVING AN ATTACHMENT FROM THE; For removing or changing the attachment:; OPERATION; FUELING AND REFUELING THE POWER HEAD
- Page 10 – OXYGENATED FUELS; DO NOT USE E15 OR E85 FUEL IN THIS UNIT. IT; ADDING/CHECKING ENGINE LUBRICANT; NOTE; OPERATING THE POWER HEAD
- Page 11 – BLADE THRUST; MAINTENANCE; GENERAL MAINTENANCE
- Page 12 – SPARK PLUG REPLACEMENT; To change the engine lubricant:
- Page 13 – CLEARANCE; When storing 1 month or longer:; HIGH ALTITUDE ENGINE OPERATION
- Page 14 – CALL US FIRST; For any questions about operating or maintaining your product,; MAINTENANCE SCHEDULE
- Page 15 – TROUBLESHOOTING; PROBLEM
- Page 17 – WARRANTY; LIMITED WARRANTY STATEMENT
- Page 19 – LIRE ET VEILLER À BIEN COMPRENDRE TOUTES; LIRE TOUTES LES INSTRUCTIONS; RÈGLES DE SÉCURITÉ GÉNÉRALES
- Page 20 – RÈGLES DE SÉCURITÉ PARTICULIÈRES
- Page 21 – SYMBOLES; SYMBOLE
- Page 23 – INSTALLATION DE LA POIGNÉE AVANT; ASSEMBLAGE; UTILISATION; APPROVISIONNEMENT EN CARBURANT
- Page 24 – UTILISATION DU BLOC-MOTEUR; CARBURANTS OXYGÉNÉS; NE PAS UTILISER D’ESSENCE E15 OU E85; AJOUT/VÉRIFICATION DE LUBRIFIANT
- Page 25 – RICOCHET DE LAME; ENTRETIEN; ENTRETIEN GÉNÉRAL
- Page 26 – NETTOYAGE DU FILTRE À AIR ÉCRAN; REMPLACEMENT DE LA BOUGIE
- Page 27 – CHANGER LE LUBRIFIANT À MOTEUR; Pour changer le lubrifiant à moteur :
- Page 28 – NOUS APPELER D’ABORD; BESOIN D’AID; REMISAGE LE PRODUIT; Remisage 1 mois ou plus :; PROGRAMME D’ENTRETIEN
- Page 29 – DÉPANNAGE; PROBLÈME; Remplacement de la bougie; Net toyage d u f i l t r e à a i r
- Page 31 – GARANTIE; ÉNONCÉ DE LA GARANTIE LIMITÉE
- Page 33 – REGLAS DE SEGURIDAD GENERALES; LEA TODAS LAS INSTRUCCIONES
- Page 34 – REGLAS DE SEGURIDAD ESPECÍFICAS; R E G L A S D E S E G U R I D A D E S P E C Í F I C A S
- Page 35 – SÍMBOLOS; SYMBOLO
- Page 37 – MONTAJE DEL MANGO DELANTERO; ARMADO; D E S M O N TA J E U N A D I TA M E N T O D E L; Para desmontar o cambiar el aditamento:; FUNCIONAMIENTO
- Page 38 – A B A S T E C I M I E N T O Y V E R I F I C A C I Ó N D E
- Page 39 – CONTRAGOLPE DE LA CUCHILLA; MANTENIMIENTO
- Page 40 – LIMPIEZA DEL FILTRO DE AIRE PANTALLA
- Page 41 – CAMBIO DEL LUBRICANTE PARA MOTOR; Para cambiar el lubricante para motor:; AJUSTE DE LA APERTURA DEL ÁRBOL DE
- Page 42 – LLÁMENOS PRIMERO; ¿NECESITA A; ALMACENAMIENTO DE LA PRODUCTO; PROGRAMA DE MANTENIMIENTO
- Page 43 – SOLUCIÓN DE PROBLEMAS; PROBLEMA
- Page 45 – GARANTÍA; DECLARACIÓN DE LA GARANTÍA LIMITADA
- Page 50 – OPERATOR’S MANUAL; MANUEL D’UTILISATION / MANUAL DEL OPERADOR; POWER HEAD; CABEZAL MOTOR 30; CALIFORNIA PROPOSITION 65; TECHTRONIC INDUSTRIES NORTH AMERICA, INC.
Ce bloc-moteur a été conçu et fabriqué conformément à nos
strictes normes de fiabilité, simplicité d’emploi et sécurité
d’utilisation. Correctement entretenu, cet outil vous donnera des
années de fonctionnement robuste et sans problème.
AVERTISSEMENT :
Pour réduire les risques de
blessures, l’utilisateur doit lire et veiller à bien comprendre le
manuel d’utilisation avant d’employer ce produit.
Su cabezal motor ha sido diseñado y fabricado de conformidad con
nuestras estrictas normas para brindar fiabilidad, facilidad de uso
y seguridad para el operador. Con el debido cuidado, le brindará
muchos años de sólido funcionamiento y sin problemas.
ADVERTENCIA:
Para reducir el riesgo de lesiones,
el usuario debe leer y comprender el manual del operador antes
de usar este producto.
Your power head has been engineered and manufactured to our high standard for dependability, ease of operation, and
operator safety. When properly cared for, it will give you years of rugged, trouble-free performance.
WARNING:
To reduce the risk of injury, the user must read and understand the operator’s manual before using
this product.
OPERATOR’S MANUAL
MANUEL D’UTILISATION
MANUAL DEL OPERADOR
CONSERVER CE MANUEL POUR
FUTURE RÉFÉRENCE
GUARDE ESTE MANUAL PARA
FUTURAS CONSULTAS
SAVE THIS MANUAL FOR FUTURE REFERENCE
30cc 4-CYCLE POWER HEAD
BLOC-MOTEUR 4-TEMPS DE 30 cc
CABEZAL MOTOR DE CUATRO TIEMPOS 30 cc
RY34005
ALL VERSIONS
TOUTES LES VERSIONS
TODAS LAS VERSIONES
NOTICE:
Do not use E15 or E85 fuel (or fuel containing greater
than 10% ethanol) in this product. It is a violation of federal law
and will damage the unit and void your warranty.
AVIS :
Ne pas utiliser d’essence E15 ou E85 (ou un carburant contenant
plus de 10 % d’éthanol) dans ce produit. Une telle utilisation représente
une violation de la loi fédérale et endommagera l’appareil et annulera
la garantie.
AVISO:
No utilice combustibles E15 o E85 (ni combustibles
q u e c o n t e n g a n m á s d e 1 0 % d e e t a n o l ) c o n e s t e
p r o d u c t o . E s t o c o n s t i t u y e u n a v i o l a c i ó n a l a l e y f e d e r a l ,
dañará la unidad y anulará la garantía.
"Loading the manual" means you need to wait until the file loads and becomes available for online reading. Some manuals are very large, and the time they take to appear depends on your internet speed.
Summary
ii Fig. 1 A - Coupler (coupleur, acoplador) B - Stop switch (commutateur d’arrêt, interruptor de apagado) C - Trigger lock out (gâchette avec verrou, gatillo con seguro) D - Starter grip and rope (poignée du lanceur et corde, mango del arrancador y cuerda) E - Primer bulb (poire d’amorçage, bomba de...
2 Introduction ...................................................................................................................................................................... 2 Introduction / Introducción General Safety Rules ..................................................................
3 — English GENERAL SAFETY RULES WARNING: READ AND UNDERSTAND ALL INSTRUCTIONS. Fail- ure to follow all instructions may result in electric shock, fire and/or serious personal injury. READ ALL INSTRUCTIONS For safe operation, read and understand all instructions before using this product. Follow a...