Page 2 - CO N T E N T S
CO N T E N T S 1. PA RT S O F T H E CA M CO R D E R . . . . . . . . . . . . . . . . . . . . . . . . . . . . . . . . . . . . . . . . . . . . . . . . . . . . . . . . . . . . . . . . 4 2. P R E PA R I N G F O R U S I N G . . . . . . . . . . . . . . . . . . . . . . . . . . . . . . . . . . . . . . . . . ...
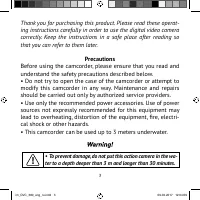
Page 3 - Precautions; To prevent damage, do not put this action camera in the wa-
3 Thank you for purchasing this product. Please read these operat- ing instructions carefully in order to use the digital video camera correctly. Keep the instructions in a safe place after reading so that you can refer to them later. Precautions Before using the camcorder, please ensure that you re...
Page 4 - PA RT S O F T H E CA M CO R D E R; LCD screen
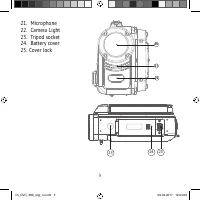
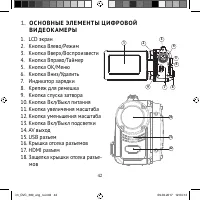
4 1. PA RT S O F T H E CA M CO R D E R 1 2 3 4 6 7 8 9 5 10 11 12 13 14 1516 17 18 19 1. LCD screen 2. Left/Mode button 3. Up/Playback button 4. Right/Self-timer button 5. OK/MENU button 6. Down/Delete button 7. Charging LED 8. Wrist strap 9. Shutter button 10. Power button 11. T/Zoom in button 12. ...
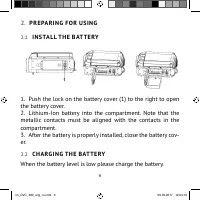
Page 6 - Push the lock on the battery cover (1) to the right to open; C H A RG I N G T H E B AT T E RY; When the battery level is low please charge the battery.
6 2. P R E PA R I N G F O R U S I N G 2.1 I N S TA L L T H E B AT T E RY 1. Push the lock on the battery cover (1) to the right to open the battery cover. 2. Lithium-Ion battery into the compartment. Note that the metallic contacts must be aligned with the contacts in the compartment. 3. After the b...
Page 7 - Caution; It is normal that when it is charging the camera body is; I N S E RT I N G T H E M E M O RY CA R D
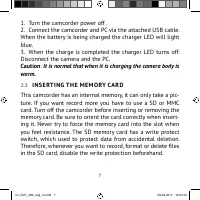
7 1. Turn the camcorder power off . 2. Connect the camcorder and PC via the attached USB cable. When the battery is being charged the charger LED will light blue. 3. When the charge is completed the charger LED turns off. Disconnect the camera and the PC. Caution : It is normal that when it is charg...
Page 8 - • To release the memory card press the edge of the card gently.
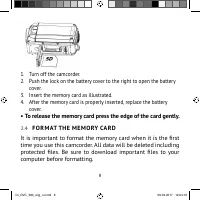
8 1. Turn off the camcorder. 2. Push the lock on the battery cover to the right to open the battery cover. 3. Insert the memory card as illustrated. 4. After the memory card is properly inserted, replace the battery cover. • To release the memory card press the edge of the card gently. 2.4 F O R M A...
Page 9 - S E T T I N G T H E L A N G U AG E
9 1. Turn the power on, press the OK/MENU button to display the menu, and then press the RIGHT button to select [Setup ]. 2. Press the UP or DOWN button to select [Format] and then press the OK button to launch the submenu. 3. Press the UP or DOWN button to select the item [OK] and then press the OK...
Page 10 - S E T T I N G T H E DAT E A N D T I M E
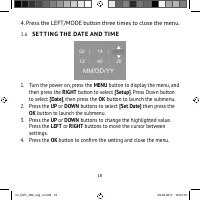
10 4. Press the LEFT/MODE button three times to close the menu. 2.6 S E T T I N G T H E DAT E A N D T I M E 02 14 / / 12 40 20 MM/DD/YY : : 2012 1. Turn the power on, press the MENU button to display the menu, and then press the RIGHT button to select [Setup] . Press Down button to select [Date] , t...
Page 11 - M O N I TO R S C R E E N D I S P L AY; maining On SD Card
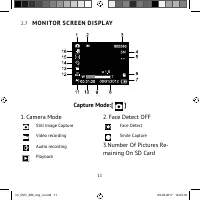
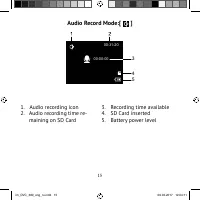
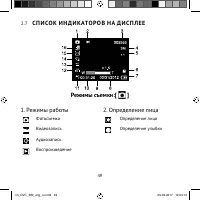
11 2.7 M O N I TO R S C R E E N D I S P L AY Capture Mode:[ ] 1. Camera Mode Still Image Capture Video recording Audio recording Playback 2. Face Detect OFF Face Detect Smile Capture 3.Number Of Pictures Re- maining On SD Card im_DVC_380_eng_ru.indd 11 im_DVC_380_eng_ru.indd 11 09.02.2017 12:04:10 0...
Page 12 - VGA; Battery Power Level
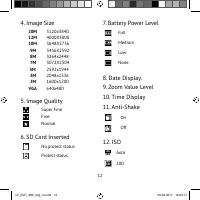
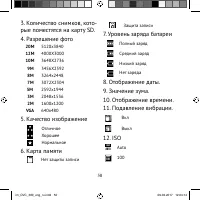
12 4. Image Size 20M 5120x3840 12M 4000X3000 10M 3648X2736 9M 3456X2592 8M 3264x2448 7M 3072X2304 5M 2592x1944 3M 2048x1536 2M 1600x1200 VGA 640x480 5. Image Quality Super FineFineNormal 6. SD Card Inserted No protect status Protect status 7. Battery Power Level Full Medium Low None 8. Date Display....
Page 13 - Capture Mode Single
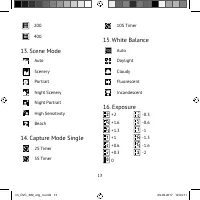
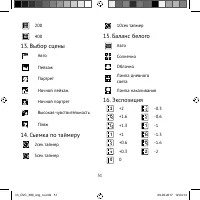
13 ISO 200 200 ISO 400 400 13. Scene Mode Auto Scenery Portrait Night Scenery Night Portrait High Sensitivity Beach 14. Capture Mode Single 2 2S Timer 5 5S Timer 10 10S Timer 15. White Balance Auto Daylight Cloudy Fluorescent Incandescent 16. Exposure 2 +2 3 1 -0.3 1 3 2 +1.6 3 2 -0.6 1 3 1 +1.3 1 -...
Page 18 - Please Note; R E CO R D I N G A V I D E O C L I P
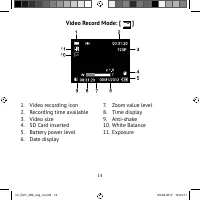
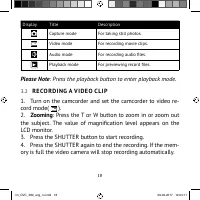
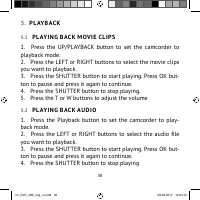
18 Display Title Description Capture mode For taking still photos. Video mode For recording movie clips. Audio mode For recording audio fi les. Playback mode For previewing record fi les. Please Note : Press the playback button to enter playback mode . 3.2 R E CO R D I N G A V I D E O C L I P 1. Tur...
Page 19 - Important note; Class 6 or above; TA K I N G S T I L L I M AG E S
19 Important note • Please use a 4GB or above SD/MMC card ( Class 6 or above ) to take 1080P video. If you use a low-speed SD/MMC card (Less than class 6) to record 1080P video, the LCD screen will appear “Slow card” when you press SHUTTER button, it will change to 720P automatically, press the Shut...
Page 21 - Capture menu list
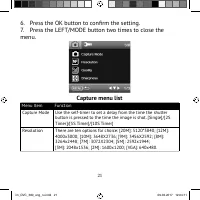
21 6. Press the OK button to con fi rm the setting. 7. Press the LEFT/MODE button two times to close the menu. Capture menu list Function Menu Item Use the self-timer to set a delay from the time the shutter button is pressed to the time the image is shot. [Single]/[2S Timer]/[5S Timer]/[10S Timer] ...
Page 24 - M E N U I N V I D E O M O D E; Press the UP or DOWN buttons to select an item.
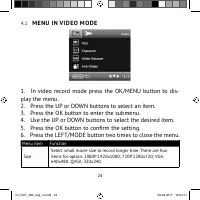
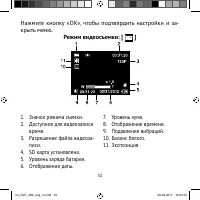
24 4.1 M E N U I N V I D E O M O D E 1. In video record mode press the OK/MENU button to dis- play the menu. 2. Press the UP or DOWN buttons to select an item. 3. Press the OK button to enter the submenu. 4. Use the UP or DOWN buttons to select the desired item. 5. Press the OK button to con fi rm t...
Page 25 - S E T U P M E N U; You can set the system items in setup menu.
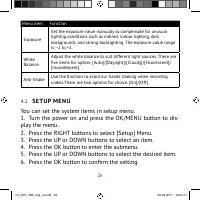
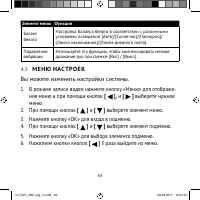
25 Menu item Function Exposure Set the exposure value manually to compensate for unusual lighting conditions such as indirect indoor lighting, dark backgrounds, and strong backlighting. The exposure value range is –2 to +2. White Balance Adjust the white balance to suit different light sources. Ther...
Page 26 - Press the LEFT/MODE button three times to close the
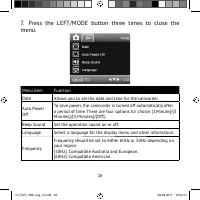
26 7. Press the LEFT/MODE button three times to close the menu. Menu item Function Date Allows you to set the date and time for the camcorder. Auto Power Off To save power, the camcorder is turned off automatically after a period of time. There are four options for choice: [1Minute]/[3 Minutes]/[5 M...
Page 28 - M E N U I N P L AY B AC K M O D E
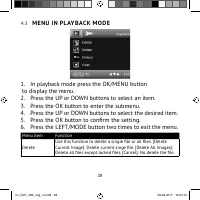
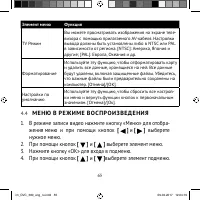
28 4.3 M E N U I N P L AY B AC K M O D E 1. In playback mode press the OK/MENU button to display the menu. 2. Press the UP or DOWN buttons to select an item. 3. Press the OK button to enter the submenu. 4. Press the UP or DOWN buttons to select the desired item. 5. Press the OK button to con fi rm t...
Page 33 - CO N N E CT I N G T H E CA M CO R D E R TO A H DTV
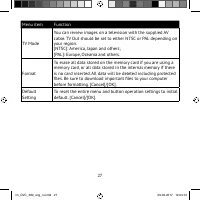
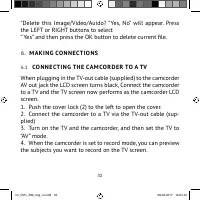
33 5. When the camcorder is set to Playback mode, you can re- view all the pictures, video and audio clips stored in the cam- era on the TV. 6.2 CO N N E CT I N G T H E CA M CO R D E R TO A H DTV HD-TV hereby means the HDTV built-in component input ports, thus can perform HD (720P) high resolution q...
Page 34 - CO N N E CT I N G T H E CA M CO R D E R TO A P C
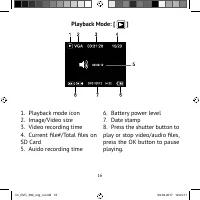
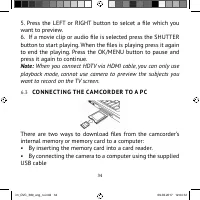
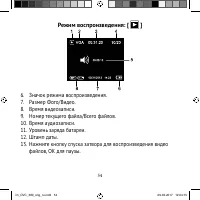
34 5. Press the LEFT or RIGHT button to selcet a fi le which you want to preview. 6. If a movie clip or audio fi le is selected press the SHUTTER button to start playing. When the fi les is playing press it again to end the playing. Press the OK/MENU button to pause and press it again to continue. N...
Page 35 - If you want to enter PC CAM mode, at
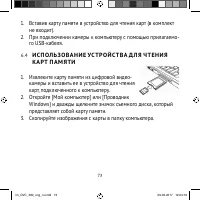
35 6.4 U S I N G A CA R D R E A D E R 1. Eject the memory card from the camcorder and insert it into a card reader that is connected to a computer. 2. Open [My Computer] or [Windows Explorer] and dou- ble-click the removable disk icon that represents the memory card. 3. Copy images from the card int...
Page 36 - appears in the drive list. Double-click the “Removable Disk” icon
36 video camera to the computer with the supplied USB cable. An icon “PC CAM” will appear on the screen. If not, please continue to press the shutter button and press the power button as well. An icon”PC CAM” will appear on the screen. The digital video camera will work as the webcam. 5. Open [My Co...
Page 37 - T E C H N I CA L S P E C I F I CAT I O N S
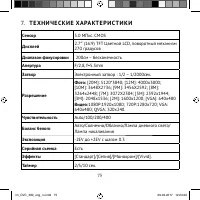
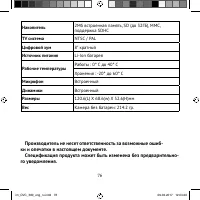
37 7. T E C H N I CA L S P E C I F I CAT I O N S Sensor 5.0 MegaPixels CMOS Display 2.7" (16:9) TFT Color LCD Focus range Standard: 200cm ~ in fi nity Aperture F/2.8, f=5.3mm Shutter Electronic Shutter: 1/2 ~ 1/2000sec. Resolution Still Image: [20M]: 5120x3840; [12M]: 4000x3000; [10M]: 3648X2736...
Page 40 - СОД Е РЖА Н И Е
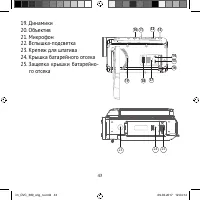
СОД Е РЖА Н И Е 1. О С Н О В Н Ы Е ЭЛ Е М Е Н Т Ы Ц И Ф Р О В О Й В И Д Е О КА М Е Р Ы . . . . . . . . . . . . . . . . . . . . . . . . . . . . . . . . . . . . 42 2. РУ КО В ОДС Т В О П О Н АС Т Р О Й К Е . . . . . . . . . . . . . . . . . . . . . . . . . . . . . . . . . . . . . . . . . . . . . . . . ...
Page 44 - Примечание
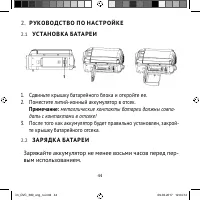
44 2. РУ КО В ОДС Т В О П О Н АС Т Р О Й К Е 2.1 УС ТА Н О В КА Б АТА Р Е И 1. Сдвиньте крышку батарейного блока и откройте ее . 2. Поместите литий - ионный аккумулятор в отсек . Примечание : металлические контакты батареи должны совпа - дать с контактами в отсеке ! 3. После того как аккумулятор буд...
Page 45 - USB; УС ТА Н О В КА; SD
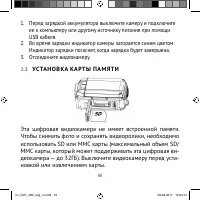
45 1. Перед зарядкой аккумулятора выключите камеру и подключите ее к компьютеру или другому источнику питания при помощи USB кабеля . 2. Во время зарядки индикатор камеры загорается синим цветом . Индикатор зарядки погаснет , когда зарядка будет завершена . 3. Отсоедините видеокамеру . 2.3 УС ТА Н О...
Page 47 - В Ы Б О Р; Язык; «OK»
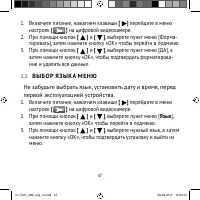
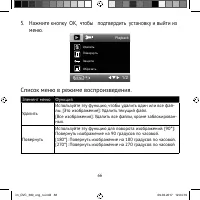
47 1. Включите питание , нажатием клавиши [ ] перейдите в меню настроек [ ] на цифровой видеокамере . 2. При помощи кнопок [ ] и [ ] , выберете пункт меню [ Форма - тировать ], затем нажмите кнопку «OK» чтобы перейти в подменю . 3. При помощи кнопок [ ] и [ ] , выберете пункт меню [ ДА ], а затем на...
Page 48 - ОК
48 2.6 УС ТА Н О В КА Д АТ Ы И В Р Е М Е Н И 02 14 / / 12 40 20 MM/DD/YY : : 2012 1. Включите питание . Нажмите кнопку [ ] , чтобы выбрать раздел « Настройки » [ ] . Нажмите кнопку [ ] , чтобы выбрать пункт « Дата », затем нажмите « ОК », чтобы перейти в подменю . 2. При помощи кнопок [ ] и [ ] , вы...
Page 56 - Важное; MMC; З А П И С Ь
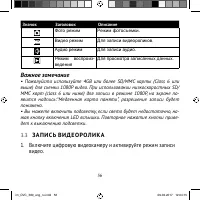
56 Значок Заголовок Описание Фото режим Режим фотосъемки . Видео режим Для записи видеороликов . Аудио режим Для записи аудио . Режим воспроиз - ведения Для просмотра записанных данных . Важное замечание • Пожалуйста используйте 4GB или более SD/MMC карты (Class 6 или выше ) для съемки 1080P видео ....
Page 57 - Ф ОТО СЪ Е М КА
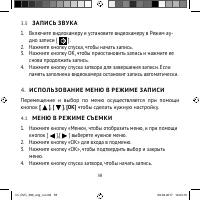
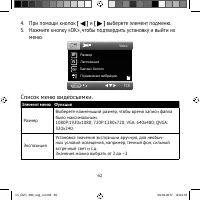
57 2. Изменение масштаба : При помощи кнопок « Вверх » или « Вниз », увеличьте или уменьшите масштаб объекта съемки . На ЖК - мони - торе отобразится значение уровня увеличения . 3. Нажмите кнопку спуска затвора , чтобы начать запись . 4. Что бы приостановить запись нажмите кнопку «OK»; что бы про -...
Page 59 - Список; Элемент
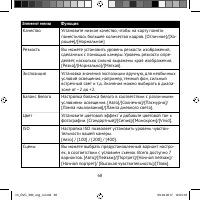
59 5. Нажмите кнопку спуска затвора еще раз , чтобы закончить запись . Если память заполнена , видеокамера остановит запись автомати - чески . 00:31:20 MENU 1/3 Still MP Q Список меню съемки Элемент меню Функция Режим съемки Используйте таймер , чтобы установить задержку между моментом нажатия на кн...
Page 61 - М Е Н Ю; Вы
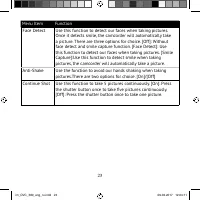
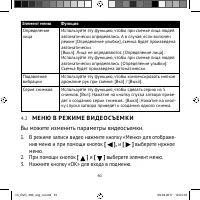
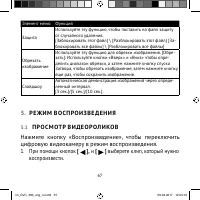
61 Элемент меню Функция Определение лица Используйте эту функцию , чтобы при съемке лица людей автоматически определялись . А в случае , если включен режим [ Определение улыбки ], съемка будет произведена автоматически . [ Выкл ]: Лица не определяются . [ Определение лица ]: Используйте эту функцию ...
Page 67 - Р Е Ж И М
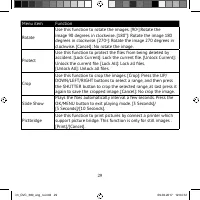
67 Элемент меню Функция Защита Используйте эту функцию , чтобы поставить на файл защиту от случайного удаления . [ Заблокировать этот файл ] \ [ Разблокировать этот файл ] [ За - блокировать все файлы ] \ [ Разблокировать все файлы ] Обрезать изображение Используйте эту функцию для обрезки изображен...
Page 69 - П Р О С М ОТ Р
69 2. На LCD- экране появится последний записанный файл . Если на карте памяти пока нет изображений , то появится сообщение [ НЕТ СНИМКОВ ]. 3. При помощи кнопок « Влево » и « Вправо » можно просматривать предыдущее или последующее изображение . 4. Изменение масштаба : Нажмите кнопки увеличения и ум...
Page 74 - WEB
74 6.5 П ОД К Л Ю Ч Е Н И Е Ц И Ф Р О В О Й В И Д Е О КА М Е Р Ы К КО М П Ь ЮТ Е РУ С П О М О Щ Ь Ю U S B КА Б Е Л Я ( В Х ОД И Т В КО М П Л Е КТ ) 1. Подключите цифровую видеокамеру к USB- порту компьютера при помощи USB- кабеля . Включите камеру . На экране появит - ся значок « Накопитель », если ...