Promounts SAM - User Manual
Promounts SAM TV Bracket – User Manual, read for free online in PDF format. We hope this helps you resolve any issues you may have. If you have further questions, please contact us through the contact form.


SPM
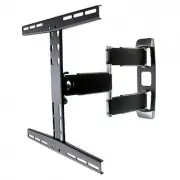
SAM
8.6” (218 mm)
8.6” (218 mm)
SPM & SAM
User’s Manual
/ Mounting Template
Up to 80 lbs / 36 kg
Included Mounting Hardware
1. Mount (SPM or SAM)
(x1)
2. M4 x 10, 15 & 25 mm bolts
(x4)
3. M5 x 10, 15 & 25 mm bolts
(x4)
4. M6 x 10, 15 & 25 mm bolts
(x4)
5. M8 x 10, 15 & 25 mm bolts
(x4)
6. Rectangular washers
(x4)
7. Concrete anchors
SPM (x4), SAM (x2)
8. Round washers
SPM (x4), SAM (x2)
9. 5/16” lag bolts
SPM (x4), SAM (x2)
10. Mounting template
(x1)
11. Allen key
(x2)
12. Wrench
(x1)
Included Mounting Hardware(For Curved
LCD/LED TV and SAMSUNG TV)
1. M8 x 30 bolts
(x4)
2. M8x 50 bolts
(x4)
3. Φ15 x Φ8xΦ5 mm spacer
(x8)
4. Φ15 x Φ8xΦ15 mm spacer
(x8)
You Will Need
A. Bubble level
C.
Marker
D.
Drill
E. 3/16” (wood) or 1/2” (concrete) drill bit
F.
Hammer
G. Wrench
*SPM used in diagrams, steps also apply to SAM.
Center Bars
Upper
hBars
Lower
hBars
Arms
Wall plates
where you want to mount your TV.
*Make sure you understand the
note above.
1.2a Mark the center of the stud. Using the
provided mounting template** mark the
4 holes (2 on SAM) where the wall plate
will be mounted.
Make sure it’s
leveled.
1.1b Using the provided mounting
template** mark the 4 holes (2
on SAM) where the wall plate
will be mounted.
1.3a Drill a 3/16” hole on each mark.
Upper hBar
Lower hBar
Bolts go
on top
1.4a Mount the wall plate using the lag bolts and the round washers.
Do not overtighten.
1.5a Push the covers in place.
1a. Drywall Installation
1b. Concrete Installation
2a. Fix hBars to TV
1.2b Drill a 1/2” hole with the same
depth of the anchor on each
mark.
Rectangular
Washer
1.3b Insert a concrete anchor in
wall. Use a hammer if
necessary.
1.4b Mount the wall plate using the lag bolts and the round
washers.
Do not overtighten.
**SPM & SAM
mounting template
Cut along the dotted line and
detach from manual.
You can use masking tape
(one that won’t damage your
wall) to keep it in place.
Make sure it is leveled.
*Important
Due to SPM’s nature, the center of your TV will only be on the center of the wall plate when the mount is
1.5a Push the covers in place.
2a.1 Center top hBar horizontally
and bolt to matching holes on
the back of your TV using M4,
M5, M6 or M8 bolts (x4) and
optional rectangular washers
(x4).
Do not overtighten.
2a.2 Center bottom hBar
horizontally and bolt to
matching holes on the back of
your TV using M4, M5, M6 or
M8 bolts (x4) and optional
rectangular washers (x4).
Do not overtighten.
SPM
On
ly
Horizontal Adjustment Nuts
Tilt Adjustment Bolts
Upper hBar
Lower hBar
Bolts go
on top
2b.
Rectangular
Washer
2b.1 Center top hBar horizontally
and bolt to matching holes on
the back of your TV using M8
optional rectangular washers
(x4).
Do not overtighten.
2b.2 Center bottom hBar
horizontally and bolt to
matching holes on the back of
your TV using M8 bolts (x4)
and spacer (x8) and optional
rectangular washers (x4).
Do not overtighten.
4. Conceal Cables
Horizontal Adjustment
Adjust the level of the TV by loosening
and re-tightening the upper and lower
nuts with an hex wrench.
4.1 Run cables along arm channels.
Do not run power and signal cables
together, this may cause interference.
4.2 Push cable covers until you hear them click
in place.
3.1 Hang hBars from appropriate
keyholes on center bar
depending on hBars spacing
and desired height. See chart.
We recomend one person holds the TV
while other makes sure bolts are in place.
400 only and 300 high
300 medium
300 low and 200 high
200 low
3.2 Fix lower hBar with allen bolts.
3.3 Tighten upper and lower bolts.
Do not over tighten.
3. Hang TV from Arm
For more information, visit:
www.promounts.com
Promounts
TM
name, logo and model
numbers are property of Promounts.
© Promounts
®
AUM020 v2.0
Tilting
Gently pull the top of your TV while
pushing the bottom to the desired
position up to 15˚. Do the opposite to
tilt up.
Panning
Gently move your TV from side to side
extended at 90˚
Adjust Tilt by tightening
or loosening these bolts,
on both sides.
Adjust arms by tightening or
loosening bolts on articulations.
Don’t remove bolts from
arms, TV may fall down and
somebody may get hurt.
-90˚ to 0˚ to 90˚
15˚ to -3˚
Disclaimer
Warnings & Cautions
IT IS HIGHLY RECOMMENDED THAT THIS PRODUCT BE INSTALLED BY A PROFESSIONAL. PLEASE REVIEW THIS INSTRUCTION MANUAL COMPLETELY BEFORE
STARTING THE INSTALLATION PROCESS.
WARNING: A WARNING
alerts you to the possibility of serious injury or death if you do not follow the instructions.
CAUTION: A CAUTION
alerts you to the possibility of damage or destruction of equipment if you do not follow the corresponding instruction.
WARNING:
Improper installation can result in serious personal injury! Make sure that the structural members can
installation.
WARNING:
Be aware also of the potential for personal injury or damage to the unit if it is not adequately mounted.
WARNING:
The installer is responsible for verifying that the wall or ceiling to which the mount is anchored will safely
support the combined load of all attached components or other equipment.
WARNING:
The weight of the display placed on the mount must not exceed the maximum load capacity of the mounts.
WARNING:
WARNING:
Make sure the mount and brackets are correctly oriented.
CAUTION:
Check the unit for shipping damage before you begin the installation.
Promounts intends to make this manual accurate and complete, however, Promounts makes no claim that the informa-tion contained herein covers all details, conditions
or variations, nor does it provide for every possible contingency in connection with the installation or use of this product. The information contained in this document is
subject to change without notice or obligation of any kind. Promounts makes no representation of warranty, expressed or implied, regarding the information
contained herein. Promounts assumes no responsibility for accuracy, completeness or
Fix hBars to TV(For Curved LCD/LED TV and
SAMSUNG TV)
bolts (x4) and spacer (x8)
BY
"Loading the manual" means you need to wait until the file loads and becomes available for online reading. Some manuals are very large, and the time they take to appear depends on your internet speed.