Prestigio GeoVision 4050 - User Manual
Prestigio GeoVision 4050 GPS Unit – User Manual, read for free online in PDF format. We hope this helps you resolve any issues you may have. If you have further questions, please contact us through the contact form.
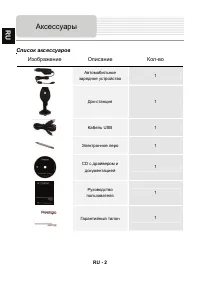
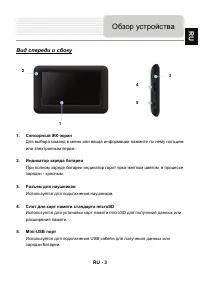
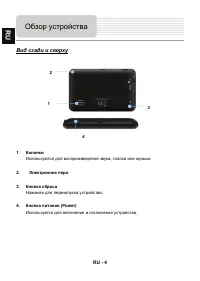

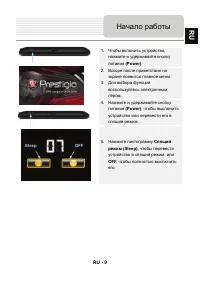
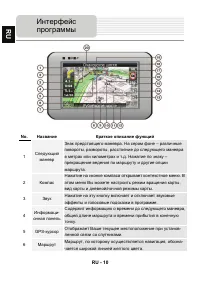
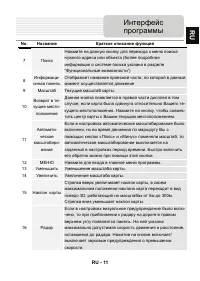
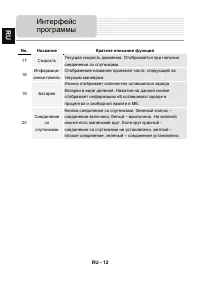
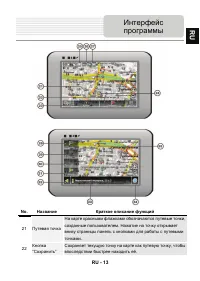

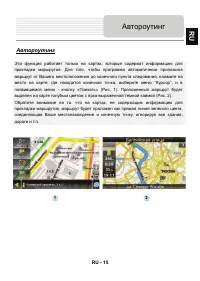
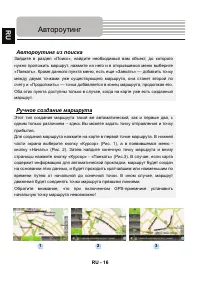
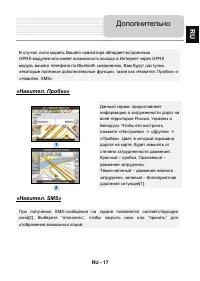
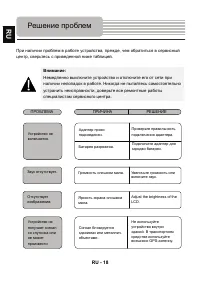
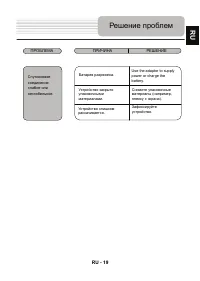
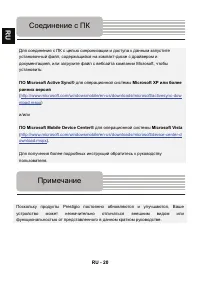
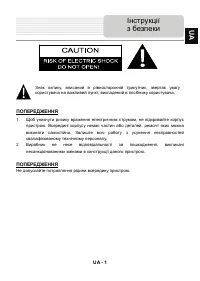
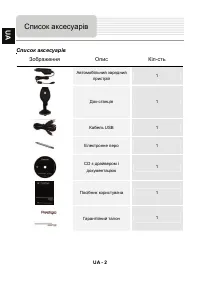
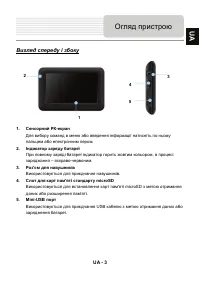
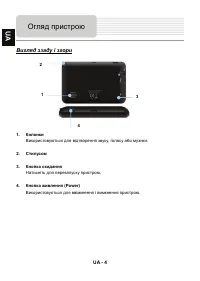
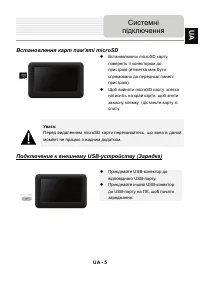
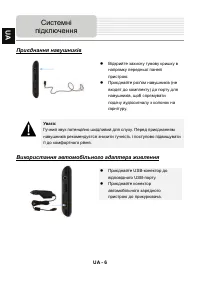
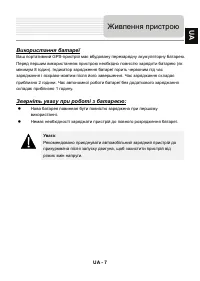

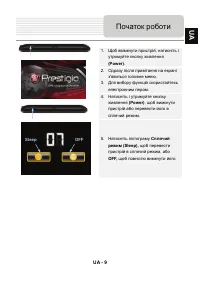
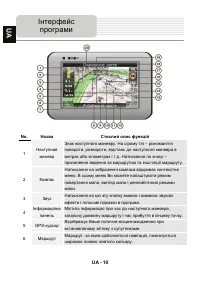
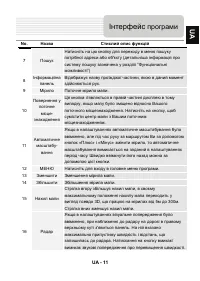
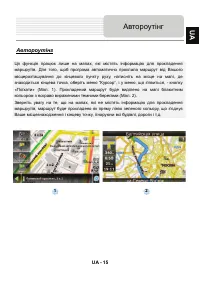

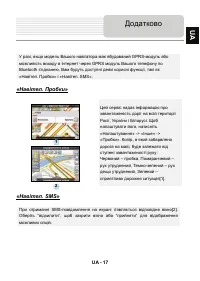
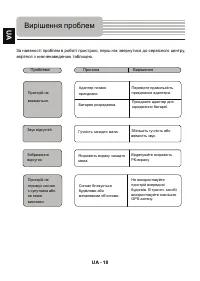
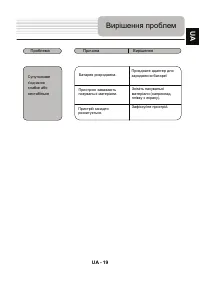
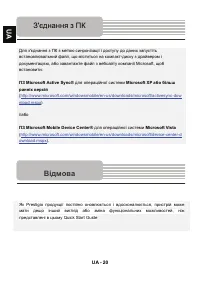

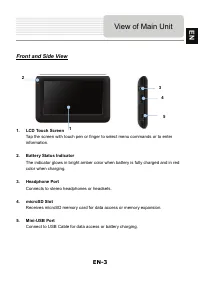
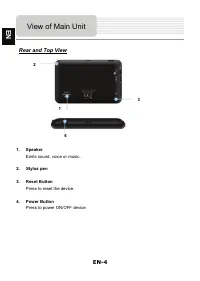
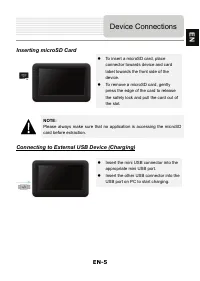
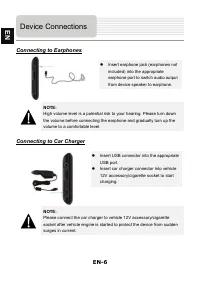
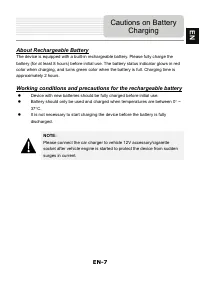
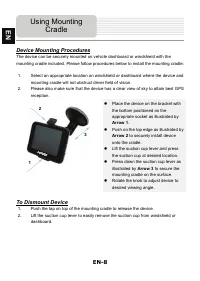
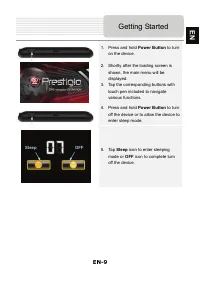
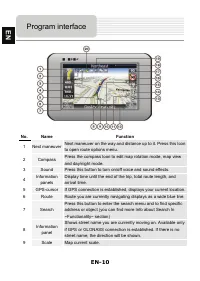
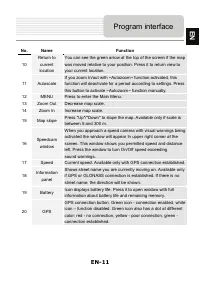
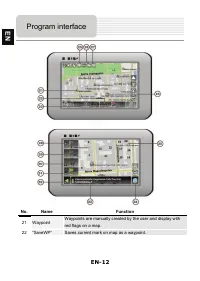
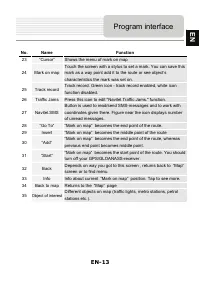
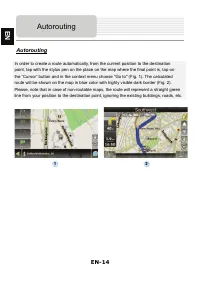

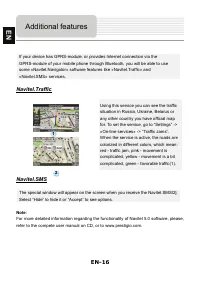
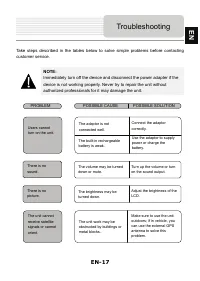
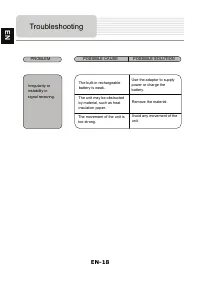
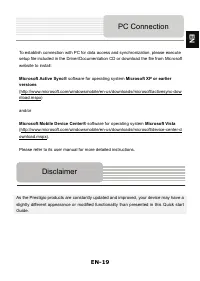
Table of Contents:
- Page 9 – Sleep OFF
- Page 26 – П є
- Page 41 – CAUTION; WARNING; Important Safety
- Page 42 – Accessories
- Page 43 – Front and Side View; View of Main Unit
- Page 44 – Rear and Top View; pen; Button
- Page 45 – Device Connections
- Page 47 – About Rechargeable Battery; Cautions on Battery
- Page 48 – Device Mounting Procedures; Arrow 1; To Dismount Device; Using Mounting
- Page 49 – Getting Started
- Page 50 – Function; Program interface
- Page 54 – Autorouting
- Page 56 – Note; Additional features
- Page 57 – Troubleshooting
- Page 59 – Microsoft Active Sync®; Microsoft XP or earlier; Microsoft Vista; Disclaimer
RU - 1
И
1.
,
.
,
.
.
2.
,
.
У
И
,
,
.
,
,
,
.
R
U
"Loading the manual" means you need to wait until the file loads and becomes available for online reading. Some manuals are very large, and the time they take to appear depends on your internet speed.
Summary
RU - 9 1. , (Power) . 2. . 3. . 4. (Power) , . 5. я (Sleep), , OFF, . Sleep OFF R U
UA - 6 П є ” . ” є ' є ( ) , . У : . є є . В ь ” є USB- USB- . ” є . U A
EN-1 CAUTION 1. To reduce the risk of electric shock, do not remove the cover (or back). No user-serviceable parts inside. Refer servicing to qualified service personnel. 2. The manufacturer should not hold responsibility for the damage caused by any substitutions and modifications of the product wi...