PowerSmart DB7006 - User Manual
PowerSmart DB7006 Snow Blower – User Manual, read for free online in PDF format. We hope this helps you resolve any issues you may have. If you have further questions, please contact us through the contact form.


Table of Contents:
- Page 3 – CONTENTS; Knowing your snow thrower...................................................; TECHNICAL DATA; 1-inch Single Stage Gas Snow Thrower; Gallon Recoil
- Page 4 – INTRODUCTION; NOTICE REGARDING EMISSIONS; SAFETY INFORMATION
- Page 5 – Adjust housing height to clear gravel or crushed rock surfaces.; PERSONAL SAFETY
- Page 7 – Allow machine to cool at least 5 minutes before storing.; OPERATION
- Page 8 – MAINTENANCE & STORAGE
- Page 9 – DO NOT MODIFY THE ENGINE
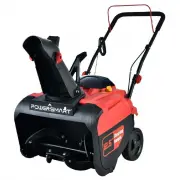
- Page 10 – KNOWING YOUR SNOW THROWER
- Page 12 – ASSEMBLY AND ADJUSTMENTS; Unpacking
- Page 13 – Step 3 – Chute assembly; Place discharge chute and rotation
- Page 14 – SNOW THROWER PREPARATION; Step 2 - ADD GASOLINE
- Page 15 – OPERATING YOUR SNOW THROWER; DO NOT USE YOUR HANDS TO UNCLOG CHUTE. Stop the motor before
- Page 16 – STARTING; Press the primer bulb 3 times.; CLEARING SNOW; with foreign materials.; STOPPING; Choke lever Switch key Primer bulb
- Page 17 – MAINTENANCE; before performing any maintenance tasks on your Snow Thrower.; MAINTENANCE PROCEDURES; RECOMMENDED ENGINE MAINTENANCE SCHEDULE; CHECKING THE OIL; Slowly add more oil and repeat step 2 until the oil mark
- Page 18 – To refill the crankcase with oil, follow these steps:; auto garage to arrange oil disposal.; STORAGE; PROPER STORAGE PROCEDURES
- Page 19 – TROUBLESHOOTING
- Page 20 – EXPLODED VIEW AND PARTS LIST
- Page 22 – Engine exploded view and parts list
- Page 24 – SAVE YOUR RECEIPTS. THIS WARRANTY IS VOID WITHOUT THEM.
INSTRUCTION MANUAL
21-inch Single Stage Gas Snow Thrower
Model # PSS1210M
Have product questions or need technical support? Please feel free to contact us!
Website: www.Amerisuninc.com
www.powersmartusa.com
Toll free: (800)791-9458 Mon-Fri 9-5 EST
Email: [email protected]
"Loading the manual" means you need to wait until the file loads and becomes available for online reading. Some manuals are very large, and the time they take to appear depends on your internet speed.
Summary
3 CONTENTS Technical data…...………………………………………………………... 3 Introduction………………………………………………………………. 4 Safety information…….………………………………………………... 4 Knowing your snow thrower…………………………………………… 10 Assembly and adjustments……………………………………………... 12 Snow thrower preparation…....………………………………………… 14 Operating your s...
4 INTRODUCTION Thank You for Purchasing a PowerSmart ® Product. This manual provides information regarding the safe operation and maintenance of this product. Every effort has been made to ensure the accuracy of the information in this manual. PowerSmart ® reserves the right to change this product a...
5 TRAINING Read, understand, and follow all instructions on the machine and in the manual(s) before attempting to assemble and operate. Keep this manual in a safe place for future and regular reference. • Be familiar with all controls and their proper operation. Know how to stop the machine and dise...