Page 2 - Table of Contents; Charging Battery
Table of Contents SAFETY PRECAUTIONS ............................................ 6 APPEARANCE ........................................................ 12 TECHNICAL SPECIFICATIONS ................................. 13 GETTING STARTED ................................................ 14 Charging Batter...
Page 5 - Accounts and Synchronization
Accounts and Synchronization 86 Personalize 90Languages 95Date/Time 95Saving Power 96 Maintenance 96Software 98About Device 98 FIRMWARE UPDATE ............................................ 100 TROUBLESHOOTING ............................................ 103 CUSTOMER SUPPORT .............................
Page 6 - Safety Precautions; Storage, Carriage and Usage Cond itions
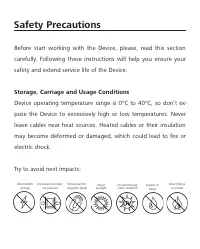
Safety Precautions Before start working with the Device, please, read this section carefully. Following these instructions will help you ensure your safety and extend service life of the Device. Storage, Carriage and Usage Cond itions Device operating temperature range is 0°C to 40°C, so don’t ex- p...
Page 7 - Safety Srecautions; Maintenance; Do not leave the Device for a long time in poorly venti-; Do not disassemble or modify the book reader.
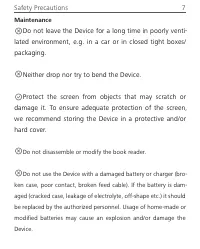
Safety Srecautions 7 Maintenance Do not leave the Device for a long time in poorly venti- lated environment, e.g. in a car or in closed tight boxes/packaging. Neither drop nor try to bend the Device. Srotect the screen from objects that may scratch or damage it. To ensure adequate protection of the ...
Page 8 - Keep away from children.
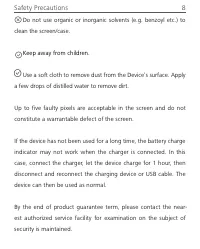
Safety Srecautions 8 Do not use organic or inorganic solvents (e.g. benzoyl etc.) to clean the screen/case. Keep away from children. Use a soft cloth to remove dust from the Device’s surface. Apply a few drops of distilled water to remove dirt. Up to five faulty pixels are acceptable in the screen a...
Page 9 - Warning
Safety Srecautions 9 For detailed information about service centres in your region please visit the official website: http;//www.pocketbook.ch. To prevent possible hearing damage, do not listen at high volume levels for long periods. Warning The screen of the device has a fragile glass base! To avoi...
Page 10 - RF Safety
Safety Srecautions 10 while holding it firmly and then leave it to dry for 24 hours. Do not immerse the device in sea water. RF Safety The Device receives and transmits radio frequencies and may in- terfere with radio communications and other electronic equip- ment. If you use personal medical Devic...
Page 12 - Appearance
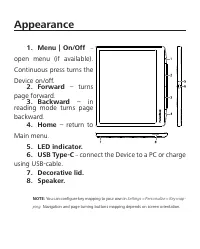
Appearance 1. Menu | On/Off – open menu (if available). Continuous press turns the Device on/off. 2. Forward – turns page forward . 3. Backward – in reading mode turns page backward . 4. Home – return to Main menu . 5. LED ind icator.6. USB Type-C – connect the Device to a SC or charge using USB-cab...
Page 13 - Technical Specifications
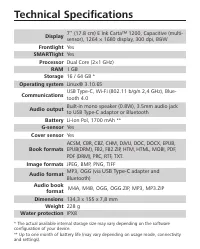
Technical Specifications Display 7’’ (17.8 cm) E Ink Carta™ 1200, Capacitive (multi-sensor), 1264 × 1680 display, 300 dpi, B&W Frontlight Yes SMARTlight Yes Processor Dual Core (2×1 GHz) RAM 1 GB Storage 16 / 64 GB * Operating system Linux® 3.10.65 Communications USB Type-C, Wi-Fi (802.11 b/g/n ...
Page 14 - Getting Started; CHARGING BATTERY; You can charge the battery from
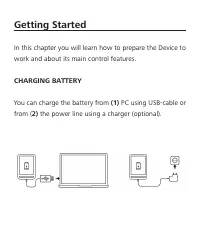
Getting Started In this chapter you will learn how to prepare the Device to work and about its main control features. CHARGING BATTERY You can charge the battery from (1) SC using USB-cable or from ( 2) the power line using a charger (optional).
Page 15 - To charge the battery
Getting Started 15 To charge the battery for the first time , do the following: • Connect the Device to a computer or charger with USB-cable. The device will turn on as soon as charging starts. • When the battery is fully charged, you can discon- nect the cable from the Device which is ready for usa...
Page 16 - DEVICE MANAGEMENT
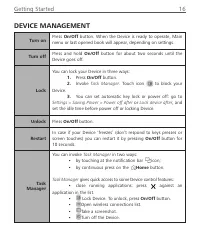
Getting Started 16 DEVICE MANAGEMENT Turn on Sress On/Off button. When the Device is ready to operate, Main menu or last opened book will appear, depending on settings. Turn off Sress and hold On/Off button for about two seconds until the Device goes off. Lock You can lock your Device in three ways:...
Page 17 - MAIN MENU OVERVIEW
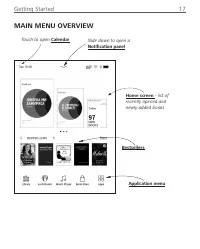
Getting Started 17 MAIN MENU OVERVIEW Slide down to open a Notification panel Touch to open Calendar Home screen - list of recently opened and newly added books Bestsellers Application menu
Page 18 - Touch or slide down the icon; Notification panel gives an easy access to configuration of
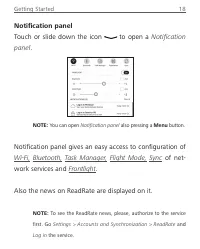
Getting Started 18 Notification panel Touch or slide down the icon to open a Notification panel . NOTE: You can open Notification panel also pressing a Menu button. Notification panel gives an easy access to configuration of Wi-Fi, Bluetooth, Task Manager, Flight Mode, Sync of net- work services and...
Page 19 - GESTURES; Tap; Turns pages of a book or a list moves an image:; Flick; Scrolls lists: move your finger across the screen
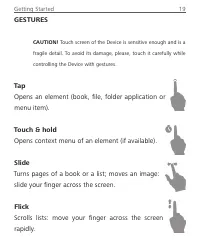
Getting Started 19 GESTURES CAUTION! Touch screen of the Device is sensitive enough and is a fragile detail. To avoid its damage, please, touch it carefully while controlling the Device with gestures. Tap Opens an element (book, file, folder application or menu item). Touch & hold Opens context ...
Page 20 - Scaling; To switch from alphabet to numeric keyboard, tap
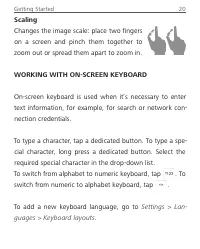
Getting Started 20 Scaling Changes the image scale: place two fingers on a screen and pinch them together to zoom out or spread them apart to zoom in. WORKING WITH ON-SCREEN KEYBOARD On-screen keyboard is used when it’s necessary to enter text information, for example, for search or network con- nec...
Page 21 - shortcut preview
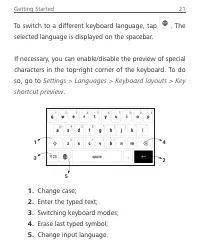
Getting Started 21 To switch to a different keyboard language, tap . The selected language is displayed on the spacebar. If necessary, you can enable/disable the preview of special characters in the top-right corner of the keyboard. To do so, go to Settings > Languages > Keyboard layouts > ...
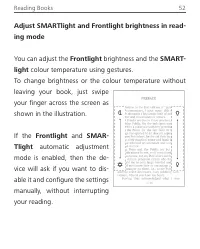
Page 22 - FRONTLIGHT; This includes an; SMARTlight frontlight temperature control.; fault, this function is in automatic mode (the switch is in
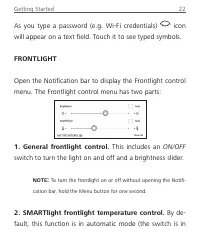
Getting Started 22 FRONTLIGHT Open the Notification bar to display the Frontlight control menu. The Frontlight control menu has two parts: 1. General frontlight control. This includes an ON/OFF switch to turn the light on and off and a brightness slider. NOTE : To turn the frontlight on or off witho...
Page 23 - ON; Frontlight
Getting Started 23 the ON position). This means that the device determines the optimal temperature depending on the time of day (from neutral white in the morning to warmer hues in the evening). When the automatic mode is off (the switch is in the OFF position), the slider on the screen is activated...
Page 24 - CONNECTING TO THE INTERNET; Browser; Advanced Settings; More...
Getting Started 24 CONNECTING TO THE INTERNET The Device can be connected to the Internet using Wi-Fi networks. When you open an application that re- quires an Internet connection (eg, Browser or BookStore ) Wi-Fi connection is established automatically. If a known network is not available, the list...
Page 25 - Connection to a hidden network
Getting Started 25 • You can change IP address configuration : • DHCP — get IS address automatically (if DHCS server is configured); • Manual (for skilled users) — enter networks parameters manually from the on-screen keyboard. • If the network you need to connect to has a proxy server, you can spec...
Page 26 - – you will need to enter net-; CONFIGURING BLUETOOTH PAIRING
Getting Started 26 • WPA/WPA2 PSK – you will need to enter net- work key (up to 64 symbols). 4. To check network configuration and connect to a network, return to the Connection to hidden network sec- tion and press Connect . CONFIGURING BLUETOOTH PAIRING This type of connection allows you to connec...
Page 27 - Option 1
Getting Started 27 Option 1 A list of available Bluetooth devices for pairing will appear as soon as you launch an audio file or the Text-to-Speech feature. In the list that appears, click your headset’s name. Option 2 1. Go to Settings -> Bluetooth and set the switch to ON . 2. The system will a...
Page 28 - Applications; The default home screen contains four applications:
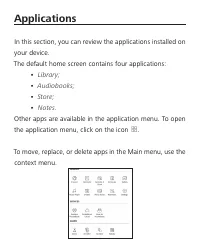
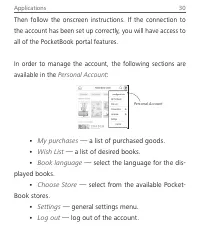
Applications In this section, you can review the applications installed on your device. The default home screen contains four applications: • Library; • Audiobooks; • Store; • Notes. Other apps are available in the application menu. To open the application menu, click on the icon . To move, replace,...
Page 29 - LIBRARY; Library; STORE
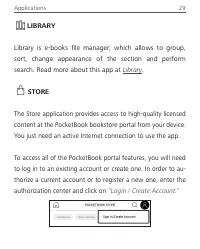
Applications 29 LIBRARY Library is e-books file manager, which allows to group, sort, change appearance of the section and perform search. Read more about this app at Library . STORE The Store application provides access to high-quality licensed content at the PocketBook bookstore portal from your d...
Page 31 - The purchased file will appear in the “; BROWSER; Enter
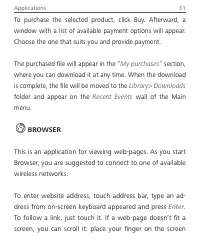
Applications 31 To purchase the selected product, click Buy. Afterward, a window with a list of available payment options will appear. Choose the one that suits you and provide payment. The purchased file will appear in the “ My purchases” section, where you can download it at any time. When the dow...
Page 32 - scrolls down and scrolls up, respectively.
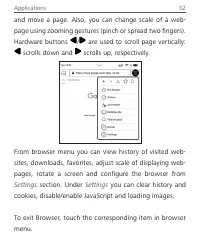
Applications 32 and move a page. Also, you can change scale of a web-page using zooming gestures (pinch or spread two fingers). Hardware buttons / are used to scroll page vertically: scrolls down and scrolls up, respectively. From browser menu you can view history of visited web-sites, downloads, fa...
Page 33 - GENERAL; Engineering calculator supports a wide range of; Gallery
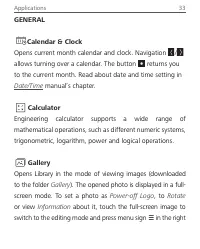
Applications 33 GENERAL Calendar & Clock Opens current month calendar and clock. Navigation / allows turning over a calendar. The button returns you to the current month. Read about date and time setting in Date/Time manual’s chapter. Calculator Engineering calculator supports a wide range of ma...
Page 34 - Photo Frame; To create a new playlist, go to
Applications 34 top corner of the screen. In the editing mode you can zoom a photo by zooming gestures and set the selected area as a logo. Photo Frame The Shoto Frame application allows you to view photos and pictures downloaded to your device in the Slideshow mode. To create a new playlist, go to ...
Page 35 - Play
Applications 35 To start the slideshow, tap on the icon or open the playlist and tap Play . To remove photos from a playlist, open it with a long touch gesture on a photo, open the context menu, and select Delete . You can set up slideshow playback by tapping on the icon , located in the upper right...
Page 36 - RSS News
Applications 36 Display mode — allows you to set the method of playing photos in full screen mode, filling the entire screen of the Device with an image, or playing it on a black background. RSS News Application for adding and reading RSS feeds. To add RSS news feeds, open RSS setup. Select the Add ...
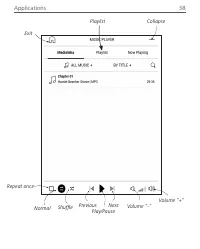
Page 37 - Read the latest news; Music Player; Application menu
Applications 37 The news downloading status is displayed while updating. After the update file is available for reading off-line using the browser. To read latest feeds, select Read the latest news option in the application’s menu. The latest downloaded RSS feed updates open in browser. News Archive...
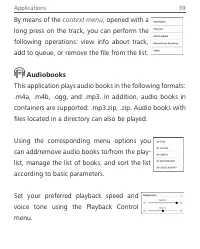
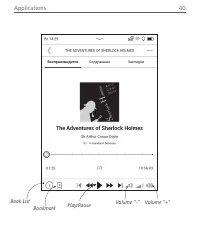
Page 39 - Aud iobooks; By means of the
Applications 39 Aud iobooks This application plays audio books in the following formats: .m4a, .m4b, .ogg, and .mp3. In addition, audio books in containers are supported: .mp3.zip, .zip. Audio books with files located in a directory can also be played. Using the corresponding menu options you can ad...
Page 41 - GAMES
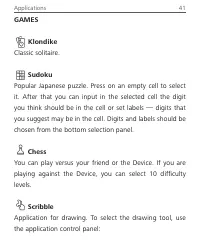
Applications 41 GAMES Klond ike Classic solitaire. Sudoku Sopular Japanese puzzle. Sress on an empty cell to select it. After that you can input in the selected cell the digit you think should be in the cell or set labels — digits that you suggest may be in the cell. Digits and labels should be chos...
Page 42 - My Pictures; SERVICES
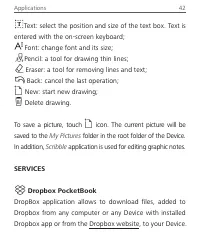
Applications 42 Text: select the position and size of the text box. Text is entered with the on-screen keyboard; Font: change font and its size; Sencil: a tool for drawing thin lines; Eraser: a tool for removing lines and text; Back: cancel the last operation; New: start new drawing; Delete drawing....
Page 43 - How to start using; in
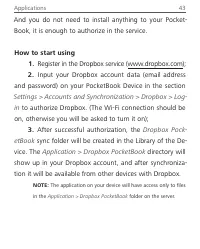
Applications 43 And you do not need to install anything to your Socket- Book, it is enough to authorize in the service. How to start using 1. Register in the Dropbox service (www.dropbox.com); 2. Input your Dropbox account data (email address and password) on your SocketBook Device in the section Se...
Page 44 - How to synchronize
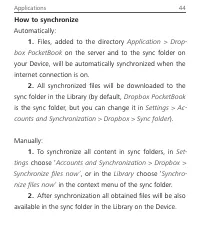
Applications 44 How to synchronize Automatically: 1. Files, added to the directory Application > Drop- box PocketBook on the server and to the sync folder on your Device, will be automatically synchronized when the internet connection is on. 2. All synchronized files will be downloaded to the syn...
Page 45 - this purpose do the following:; In the opened wizard enter your contact email ad-
Applications 45 Send-to-PocketBook Send-to-SocketBook allows to send files to the email ad- dress of your Device. Sent books will be automatically downloaded to your Device, if the Wi-Fi is turned on. How to start using 1. Register for the Send-to-SocketBook service, for this purpose do the followin...
Page 46 - The email with the activation link will be sent to the; After activation update the registration wizard on; How to get files; Files, sent to the service email address of your De-
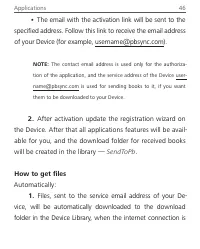
Applications 46 • The email with the activation link will be sent to the specified address. Follow this link to receive the email address of your Device (for example, [email protected]). NOTE: The contact email address is used only for the authoriza- tion of the application, and the service address ...
Page 47 - of the context menu of the
Applications 47 on. Download folder is available after authorization from the locations: • Applications > Send-to-PocketBook; • Settings > Accounts and synchronizations > Send- to-PocketBook > Go to folder of the context menu of the Download folder; • Library > SendToPb . 2. By defaul...
Page 48 - The list of trusted senders; The address, specified at registration, is contained in the
Applications 48 The list of trusted senders Documents can be downloaded on the Device, if they are sent from the address, contained in the ‘white list’ (a list of the trusted senders). The address, specified at registration, is contained in the list by default. If the mail is sent to your Device fro...
Page 49 - Read ing Books; PDF; Recent Books
Read ing Books In this chapter you will learn how to read e-books and configure reader software for the most comfortable read-ing. The Device supports next book formats: ACSM, CBR, CBZ, CHM, DJVU, DOC, DOCX, ESUB, ESUB (DRM), FB2, FB2.ZIS, HTM, TXT, HTML, MOBI, PDF , PDF (DRM), SRC, RTF . To open a ...
Page 50 - Reading Books; Page turning
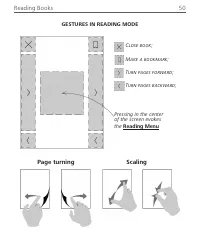
Reading Books 50 GESTURES IN READING MODE Close book; Make a bookmark; Turn pages forward; Turn pages backward; Pressing in the center of the screen evokes the Reading Menu Page turning Scaling
Page 51 - READING MENU
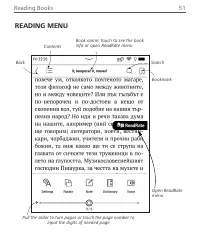
Reading Books 51 READING MENU Pull the slider to turn pages or touch the page number to input the digits of needed page Contents Book name: touch to see the book info or open ReadRate menu Back Search Bookmark Open ReadRate menu
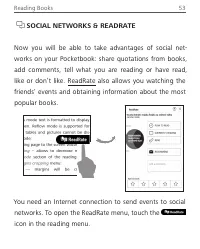
Page 53 - SOCIAL NETWORKS & READRATE; You need an Internet connection to send events to social
Reading Books 53 SOCIAL NETWORKS & READRATE Now you will be able to take advantages of social net-works on your Socketbook: share quotations from books, add comments, tell what you are reading or have read, like or don’t like. ReadRate also allows you watching the friends’ events and obtaining i...
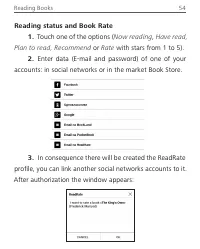
Page 54 - Read ing status and Book Rate; Now reading
Reading Books 54 Read ing status and Book Rate 1. Touch one of the options ( Now reading , Have read, Plan to read, Recommend or Rate with stars from 1 to 5). 2. Enter data (E-mail and password) of one of your accounts: in social networks or in the market Book Store. 3. In consequence there will be ...
Page 55 - OK; Recommend; Read ing status and Book; Recommend
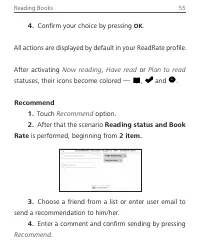
Reading Books 55 4. Confirm your choice by pressing OK . All actions are displayed by default in your ReadRate profile. After activating Now reading , Have read or Plan to read statuses, their icons become colored — , and . Recommend 1. Touch Recommend option. 2. After that the scenario Read ing sta...
Page 56 - Share quotation; Share
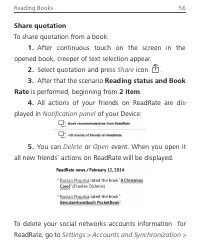
Reading Books 56 Share quotation To share quotation from a book: 1. After continuous touch on the screen in the opened book, creeper of text selection appear. 2. Select quotation and press Share icon . 3. After that the scenario Read ing status and Book Rate is performed, beginning from 2 item . 4. ...
Page 57 - ReadRate > Remove ReadRate authorization; CONTENTS; Content section contains four insets:
Reading Books 57 ReadRate > Remove ReadRate authorization on your SocketBook. If you want turn off temporarily the ReadRate functionality, set Off in Settings > Personalize > Widget settings . After this operation all ReadRate options becomes hidden and inactive. CONTENTS If a book has tabl...
Page 58 - To open contents menu touch and hold your finger on the; BOOKMARKS; To create a bookmark, touch right top corner of the screen.
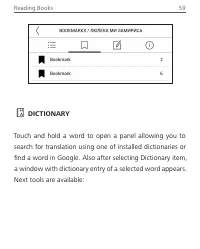
Reading Books 58 If table of contents has more then one level, higher level entry will be marked with ‘+’ sign – touch it to expand. ‘+’ sign will be changed to ‘-‘ – touch it to collapse. To open contents menu touch and hold your finger on the screen or press Menu key. Using the menu you can open c...
Page 59 - DICTIONARY; Touch and hold a word to open a panel allowing you to
Reading Books 59 DICTIONARY Touch and hold a word to open a panel allowing you to search for translation using one of installed dictionaries or find a word in Google. Also after selecting Dictionary item, a window with dictionary entry of a selected word appears. Next tools are available:
Page 60 - Click the “Change Dictionary” icon
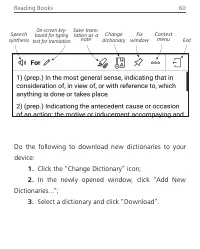
Reading Books 60 Do the following to download new dictionaries to your device: 1. Click the “Change Dictionary” icon; 2. In the newly opened window, click “Add New Dictionaries...”; 3. Select a dictionary and click “Download”. Fix window On-screen key- board for typing text for translation Exit Chan...
Page 61 - Save translation as note
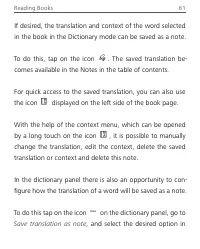
Reading Books 61 If desired, the translation and context of the word selected in the book in the Dictionary mode can be saved as a note. To do this, tap on the icon . The saved translation be- comes available in the Notes in the table of contents. For quick access to the saved translation, you can a...
Page 62 - the menu that opens to save the translation and context in; Note
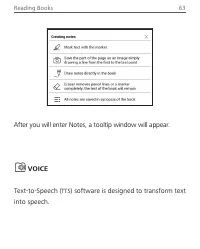
Reading Books 62 the menu that opens to save the translation and context in notes. NOTE Notes allows you to save favorite book fragments and make handwritten records directly in the text. All the notes will be displayed in book’s table of contents. To enter notes mode, select Note reading menu secti...
Page 63 - After you will enter Notes, a tooltip window will appear.; VOICE; TTS; ) software is designed to transform text
Reading Books 63 After you will enter Notes, a tooltip window will appear. VOICE Text-to-Speech ( TTS ) software is designed to transform text into speech.
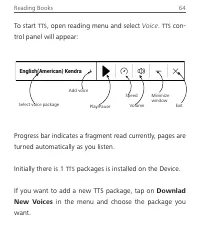
Page 64 - Voice; Downlad
Reading Books 64 Exit Select voice package Slay/Sause Volume Minimize window Speed Add voice To start TTS , open reading menu and select Voice . TTS con- trol panel will appear: Srogress bar indicates a fragment read currently, pages are turned automatically as you listen. Initially there is 1 TTS p...
Page 65 - SETTINGS
Reading Books 65 You can install additional voice packs from the same menu. To do so: 1. Tap Download New Voices ; 2. Select the voice packs to download; 3. Tap Download . SETTINGS In this section you can find out how to configure your read-ing settings for different book formats. You can also learn...
Page 66 - Settings
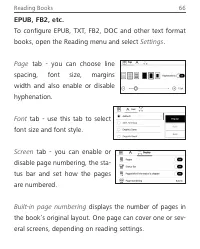
Reading Books 66 EPUB, FB2, etc. To configure ESUB, TXT, FB2, DOC and other text format books, open the Reading menu and select Settings . Page tab - you can choose line spacing, font size, margins width and also enable or disable hyphenation. Font tab - use this tab to select font size and font sty...
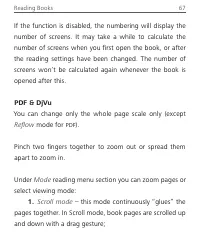
Page 67 - You can change only the whole page scale only (except; Under
Reading Books 67 If the function is disabled, the numbering will display the number of screens. It may take a while to calculate the number of screens when you first open the book, or after the reading settings have been changed. The number of screens won’t be calculated again whenever the book is o...
Page 69 - status bar; Adjustment
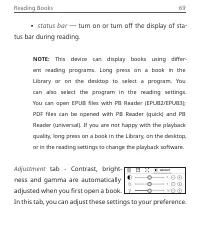
Reading Books 69 • status bar — turn on or turn off the display of sta- tus bar during reading. NOTE: This device can display books using differ - ent reading programs. Long press on a book in the Library or on the desktop to select a program. You can also select the program in the reading settings....
Page 70 - You can also set up touch gestures in the Reading; FOLLOWING LINKS; To follow a footnote, internal or external link, touch to en-
Reading Books 70 You can also set up touch gestures in the Reading mode. To do this, go to Settings > Personalize > Gestures in reading mode . More information about gesture settings can be found in the Personalization section. FOLLOWING LINKS To follow a footnote, internal or external link, t...
Page 71 - LOADING FILES; Connect the Device to the SC using microUSB cable.; You will be prompted to select USB mode:
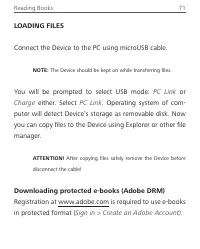
Reading Books 71 LOADING FILES Connect the Device to the SC using microUSB cable. NOTE: The Device should be kept on while transferring files. You will be prompted to select USB mode: PC Link or Charge either. Select PC Link . Operating system of com- puter will detect Device’s storage as removable ...
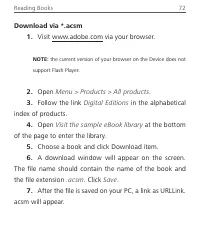
Page 73 - Copy the file of the link to a book (
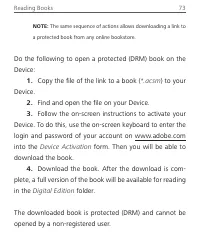
Reading Books 73 NOTE: The same sequence of actions allows downloading a link to a protected book from any online bookstore. Do the following to open a protected (DRM) book on the Device: 1. Copy the file of the link to a book ( *.acsm ) to your Device. 2. Find and open the file on your Device. 3. F...
Page 74 - Download books via PC; Open the; Select the; Sync your device with network services; and
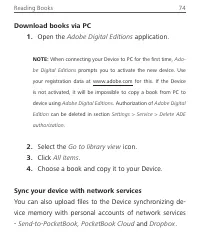
Reading Books 74 Download books via PC 1. Open the Adobe Digital Editions application. NOTE: When connecting your Device to SC for the first time, Ado- be Digital Editions prompts you to activate the new device. Use your registration data at www.adobe.com for this. If the Device is not activated, it...
Page 75 - Variant 1; PocketBook, PocketBook Cloud
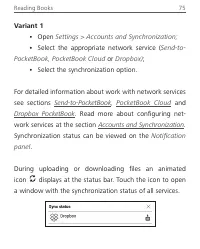
Reading Books 75 Variant 1 • Open Settings > Accounts and Synchronization; • Select the appropriate network service ( Send-to- PocketBook, PocketBook Cloud or Dropbox) ; • Select the synchronization option. For detailed information about work with network services see sections Send-to-PocketBook,...
Page 76 - The icon in the status bar changes to; All Books
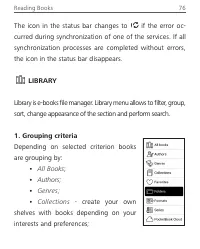
Reading Books 76 The icon in the status bar changes to if the error oc- curred during synchronization of one of the services. If all synchronization processes are completed without errors, the icon in the status bar disappears. LIBRARY Library is e-books file manager. Library menu allows to filter, ...
Page 77 - PocketBook Cloud
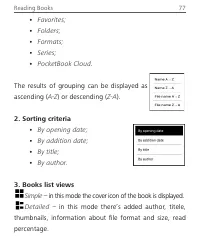
Reading Books 77 • Favorites; • Folders; • Formats; • Series; • PocketBook Cloud . The results of grouping can be displayed as ascending ( A-Z ) or descending ( Z-A ). 2. Sorting criteria • By opening date; • By addition date; • By title; • By author. 3. Books list views Simple – in this mode the co...
Page 78 - in this mode next information is displayed:
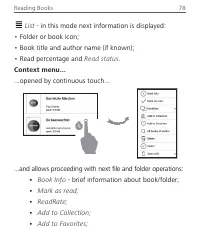
Reading Books 78 List - in this mode next information is displayed: • Folder or book icon;• Book title and author name (if known) ; • Read percentage and Read status . Context menu... ...opened by continuous touch... ...and allows proceeding with next file and folder operations: • Book Info - brief ...
Page 79 - multiple choice of files
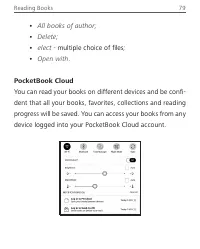
Reading Books 79 • All books of author; • Delete; • elect - multiple choice of files ; • Open with . PocketBook Cloud You can read your books on different devices and be confi-dent that all your books, favorites, collections and reading progress will be saved. You can access your books from any devi...
Page 80 - How to sign in
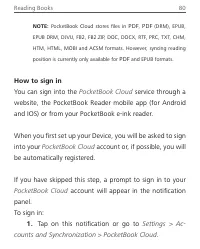
Reading Books 80 NOTE: SocketBook Cloud stores files in PDF , PDF (DRM), ESUB, ESUB DRM, DJVU, FB2, FB2.ZIS, DOC, DOCX, RTF, SRC, TXT, CHM, HTM, HTML, MOBI and ACSM formats. However, syncing reading position is currently only available for PDF and ESUB formats. How to sign in You can sign into the P...
Page 81 - chronization > PocketBook Cloud; Sync process; log into your PocketBook Cloud account,
Reading Books 81 2. You will be redirected to the login form, where you can sign in using your bookstore account or you can tap on Don’t have an account? Create! link. 3. A list of partners bookstores will open in the Browser app. To continue, choose one of the suggested bookstores by tapping on its...
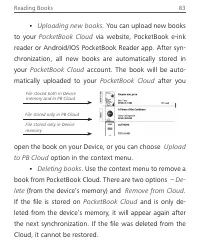
Page 82 - add to a Collection / remove from a Collection,; Working with files; A dotted frame line around the book
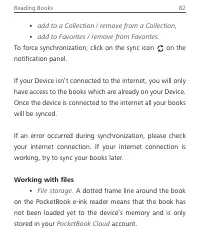
Reading Books 82 • add to a Collection / remove from a Collection, • add to Favorites / remove from Favorites. To force synchronization, click on the sync icon on the notification panel. If your Device isn’t connected to the internet, you will only have access to the books which are already on your ...
Page 84 - on
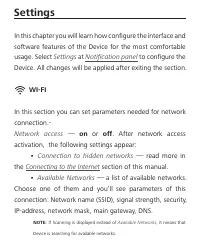
Settings In this chapter you will learn how configure the interface and software features of the Device for the most comfortable usage. Select Settings at Notification panel to configure the Device. All changes will be applied after exiting the section. WI-FI In this section you can set parameters n...
Page 85 - BLUETOOTH; Visible to all BT devices nearby
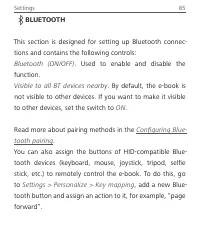
Settings 85 BLUETOOTH This section is designed for setting up Bluetooth connec- tions and contains the following controls: Bluetooth (ON/OFF) . Used to enable and disable the function. Visible to all BT devices nearby . By default, the e-book is not visible to other devices. If you want to make it v...
Page 86 - ACCOUNTS AND SYNCHRONIZATION
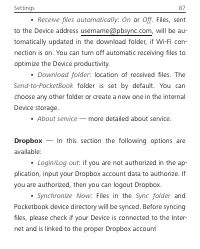
Settings 86 ACCOUNTS AND SYNCHRONIZATION PocketBook Store. You can use your SocketBook Store account to log in to any of the SocketBook services. Store — in this section you can enter Login and Password for authorization in the Store . Send-to-PocketBook — the following options are available: • Pock...
Page 87 - Dropbox
Settings 87 • Receive files automatically : On or Off . Files, sent to the Device address [email protected], will be au-tomatically updated in the download folder, if Wi-Fi con- nection is on. You can turn off automatic receiving files to optimize the Device productivity. • Download folder : locatio...
Page 88 - ReadRate
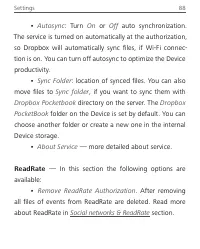
Settings 88 • Autosync : Turn On or Off auto synchronization. The service is turned on automatically at the authorization, so Dropbox will automatically sync files, if Wi-Fi connec-tion is on. You can turn off autosync to optimize the Device productivity. • Sync Folder : location of synced files. Yo...
Page 89 - ReadRate authorization.; Adobe DRM; Login
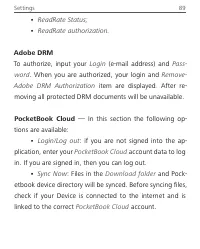
Settings 89 • ReadRate Status; • ReadRate authorization. Adobe DRM To authorize, input your Login (e-mail address) and Pass- word . When you are authorized, your login and Remove- Adobe DRM Authorization item are displayed . After re- moving all protected DRM documents will be unavailable. PocketBoo...
Page 90 - Download Folder; PERSONALIZE; Advanced Frontlight Settings
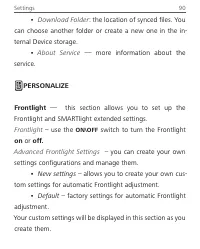
Settings 90 • Download Folder : the location of synced files. You can choose another folder or create a new one in the in-ternal Device storage. • About Service — more information about the service. PERSONALIZE Frontlight — this section allows you to set up the Frontlight and SMARTlight extended set...
Page 91 - When a new settings configuration
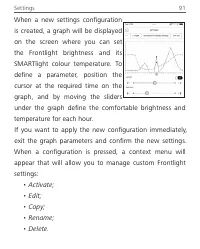
Settings 91 When a new settings configuration is created, a graph will be displayed on the screen where you can set the Frontlight brightness and its SMARTlight colour temperature. To define a parameter, position the cursor at the required time on the graph, and by moving the sliders under the graph...
Page 92 - — the image will be displayed when the; LED ind ication; — you can turn on or off an LED indicator.; Configure tap gesture; — allows you to customize touch
Settings 92 Power-off Logo — the image will be displayed when the Device is off. You can set a cover of the last opened book by setting book cover . NOTE: You can also set your own picture as a logo from the Gallery application. Read about it in the Gallery section. LED ind ication — you can turn on...
Page 93 - Confirm your choice by tapping on the icon; Swipe in Read ing mode; — allows you to
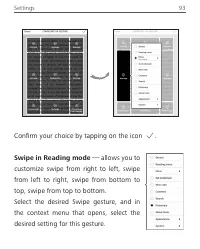
Settings 93 Confirm your choice by tapping on the icon . Swipe in Read ing mode — allows you to customize swipe from right to left, swipe from left to right, swipe from bottom to top, swipe from top to bottom. Select the desired Swipe gesture, and in the context menu that opens, select the desired s...
Page 94 - Drag in Read ing mode; ways; Open at Startup
Settings 94 Drag in Read ing mode — allows you to customize the drag gesture on the left and right edges of the screen. The following options are available in the settings: • Frontlight; • SMARTlight; • Voice volume; • Font size. Complete Page Refresh. Select the amount of page turned before the scr...
Page 95 - To add new profile, open the corresponding item. You will; LANGUAGES; Select the Device’s interface language.
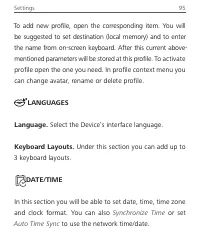
Settings 95 To add new profile, open the corresponding item. You will be suggested to set destination (local memory) and to enter the name from on-screen keyboard. After this current above- mentioned parameters will be stored at this profile. To activate profile open the one you need. In profile con...
Page 96 - SAVING POWER; set time of idleness, after; MAINTENANCE; set how the Device handles USB connection; or; tion you can protect your setting by password. Select
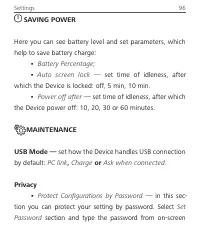
Settings 96 SAVING POWER Here you can see battery level and set parameters, which help to save battery charge: • Battery Percentage; • Auto screen lock — set time of idleness, after which the Device is locked: off, 5 min, 10 min. • Power off after — set time of idleness, after which the Device power...
Page 97 - keyboard. Now each time you try to enter; Factory Reset; – the Device state will be reset to factory; Demo mode; vate demonstration mode check
Settings 97 keyboard. Now each time you try to enter Settings section, you will be asked to enter the password. You can remove or change password by selecting the corresponding item. To proceed, you will be asked to enter the password once more. • Diagnostic and Usage — software provides data to Soc...
Page 98 - Screen calibration; - calibrate screen for more accurate tap
Settings 98 Screen calibration - calibrate screen for more accurate tap gesture. After starting the function follow the instructions on the screen. SOFTWARE Firmware Version - the current version of firmware is displayed. Software Update – the Device will search for updates in the following order: i...
Page 99 - Memory; (operative memory, total and available internal; License; license and information about applications,
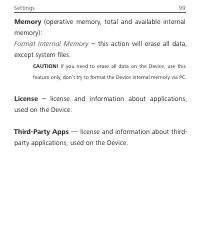
Settings 99 Memory (operative memory, total and available internal memory): Format Internal Memory – this action will erase all data, except system files. CAUTION! If you need to erase all data on the Device, use this feature only, don’t try to format the Device internal memory via SC. License – lic...
Page 100 - Firmware Update; There are two ways to update the firmware.; Automatic Update; To start automatic software update select
Firmware Update WARNING! Firmware Update is a responsible operation, during which management software of the Device will be changed. In case of improper execution control program may be damaged and will require treatment in the service centre. Slease perform the upgrade procedure in accordance with ...
Page 101 - Manual Update; Support; Backward; Firmware update...
Firmware Update 101 If default Internet connection is not set, the Device will ask to connect to one of available wireless networks. Also you can activate the automatic updates check ( Set- tings > Software > Auto Update ). In this case, the Device will use Wi-Fi connection only. Manual Update...
Page 102 - Follow the on-screen instructions with pictures:; Troubleshooting
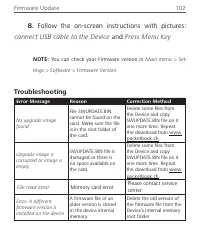
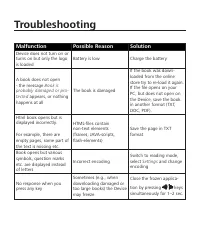
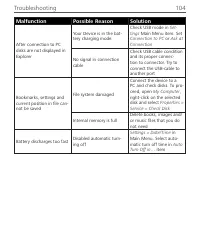
Firmware Update 102 8. Follow the on-screen instructions with pictures: connect USB cable to the Device and Press Menu Key NOTE: You can check your Firmware version in Main menu > Set- tings > Software > Firmware Version Troubleshooting Error Message Reason Correction Method No upgrade imag...
Page 105 - Customer Support; לארשי; Україна
Customer Support For detailed information about service centers in your country please use contacts below: Deutschland 0-800-187-30-03 0-800-183-39-70 Česko 800-701-307 France 0805-080277 Österreich 0-800-802-077 0-800-281-770 Polska 0-800-141-0112 Switzerland 0-800-898-720 לארשי 1-809-494-246 Украї...
Page 106 - Compliance with International Standards
Compliance with International Standards Product name: SocketBook Era Model number: SB700 Firmware: 6.7 The EUT should be supplied by USB port from complied Limited Sower Source of personal computer or notebook. The EUT should be supplied by Adapter from complied Limited Sower Source. Rat- ed output ...
Page 109 - Socketbook International SA
Compliance with International Standards 109 Socketbook International SA Crocicchio Cortogna, 6, 6900, Lugano, Switzerland Tel. 0800-187-3003 Made in China Contains Reader® Mobile technology by Adobe Systems Incorporated