Page 4 - empty page before TOC
Page 6 - Introduction
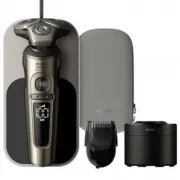
English 6 English Introduction Congratulations on your purchase and welcometo Philips Norelco! To fully benefit from the support that PhilipsNorelco offers, register your product at www.norelco.com/register . General description (Fig. 1) 1 USB power source2 USB plug3 Wireless Qi charging pad4 Pouch5...
Page 7 - Read all instructions before using this product.; DANGER; To reduce the risk of electric shock:; WARNING
7 English Read all instructions before using this product. DANGER To reduce the risk of electric shock: - Do not reach for a corded charging pad that has fallen into water. Unplug immediately from the power outlet. - Keep the USB power source and the charging pad dry.- Do not place or store the prod...
Page 9 - SAVE THESE INSTRUCTIONS; The display
9 English - Charge, use and store the product at a temperature between 41 °F / 5 °C and 95 °F / 35 °C. - Keep product and batteries away from fire and do not expose them to direct sunlight or high temperatures. - If the product becomes abnormally hot or smelly, changes color or if charging takes lon...
Page 10 - Charging
10 English Charging When the shaver is charging, the ring on the padlights up and the battery charge indicator on theshaver flashes white. The battery charge is indicated by the batterycharge percentage flashing on the display, whichis shown when the shaver is moved. Quick charge: After approx. 18 m...
Page 11 - Remaining battery charge
11 English Remaining battery charge The remaining battery charge is indicated by thebattery charge percentage shown on the display. Personal comfort settings The shaver has a feature that allows you topersonalize your settings. Depending on yourpersonal shaving needs, choose between threesettings, f...
Page 12 - Replacement reminder; Overheating
12 English Replacement reminder For maximum shaving performance, we adviseyou to replace the shaving heads once a year.Replace damaged shaving heads immediately.Always replace the shaving heads with originalPhilips shaving heads.The shaver is equipped with a replacementreminder which reminds you to ...
Page 13 - Foreign object on wireless Qi charging pad; Quick charge
13 English shaving heads are dirty, you have to clean them.If the shaving heads are damaged, you have toreplace them. Foreign object on wireless Qi charging pad If there is a foreign (metal) object on the wirelessQi charging pad during charging, the notificationsymbol on the wireless Qi charging pad...
Page 14 - Charging with the wireless Qi charging pad; - The wireless Qi charging pad beeps and the
14 English Charging with the wireless Qi charging pad Note: The charging pad is Qi compliant. Onlycharge the Qi compatible shaver or other Qicharging compliant appliances on the wireless Qicharging pad provided. Note: Carefully shake off excess water beforeplacing the shaver on the Qi pad. 1 Put the...
Page 15 - - When the shaver is charging, the ring on the; Using the shaver; as described in this manual.
15 English - When the shaver is charging, the ring on the pad lights up and the battery charge indicatoron the shaver flashes white. The batterycharge is indicated by the battery chargepercentage flashing on the display, which isshown when the shaver is moved. 3 When the battery is fully charged, th...
Page 16 - Switching the shaver on and off; Skin adaptation period; - Select your personal comfort setting (see; Dry shaving; Switch on the shaver.
16 English Switching the shaver on and off 1 To switch on the shaver, press the on/offbutton once. The battery charge percentage lights up for afew seconds. 2 To switch off the shaver, press the on/offbutton once. The battery charge percentage lights up for afew seconds and shows the remaining batte...
Page 17 - Wet shaving; Apply some water to your skin.
17 English 2 Move the shaving heads over your skin incircular movements to catch all hairs growingin different directions. Make sure each shavinghead is fully in contact with the skin. Exertgentle pressure for a close, comfortable shave. Note: Do not press too hard, as this can causeskin irritation....
Page 18 - Using click-on attachments; Removing or attaching click-on attachments; Make sure the shaver is switched off.
18 English 5 Move the shaving heads over your skin incircular movements to catch all hairs growingin different directions. Make sure each shavinghead is fully in contact with the skin. Exertgentle pressure for a close, comfortable shave. Note: Do not press too hard, as this can causeskin irritation....
Page 19 - Using the beard styler attachment with comb
19 English Using the beard styler attachment with comb You can use the beard styler with the combattached to style your beard at one fixed setting,but also at different length settings. You can alsouse it to pre-trim any long hairs before shavingfor a more comfortable shave. Note: The beard styler i...
Page 20 - Clean the attachment after use.; Using the beard styler attachment without comb; Switch on the appliance.; Travel lock
20 English 5 Move the shaver upwards while you exertgentle pressure. Make sure the front of thecomb is in full contact with the skin. 6 Clean the attachment after use. Using the beard styler attachment without comb You can use the beard styler attachment withoutthe comb to contour your beard, mousta...
Page 21 - Activating the travel lock; Cleaning and maintenance
21 English Activating the travel lock 1 Press the on/off button for 3 seconds to usethe travel lock mode. 3 sec. While you activate the travel lock, the travellock symbol lights up briefly and the shaverproduces a short sound.When the travel lock isactivated, the travel lock symbol flashes. If you t...
Page 22 - How do I use the Quick Clean Pod; Icon; Preparing the Quick Clean Pod for use
22 English Do not use compressed air, abrasives,scourers or aggressive liquids such as petrolor acetone to clean the shaver. How do I use the Quick Clean Pod ? What does the icon on my Quick Clean Podmean? Icon Behavior Meaning Becomes visible on theQuick Clean Pod The Quick Clean Pod Cartridgeneeds...
Page 23 - Using the Quick Clean Pod
23 English 4 Press the small circular piece on the handle ofthe Quick Clean Pod Cartridge to break thesnap hook on the handle. 5 Place the Quick Clean Pod Cartridge into theQuick Clean Pod. 6 Put the top of the Quick Clean Pod back ontothe base and turn it clockwise until you hear aclick. Do not til...
Page 24 - Replacing the Quick Clean Pod Cartridge; Frequency of use
24 English Each cleaning program takes approximately oneminute. 1 Let the shaver air-dry completely in the QuickClean Pod before storing it. Replacing the Quick Clean Pod Cartridge Replace the Quick Clean Pod Cartridgeimmediately when the cartridge replacementicon on the Quick Clean Pod becomes visi...
Page 25 - Scan the QR code to the left or visit; Thorough cleaning; Switch off the shaver.
25 English 3 Pour any remaining fluid down a drain andrecycle the empty cartridge in accordance withlocal waste regulations. 4 Place a new Quick Clean Pod Cartridge intothe Quick Clean Pod (see 'Preparing the QuickClean Pod for use'). Scan the QR code to the left or visit www.philips.com/cleaning-ca...
Page 26 - Clean the cutter and guard under the tap.
26 English 2 1 4 Turn the retaining ring anticlockwise and lift itoff the shaving head. Repeat this process for the other retainingrings. Place them aside in a safe place. 5 Remove the shaving heads from the shavinghead holder. Each shaving head consists of acutter and guard. Note: Do not clean more...
Page 27 - Cleaning the beard styler attachment; Clean the beard styler attachment after each use.
27 English 12 Attach the shaving head holder to the bottompart of the shaving unit (‘click’). Cleaning the beard styler attachment Clean the beard styler attachment after each use. 1 Pull the comb off the beard styler attachment. Note: Grab the comb in the center to pull it offthe beard styler attac...
Page 28 - Replacement; Replacing the shaving heads
28 English 1 2 7 When the cutting unit is dry, attach it to thebeard styler attachment. 8 When the comb is dry, attach it to the beardstyler attachment. 9 For optimal performance, lubricate the teethof the attachment with a drop of sewingmachine oil regularly. Replacement Replacing the shaving heads...
Page 29 - Storage; Store the shaver in the pouch.; Ordering accessories; To buy accessories or spare parts, visit
29 English 2 Press the release button on the shaving unitand pull the shaving head holder off theshaving unit. SH91 3 Remove the shaving heads from the shavinghead holder. Discard the used shaving headsimmediately to avoid mixing them with thenew shaving heads. 7 sec. 4 After replacing the shaving h...
Page 30 - Assistance
30 English The following accessories and spare parts areavailable:- SH91 Philips Norelco replacement shaving heads - CC12 Philips Norelco Quick Clean Pod Cartridge 2-pack Assistance For assistance, visit our website: www.philips.com/support or call toll free 1-800-243-3050. Online information is ava...
Page 31 - Full Two-Year Warranty; IMPORTANT; : This warranty does not cover
31 English Full Two-Year Warranty Philips North America LLC warrants this newproduct (except cutters and combs) againstdefects in materials or workmanship for a periodof two years from the date of purchase, andagrees to repair or replace any defective productwithout charge. IMPORTANT : This warranty...
Page 32 - We cannot be responsible for lost mail.
32 English *Read enclosed instructions carefully. 45-DAY MONEY-BACK GUARANTEE To enjoy the closest and most comfortable shavefrom your new Philips Norelco Men’s Shaver, theshaver should be used exclusively for 3 weeks.This allows your hair and skin enough time toadapt to the Philips Norelco Shaving ...
Page 33 - Introducción; INSTRUCCIONES IMPORTANTES DE SEGURIDAD; PELIGRO
Español 33 Español Introducción ¡Felicitaciones por su compra y bienvenido aPhilips Norelco!Para beneficiarse completamente del soporte que ofrecePhilips Norelco, registre el producto en www.norelco.com/register . Descripción general (Fig. 1) 1 Fuente de alimentación USB2 Clavija USB3 Almohadilla de...
Page 34 - ADVERTENCIA
34 Español - No coloque ni guarde el producto o la almohadilla de carga en un lugardesde donde pueda caerse a una bañera o un lavamanos. No coloque elproducto o la almohadilla de carga sobre agua ni deje que caiga en el aguao cualquier otro líquido. - Desconecte siempre la almohadilla de carga del t...
Page 35 - CONSERVE ESTAS INSTRUCCIONES; La pantalla
35 Español - Enchufe la fuente de alimentación USB directamente al tomacorriente. Nouse un cable de extensión. - Desconecte la fuente de alimentación USB antes de conectar o desconectarla almohadilla de carga. - La almohadilla de carga no está diseñada para usarse en un auto. Puedeinterferir con los...
Page 36 - Carga
36 Español Carga Cuando la afeitadora se está cargando, el anillo sobre laalmohadilla se enciende y el indicador de carga debatería destella en color blanco.El porcentaje de carga destellante en la pantalla indica lacarga de la batería, este se muestra cuando se mueve laafeitadora.Carga rápida: Lueg...
Page 37 - Ajustes de comfort personalizados
37 Español Ajustes de comfort personalizados La afeitadora tiene una característica que le permitepersonalizar sus ajustes. Según sus necesidades deafeitado personales, elija de entre tres ajustes, de bajo aalto: comfort, dinámico o eficaz. Cuando presiona elbotón que se encuentra a la derecha o a l...
Page 38 - Símbolo de notificación
38 Español Nota: Después de reemplazar los cabezales de afeitado,necesita restablecer el recordatorio de reemplazopresionando el botón encendido/apagado durante 7segundos. Símbolo de notificación Sobrecalentamiento Si la afeitadora se sobrecalienta durante la carga, el signode notificación destella....
Page 39 - Carga rápida
39 Español Carga Cargue la afeitadora antes de usarla por primera vez ycuando la pantalla indique que la batería está casiagotada.La carga toma aproximadamente 3 horas. Una afeitadoracompletamente cargada otorga un tiempo de afeitadode hasta 60 minutos.Luego de aproximadamente 18 minutos de carga, l...
Page 40 - Uso de la afeitadora
40 Español - La almohadilla inalámbrica Qi emite un sonido y elanillo en la almohadilla se enciende cuando laafeitadora está colocada correctamente y conectadapara cargarse. - Cuando la afeitadora se está cargando, el anillo sobrela almohadilla se enciende y el indicador de carga debatería destella ...
Page 41 - Encendido y apagado de la afeitadora
41 Español Encendido y apagado de la afeitadora 1 Para encender la afeitadora, pulse el botón deencendido/apagado una vez. El porcentaje de carga de la batería se enciende porunos segundos. 2 Para apagar la afeitadora, pulse el botón deencendido/apagado una vez. El porcentaje de carga de la batería ...
Page 43 - Uso de los accesorios de ajuste de clic; Quitar y poner los accesorios de ajuste de clic; Uso del accesorio recortadora de barba con el peine
43 Español 7 Desconecte y limpie la afeitadora después de cadauso. Nota: Asegúrese de enjuagar toda la espuma o gel deafeitar de la afeitadora. Uso de los accesorios de ajuste de clic Quitar y poner los accesorios de ajuste de clic 1 Asegúrese de que la afeitadora esté apagada. 2 Extraiga el accesor...
Page 44 - Uso del accesorio recortadora de barba sin el peine
44 Español 1 Ajuste el accesorio en la afeitadora ("clic"). 2 Deslice el peine directo dentro de las ranuras guía enambos lados del accesorio de la recortadora de barba("clic"). 1 2 3 Presione el selector de longitud y luego empújelohacia la izquierda o derecha para seleccionar el la...
Page 45 - Bloqueo para viajes; Activación del sistema de bloqueo
45 Español Nota: Tome el peine por el centro para sacarlo delaccesorio de recortadora de barba. No jale de loslados del peine. 2 Encienda el aparato. 3 Sostén el accesorio de recortadora de barbaperpendicular a la piel y mueve el dispositivo haciaabajo mientras aplicas una presión suave. 4 Limpie el...
Page 46 - Limpieza y mantenimiento; ¿Cómo uso el Quick Clean Pod?; Ícono
46 Español Limpieza y mantenimiento Una limpieza frecuente garantiza los mejoresresultados de afeitado. Nunca limpie, retire ni reemplace la unidad deafeitado cuando la afeitadora esté encendida. No aplique presión a las protecciones del cabezalde afeitado. No toque los cabezales de afeitado con obj...
Page 48 - Frecuencia de uso
48 Español Cada programa de limpieza toma aproximadamente unminuto. 1 Deje que la afeitadora se seque completamente alaire en el Quick Clean Pod antes de guardarla. Reemplazo del cartucho del Quick Clean Pod Reemplace el cartucho del Quick Clean Podinmediatamente cuando el ícono de reemplazo delcart...
Page 49 - Limpieza a fondo
49 Español 3 Vierta el líquido restante por el desagüe y recicle elcartucho vacío conforme a la reglamentación local enmateria de residuos. 4 Coloque un nuevo cartucho del Quick Clean Pod en elQuick Clean Pod (ver 'Preparación del Quick Clean Podpara el uso'). Escanea el código QR que se encuentra a...
Page 50 - Limpieza del accesorio recortadora de barba
50 Español 5 Quite los cabezales de afeitado del soporte delcabezal de afeitado. Cada cabezal de afeitadoconsiste de un cortador y un protector.Nota: No limpie más de un cortador y protector a lavez, ya que todos son pares. Si accidentalmentecoloca una cuchilla en el protector de afeitadoequivocado,...
Page 52 - Sustitución; Reemplazo de los cabezales de afeitado
52 Español Sustitución Reemplazo de los cabezales de afeitado Para un desempeño de afeitado óptimo, le aconsejamosque reemplace los cabezales de afeitado cada 12 meses.Reemplace los cabezales de afeitado dañadosinmediatamente. Siempre reemplace los cabezales de afeitado concabezales originales de Ph...
Page 53 - Almacenamiento
53 Español Almacenamiento Guarde la afeitadora en la funda.Nota: Siempre deje secar la afeitadora completamenteantes de guardarla en la funda. Pedido de accesorios Para comprar accesorios o piezas de repuesto, visite www.philips.com/parts-and-accessories o acuda a su distribuidor de Philips. También...
Page 54 - Garantía Total de Dos Años
54 Español - Su producto está diseñado y fabricado con materialesy componentes de alta calidad, que pueden serreciclados y reusados. Para obtener información sobrereciclado, comuníquese con las oficinas locales demanejo de desechos o visite www.recycle.philips.com . Garantía Total de Dos Años Philip...
Page 55 - GARANTÍA DE DEVOLUCIÓN DE SU DINERO POR
55 Español GARANTÍA DE DEVOLUCIÓN DE SU DINERO POR 45 DÍAS Para disfrutar de una afeitada cómoda y al ras con sunueva afeitadora para hombres Philips Norelco, laafeitadora se debe usar únicamente por 3 semanas. Estopermite que su cabello y su piel tengan tiempo suficientepara adaptarse al Sistema de...
Page 57 - Empty page before back cover


 Philips SP9871/22 User Manual
 Philips SP9872/15 User Manual
 Philips SP9872/22 User Manual
 Philips SP9882/36 User Manual
 Philips SP9883/35 User Manual
 Philips SP9883/36 User Manual
 Philips SP9885/35 User Manual
 Philips SPA1312 Manual
 Philips SPA2200 Manual
 Philips SPA2210 Manual
 Philips SPA2300 Manual
 Philips SPA2360/10 User Manual