Page 2 - 商品のご確認; 商品をご確認ください。
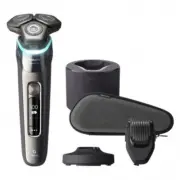
1 本体 収納ケース 充電アダプタ 充電スタンド(ライト付き) ※ S9982/54, S9987/59 のみ フィリップス シェーバーをお買い上げいただき、まことにありがとうござ います。長い間ご 愛 用いただくために、ご 使 用 前にこの取 扱 説 明 書 をよくお読みのうえ、正しくお使いください。 また、お読みになった後は、お使いになる方がいつでも見られると ころに必ず保管してください。 商品のご確認 商品をご確認ください。 ※改良の為、仕様を予告なく変更することがあります。 ヒゲスタイラー ※ S9987/59 のみ クイッククリーン ポッドカートリッジ ※ S9987/59, S99...
Page 3 - お買い上げの商品によって付属品が異なります。
2 ■品番別 付属品一覧 お買い上げの商品によって付属品が異なります。 該当する品番を下記の一覧よりお選びいただき、付属品をご確認ください。 S9987/59 S9982/54 S9986/50 S9985/50 充電アダプタ ● ● ● ● クイッククリーンポッド ● ● ● ● クイッククリーンポッド カートリッジ ● ● ● ● 収納ケース ● ● ● ● クリーニングブラシ ● ● ● ● ヒゲスタイラー (スタイラーコーム付き) ● ー ー ー 充電スタンド (ライト付き) ● ● ー ー S9987/30 S9986/30 S9985/30 S9982/30 充電アダプタ ● ● ...
Page 4 - お買い上げのお客様へ; 初めてご使用になる際は、ご使用前に充電してください。; クイッククリーンポッド付きモデルお買い上げのお客様へ
3 お買い上げのお客様へ 初めてご使用になる際は、ご使用前に充電してください。 ●クイッククリーンポッドカートリッジに関して フィリップスの専用クイッククリーンポッドカートリッジをご使用ください。 フィリップスの専用クリーニング液(ボトルタイプ)を入れてご使用いただく ことはできません。 クイッククリーンポッド付きモデルお買い上げのお客様へ s9987_8sku_jp_a6_cc2020_0314.indd 3 s9987_8sku_jp_a6_cc2020_0314.indd 3 2024/03/14 11:14 2024/03/14 11:14
Page 5 - 目 次; LED
4 目 次 ● ● ● ● ● ● は じ め に ご 使 用 方 法 廃 棄 につ いて 困 っ た と き 英 文 解 説 保 証 商品のご確認 1 ・ 2 目次 4 必ずお守りください 5 ~ 7 各部の名称 8 メインメニューについて 9 LED 表示について 10 ~ 12 過圧防止センサーについて 13 ・ 14 充電のしかた 15 ・ 16 アプリについて 17 ・ 18 シェービングのしかた 19 ~ 21 ポップアップトリマーの使いかた 22 ヒゲスタイラーアタッチメントの使いかた 23 ・ 24 お手入れ方法 25 ~ 28 クイッククリーンポッドの使いかた 29 ...
Page 6 - 警 告; 必ずお守り; 安 全 上 の ご 注 意; 危険; 危 険
5 警 告 ● 電源プラグは、根元まで確実に差し込 んでください。スムーズにコンセントに 電源プラグが装着できない場合、無理 に押し込もうとしないでください。火 災や感電の原因になります。 ● 充電アダプタを傷つけたり、電源コー ドを無理に曲げたり、引っ張ったり、ね じったり、たばねたり、重いものを載せ たり、挟み込んだり、加工したりしない でください。電源コードが破損し、火 災・感電の原因となります。 ● 充電アダプタが傷んだり、コンセント の差込みが緩いときは使用しないで ください。感電・ショート・発火の原 因になります。 ● 刃が破損または故障した場合は、本 製品を使用しないでください...
Page 8 - 使 用 上 の ご 注 意
7 使 用 上 の ご 注 意 1 . フィリップスシェーバーを初めてお使いの方は、剃りかたに慣れるまで 2 ~ 3 週間かかることがあります。 2 . 本体のお手入れは、水またはぬるま湯で行ってください。 60 ℃以上の熱湯では洗浄しないでください。 研磨パッドや研磨剤を含んだ洗剤またはエアダスターは使用しないでください。 3 . 外刃は、薄く仕上げてありますので、刃部を強く押さえたり、硬いものにあてないよう、ていねいに扱っ てください。 4 . シェービングユニットはクリーニング表示(しずくマーク)が表示された場合、 「お手入れ方法」 ( P.25 ~ 28 )に従って掃除してください。 ...
Page 9 - 各部の名称; シェービングユニット
8 各部の名称 ポップアップ トリマー シェービング ユニット 電源ボタン ライトリング (過圧防止センサー) ヒゲスタイラー ※ S9987/59 のみ メニューボタン ハンドル 電源コネクタ受部 電源コネクタ受部 シェービング ユニットリリース ボタン ● シェービングユニット 電源プラグ部 長さ調整ボタン ライト(充電スタンド下部) 充電アダプタ 電源コード部 シェービングヘッド分解図 保持板 内刃 外刃 (替刃品番: SH91 ) シェービング ヘッドホルダー受部 シェービング ヘッドホルダー 電源コネクタ部 トリマー リリーススイッチ 充電スタンド(ライト付き) ※ S9982/54...
Page 11 - 主な表示(本体); 表示について; 初めてお使いになるときや、長い間ご使用; 表示が出るま
10 主な表示(本体) ●充電残量表示 充電残量はディスプレイ上に使用可能量( % )として表示され ます。電源の ON/OFF の際に数秒間点灯します。 ●シェービングガイド表示 シェーバーを正しい動かしかた(円を描く動かしかた)で動か せたかどうかをお知らせします。 「過圧防止センサーについて」 ( P.13 ・ 14 )をご参照ください。 ●トラベルロック機能 (カギがかかっているマークが表示されると電源が入りません) 表示されるカギマークの状態によってトラベルロック機能が 作動しているかどうかをお知らせします。 「メインメニューに ついて」 ( P.9 )をご参照ください。 ● Blu...
Page 13 - 主な表示(クイッククリーンポッド)
12 ●クイッククリーンポッド表示 クイッククリーンポッドによる洗浄をうながすために表示さ れます。 「クイッククリーンポッドの使い方」 ( P.29 ~ 31 )をご 参照ください。 ●クリーニング中断表示 なんらかの理由でクイッククリーンポッドでの洗浄が中断 された場合に表示されます。 「故障かな ? と思ったら」 ( P.36 ・ 37 )をご参照ください。 ●プラグ解除お知らせ表示 充電アダプタに接続している時に電源ボタンを押すと表示さ れます。ご使用の際は、充電スタンドまたは充電アダプタを シェーバー本体から外してご使用ください。 ●クイッククリーンポッドカートリッジ交換表示 クイッ...
Page 14 - シェービングヘッドをあまり強く押し; 過圧防止センサーのモード切り替え
13 過圧防止センサー について シェービングヘッドをあまり強く押し 当 て 過 ぎると、肌 を 傷 める 可 能 性 および本体故障の原因になります。 過圧防止センサー機能とは、シェービングの際、肌に押しつけられているシェービン グヘッドの圧力をお知らせする機能です。圧力の強さに応じてシェーバー本体のラ イトリングが 3 色に点灯します。ライトリングを確認し適切な圧力 ( 緑色で点灯 ) に なるように、シェービングヘッドを押しつける力を調整してください。 ● 押しつける力が弱い場合ライトリングは青色に点灯します。 ● 適切な力でシェービングできている場合ライトリングは緑色に点灯します。 ●...
Page 15 - シェービングアドバイス機能
14 シェービングが終了しシェーバー本体の電源を OFF にすると、ディスプレイに正しくシェービングが できていたかどうかをお知らせする、さまざまな情報が表示されます。 ※この機能のご使用はアプリによる設定が必要です。 シェービングアドバイス機能 ●シェービングヘッドを押しつける力に問題がある シェービングヘッドを押し付ける力が弱すぎたり、強 すぎたりした場合には、 「 ! 」マークとともに過圧防止 センサーアイコンが表示されます。 ▼ 押しつける力が弱い ▼ 押しつける力が強い ●シェーバーの動かし方に問題がある シェーバーを正しく動かせていない ( 円を描くように動かす ) 場合に、 「 ...
Page 16 - 充電のしかた; 注意; 充電アダプタで充電する場合
15 充電のしかた 注意 ●水場や浴室で充電をしないでください。 ●付属の充電アダプタ以外での充電はしないでください。 ● 充電アダプタは、完全に乾いていることを確認してからコンセントに差して ください。 ●濡れた手で充電アダプタを抜き差ししないでください。 充電アダプタで充電する場合 充電残量が 0 の状態で充電アダプタで充電すると、約 5 分間でシェービング 1 回分が 急速充電されます。 クイックチャージ 1. シェーバー本体の電源が OFF になっていることを確認してください。 2. 充電アダプタの電源コネクタ部をシェーバー本体の電源コネクタ受部に差し込みます。 3. ご家庭のコンセン...
Page 17 - 充電スタンドで充電する場合
16 充電スタンドで充電する場合 ※ S9982/54, S9987/59 のみ 1. シェーバー本体の電源が OFF になっていることを確認してく ださい。 2. 充電アダプタの電源コネクタ部を充電スタンドの電源コネクタ 受部に差し込みます。 3. シェーバー本体を充電スタンドにセットします。 ※ 充電の状況は本体ディスプレイにパーセンテージで表示されます。 ※ 充電スタンド下部が、クイックチャージ中は高速で点滅し、通常の充電中は ゆっくり点滅します。充電が完了すると、しばらく経ってから消灯します。 4. 充電後はコンセントから充電アダプタを抜き、シェーバーを充電 スタンドから外します。 ※...
Page 18 - アプリについて; フィリップスメンズグルーミングアプリの機能; シェーバーとスマートフォンのペアリング
17 アプリについて フィリップスメンズグルーミングアプリの機能 本製品はお持ちのスマートフォンと連携し、フィリップスメンズグルーミングアプリをご利用いただく ことができます。本アプリはお客様一人ひとりに合った上手なシェービングの方法をお知らせいた します。理想的なシェービングのため、フィリップスメンズグルーミングアプリをぜひご活用ください。 ※最初はガイドシェービングから始め、シェービング経験を重ねることをおすすめします。シェーバーを正しく取り扱うこ とでより良いシェービング結果を得ることができます。 接続、操作設定 スマートフォンとシェーバーのペアリングに使用します。 シェービングの アド...
Page 19 - の接続とシェービングデータの同期
18 シェーバー本体には、過去のシェービングデータを最大 20 件まで保存できます。データの消失を防ぐため、シェービ ングを行ったら 20 回以内に、シェーバーとペアリングしたスマートフォンを同期させてください。 Bluetooth の接続とシェービングデータの同期 2. シ ェ ー バ ー と ス マ ー ト フ ォ ン の ペ ア リング(初期設定)が完了している場合、 「アプリについて」 ( P.17 )をご参照くだ さい。本製品と操作設定用アプリは自 動的に接続されます。これでフィリッ プスメンズグルーミングアプリを利用 したシェービングができます。 3. スマートフォンのフィリップス...
Page 20 - シェービングの
19 ● モーターの始動時、微弱な振動がシェーバー本体に伝わりますが、問題はありません。 ● ほこりなどで肌が汚れている場合、ふきとってからご使用ください。 ● ご使用の前に外刃の破れや変形がないか確認してください(外刃に破れや変形があると肌を傷つける原 因になります)。 ● ヒゲ剃り以外の目的(頭髪など)には、使用しないでください。 肌が乾いた状態でのシェービングの しかたです。 2. 円を描くようにシェービングヘッドを動かしながら、さまざまな方 向に伸びているヒゲを剃ります。各シェービングヘッドが肌に密着 するように動かしてください。軽く押し当てると、肌に沿ってなめ らかにシェービングでき...
Page 22 - シェービングフォームやシェービングジェ
21 ● モーターの始動時、微弱な振動がシェーバー本体に伝わりますが、問題はありません。 ● ご使用の前に外刃の破れや変形がないか確認してください(外刃に破れや変形があると肌を傷つける原 因になります)。 ● ヒゲ剃り以外の目的(頭髪など)には、使用しないでください。 ● 石けんもお使いいただけますが、肌の上での滑りをよくするため、シェービングフォームやシェービングジェルの使用をお勧めします。 シェービングの しかた(ウェット) シェービングフォームやシェービングジェ ルを使ったシェービングのしかたです。 剃った部分を実感しながら、なめらかな シェービングができます。 1. 顔を濡らし、市販の...
Page 23 - トリマーはヘアーライン、もみあげ、
22 ポップアップトリマーの 使いかた トリマーはヘアーライン、もみあげ、 ヒゲなどを整えるのに便利です。 1. トリマーリリーススイッチを下方向に押し、ポップアップトリマー を開きます。 2. シェーバーの電源を ON にします。 3. カットしたいところに直角に当たるようにトリマーを軽く押 し当て、下方向に動かします。 4. トリマーを鼻の下のエリアに使うこともできます。 注意 強く押し当てると肌を傷めますのでご注意ください。 5. 詰 まりや 損 傷 を防ぐ た め、使 用 後 は 電 源 を OFF にして、必 ず ポップアップトリマーをクリーニングします。 「 お 手 入 れ 方 法...
Page 24 - ヒゲスタイラー; スタイラーコームを取り付けた使いかた
23 ヒゲスタイラーはあごヒゲ、口ヒゲ、も みあげなどを整えるのに便利です。 ※ S9987/59 のみ ヒゲスタイラー アタッチメントの使いかた ヒゲスタイラーアタッチメントにコームを取り付けて、カットの仕上がりが均一になるよう にしたり、違った長さでそろえたりすることができます。ヒゲを剃る前に長いヒゲをカットす るときにも使えます。 ヒゲスタイラーアタッチメントの長さ調節はカット後の仕上がりの長さを示します。設定範 囲は 1 ~ 5 mm です。 1. スタイラーコームをヒゲスタイラーアタッチメントの両側にあ る溝に沿ってスライドさせて取り付けます。 2. 長さ調節レバーを押し、左右に動か...
Page 25 - スタイラーコームなしでの使いかた; ヒゲスタイル
24 1. スタイラーコームをヒゲスタイラーアタッチメントから外します。 ※コームの中心をつかんで、ヒゲスタイラーアタッチメントか ら外します。コームの両側を持って外さないでください。 2. 電源ボタンを押し電源を ON にします。 3. ヒゲの流れに逆らうように動かします。 4. 使用後はヒゲスタイラーをお手入れします。 「ヒゲスタイラーアタッ チメントのお手入れ方法」 ( P.28 )をご参照ください。 スタイラーコームなしでの使いかた 下記のようなさまざまなヒゲスタイルをお楽しみください。 ちょいワル無精ヒゲ フルフェイス ピラミッドヒゲ ドーナツヒゲ ヒゲスタイル コーム無しでもあごヒ...
Page 26 - お手入れ方法; シェービングユニットのお手入れ方法
25 お手入れ方法 注意 ●本製品や部品を食器洗浄機で洗わないでください。 ●シェービングユニットは水洗いできますが、本体は水中に浸けないでください。 ●シェービングユニットを乾燥させる時に、タオルやティッシュペーパーを使用しないでく ださい。刃を傷める場合があります。 シェービングユニットのお手入れ方法 1. シェービングユニット表面 の汚れをぬるま湯で洗い流 します。 2. シェービングユニットリリー ス ボ タ ン を 押 し て、シ ェ ー ビングユニットを開きます。 3. シェービングヘッドホルダー 受 部 の汚 れをぬるま湯で 洗 い流します。 4. シェービングヘッドホルダーの ...
Page 27 - シェービングユニットのお手入れ方法(分解+水洗い)
26 ※1カ月に1度、またはシェーバーの切れ味が落ちてきたら、シェービングヘッドを分解して水洗いすることをおす すめします。 ※シェービングユニットの掃除や着脱は、必ず電源を OFF にしてから行ってください。 シェービングユニットのお手入れ方法(分解+水洗い) 2. シェービングヘッドホルダー内側とシェー ビングヘッドホルダー受 部の汚れを水 で洗い流します。 3. 内刃と外刃を取り外します。詳しい手 順 については、 「刃 の交 換」 ( P.32 )を ご参照ください。 ※ 内刃と外刃は 1 組になっているため、 一度に 2 組以上の内刃と外刃をクリー ニングしないでください。外 刃と内...
Page 28 - ポップアップトリマーのお手入れ方法
27 ポップアップトリマーのお手入れ方法 1. トリマーリリーススイッチを下方向に押 し、ポップアップトリマーを開きます。 4. ポップアップトリマーを閉じます。 3. 水を切り、トリマーを自然乾燥させます。 2. 温水でトリマーを洗浄します。 ※詰まりや損傷を防ぐため、使用後は必ずトリマーをクリーニングしてください。 ※トリマーはタオルやティッシュペーパーなどでふかないでください。刃を傷めたり思わぬけがをすることがあります。 s9987_8sku_jp_a6_cc2020_0314.indd 27 s9987_8sku_jp_a6_cc2020_0314.indd 27 2024/03/14...
Page 29 - ヒゲスタイラーアタッチメントのお手入れ方法
28 ※ヒゲスタイラーアタッチメントは、使用後必ずお手入れしてください。 ※ ヒゲスタイラーアタッチメントはタオルやティッシュペーパーなどでふかないでください。刃を傷めたり思わぬけが をすることがあります。 ※ アタッチメントやコームの着脱は、必ず電源を OFF にしてから行ってください。 ヒゲスタイラーアタッチメントのお手入れ方法 ※ S9987/59 のみ ※コームの中心をつかんで、ヒゲスタイラーアタ ッチメントからはずします。コームの両側を持 ってはずさないでください。 1. コームをヒゲスタイラーアタッチメント からはずします。 4. ヒゲスタイラーアタッチメントの内部を ぬるま湯また...
Page 30 - クイッククリーンポッドの準備
29 クイッククリーンポッドの 使いかた 2 1 1. クイッククリーンポッドのキャップを回し て取り外します。 2. クイッククリーンポッドカートリッジのキャッ プを回して取り外します。 3. シールのつまみを持ち上げ、シールを端か ら引き上げてクイッククリーンポッドカート リッジから剥がします。 クイッククリーンポッドの準備 4. クイッククリーンポッドカートリッジのつま みの円状の部分を押して、つまみのツメを 外します。 5. クイッククリーンポッドカートリッジをクイッ ククリーンポッドに入れます。 6. クイッククリーンポッドのキャップを再度取 り付け、カチッと音がするまで時計回りに ...
Page 31 - クイッククリーンポッドの使いかた
30 ※ シェービングフォームやシェービングジェルの使用後に、クイッククリーンポッドで洗浄をされる場合は、ぬる ま湯または水でしっかりと洗い流してください。 ※ クイッククリーンポッドには、専 用のクイッククリーンポッドカートリッジ 以 外は使 用しないでください。 専 用のクイッククリーンポッドカートリッジに水を足したり専 用のクイッククリーンポッドカートリッジの 代わりに水や他の液を使用すると、故障の原因となりますのでお止めください。 ※ フィリップスの専用クイッククリーンポッドカートリッジをご使用ください。フィリップスの専用クリーニング液 (ボトルタイプ)を入れてご使用いだだくことはでき...
Page 32 - クイッククリーンポッドカートリッジの交換
31 クイッククリーンポッドにクイッククリーンポッドカートリッジ 交 換 お 知らせ が 表 示されるか、以 下 の 表 に 示 す 交 換 時 期 が 来 たら 、 クイッククリーンポッドカートリッジを交換してください。 クイッククリーンポッドカートリッジの交換 使用頻度 使用回数 クイッククリーンポッド カートリッジの交換時期 毎日 約 30 回 月に1回 週に 2 ~ 3 回 約 20 回 2 カ月に1回 週に1回 約 13 回 3 カ月に1回 月に1回 約 3 回 3 カ月に1回 1. クイッククリーンポッドのキャップを回して 取り外します。 2. クイッククリーンポッドカートリッジの...
Page 33 - 刃の交換
32 1 2 替刃( SH91 )の交換 ※シェービング性能を維持するために、刃は 2 年ごとに交換することをおすすめします。 ※交換する際は、必ずフィリップス社製の専用の替刃(品番: SH91 )とお取り替えください。 ※刃を交換する際は、電源を OFF にしてください。 1 2 2. シェービングヘッドホルダー裏側の保持 板を反時計回りに回して取り外します。 他の保持板も同様に外します。 3. シェービングヘッドホルダーから内刃と 外刃を取り外します。 4. 新しい替刃をシェービングホルダーに取 り付けます。 5. 保持板をシェービングヘッドに再度取り 付け、時計回りに回します。 6. シ...
Page 34 - 保管のしかた; シェーバーやアタッチメントを保管する前
33 保管のしかた ※室温 5 ℃~ 35 ℃の環境で保管してください。 ※直射日光の当たる場所には保管しないでください。 ※夏場、車の中には放置しないでください。 シェーバーやアタッチメントを保管する前 にきちんと乾燥させてください。 ● シェーバーを収納ケースに入れて保管してください。 s9987_8sku_jp_a6_cc2020_0314.indd 33 s9987_8sku_jp_a6_cc2020_0314.indd 33 2024/03/14 11:14 2024/03/14 11:14
Page 35 - リチウムイオン充電池のリサイクルについて
34 シェーバーを 廃棄するとき リチウムイオン充電池のリサイクルについて このシェーバーはリチウムイオン充電池を使用しています。 リチウムイオン充電池はリサイクル可能な貴重な資源です。 使用済みの製品の廃棄の際はリチウムイオン充電池を取り出してください。 取り出したリチウムイオン充電池は各自治体の廃棄方法に従い廃棄するか リサイクル協力店にお持ちください。 製品を廃棄する際は、リチウムイオン充電池を取り出し、充電池を取り外した後の製品については、 各自治体の廃棄方法に従い廃棄してください。 Li-ion ※ 充電池の修理交換は できません。 注意 ●製品を廃棄するとき以外は、絶対に本体を分解...
Page 36 - 充電池の取り外しかた
35 充電池の取り外しかた 電源の ON ・ OFF を何回か繰り返し完全に動作しなくなるまで充電池を放電させてから、行ってく ださい。 ※ 充電池を取り出した後の製品の廃棄については、お住まいの地域の条例などに従って処分してください。 1. シェービングユニットを 回して本体から取り外 します。 5. モーターユニットをスラ イドさせて本 体から取 り外します。 2. 本体下部のネジをマイナ スドライバーで外します。 6. 側面のツメを外し、モー ターユニットの透明カバ ーを取り外します。 3. 本体背面のトリマーとフ ロントパネルの間にマイ ナスドライバーを差し込 んで、フロントパネルを ...
Page 37 - 故障かな?と思ったら、; シェーバーの電源ボタンを押しても作動しない; シェーバー本体のモーターは回転しているが、内刃が回転しない
36 故障かな? と思ったら 故障かな?と思ったら、 お調べください。 シェーバーの電源ボタンを押しても作動しない ● シェーバーに充電アダプタが接続されている場合は充電アダプタを外してください。 ● 充電がされていない場合は約 1 時間、充電をしてください。 ● カギマーク が表示される場合はロックを解除してください。 ● 刃が破損している場合は交換をしてください。 充電しても使用時間が極端に短い ● シェーバーが完全に止まるまで作動させてから、もう一度充電してください。 それでも改善されないときは、充電池の寿命です。 だんだん切れ味が悪くなった ● シェービングヘッド部が汚れていないか確認...
Page 39 - English; nglish
English 38 3 1 2 4 5 6 7 8 9 11 12 13 14 16 17 10 15 E nglish S9987/59, S9982/54, S9986/50, S9985/50, S9987/30, S9986/30, S9985/30, S9982/30 s9987_8sku_en_a6_cc2020_1222.indd 38 s9987_8sku_en_a6_cc2020_1222.indd 38 2023/12/22 16:03 2023/12/22 16:03
Page 40 - Introduction; Congratulations on your purchase and welcome to; Important safety information; Only use the product for its intended purpose. Read
English 39 Introduction Congratulations on your purchase and welcome to Philips! To fully benefit from the support that Philips offers, register your product at www.philips.com/welcome or via the app. Important safety information Only use the product for its intended purpose. Read this important inf...
Page 41 - Warning
English 40 Warning - Keep the supply unit and the charging stand dry. - This shaver is waterproof. It is suitable for use in the bath or shower and for cleaning under the tap. For safety reasons, the shaver can therefore only be used without cord. - Do not modify the supply unit. - This appliance ca...
Page 43 - Philips Quick Clean Pod Cartridge fluid
English 42 - If batteries are damaged or leaking, avoid contact with the skin or eyes. If this occurs, immediately rinse well with water and seek medical care. Philips Quick Clean Pod Cartridge fluid - Keep out of reach of children. - Do not swallow. - In case of eye contact, rinse with plenty of wa...
Page 44 - General description; Main Menu; Icon
English 43 General description 1 Pop-up trimmer 2 Trimmer release slide 3 Shaving unit 4 Shaving unit release button 5 On/off button 6 Menu button 7 Socket for small plug 8 Charging stand 9 Supply unit 10 Small plug 11 Pouch 12 Philips Quick Clean Pod Cartridge 13 Quick Clean Pod 14 Cleaning brush 1...
Page 45 - Switching the shaver on; Warnings and notifications
English 44 The display shows that your shaver is not paired to your smartphone (see 'Pair the shaver and smartphone'). The display shows that your shaver is paired to your smartphone (see 'Pair the shaver and smartphone'). - Switching the shaver on Press the on/off button to switch on the shaver. Ic...
Page 46 - Cleaning the shaver; Unplug for use; What is my shaver telling me?; When your shaver is switched on
English 45 - Cleaning the shaver Icon Meaning A reminder: clean your shaver in the quick cleaning pod (see 'How do I use the Quick Clean Pod?'). A reminder: clean your shaver. The cleaning process is in progress and the display shows the remaining cleaning time as a clock, or in seconds, if you pres...
Page 47 - blue
English 46 - When you apply too much pressure, the light ring lights up orange. When your shaver is switched on, you can customize the type of pressure feedback you receive. 1 Switch on the shaver. 2 Press the menu button to toggle through the pressure feedback options. The table below shows what pr...
Page 48 - When your shaver is switched off; Main menu; through the four menu functions by pressing the; Remaining battery charge; This menu item shows the remaining battery; Motion Control sensor; your shaver by pressing and holding the menu
English 47 When your shaver is switched off Main menu While your shaver is switched off, you can also toggle through the four menu functions by pressing the menu button. - Remaining battery charge This menu item shows the remaining battery charge. - Motion Control sensor This menu item shows the mot...
Page 49 - This shaver is equipped with; higher to connect to the app. When you have; Post-shave feedback (this feature can be; from your shave on the handle directly after you; Pressure Guard sensor feedback; The pressure you applied during the shave was
English 48 - Bluetooth From this menu item, you can unpair your shaver and smartphone. For information about the benefits of pairing your shaver and smartphone, see 'Benefits of connecting your shaver to the app'. Note: Make sure your smartphone is equipped with Bluetooth ® 4.2 or higher. This shave...
Page 50 - Motion Control sensor feedback; How do I charge my appliance?
English 49 - The pressure you applied during the shave was too low. Motion Control sensor feedback - When your shaving motion can be improved, the Motion Control sensor icon displays with an exclamation mark. Perfect Routine feedback - When both the pressure and the motion applied during the shave i...
Page 51 - Charging with the supply unit; Specific models only:
English 50 Note: You cannot use the appliance while it is charging. Charging with the supply unit 1 Make sure that the appliance is switched off. 2 Insert the small plug into the appliance and put the supply unit in the wall socket. - While the appliance is charging, an animation appears on the disp...
Page 52 - How do I use my appliance and the; Warning: Always check the appliance and; Shaving
English 51 - After approximately 5 minutes, the light ring rotates slower. The battery now contains enough energy for one full shave. - As the appliance continues to charge, the light ring becomes brighter and rotates slower. - When the appliance is fully charged, the light ring lights up fully and ...
Page 53 - shaving unit regularly during your shave to ensure
English 52 Note: If you are shaving with gel or foam, rinse the shaving unit regularly during your shave to ensure that it continues to glide smoothly over your skin. 3 Use the narrow sides of the shaving unit to shave in hard-to-reach areas such as along your jawline and under your nose. 4 Switch o...
Page 54 - Skin adaptation period; Cleaning reminder
English 53 Skin adaptation period Your first shaves may not bring you the result you expect and your skin may even become slightly irritated. This is normal. Your skin needs time to adapt to any new shaving system. Follow the advice provided by the app and shave regularly (at least 3 times a week) w...
Page 55 - Using the click-on attachments; Using the beard styler attachment with
English 54 4 You can also use the trimmer under your nose. 5 Switch off the appliance and clean the trimmer after each use to prevent clogging and damage (see 'How do I clean my appliance and the attachments?'). 6 Close the trimmer. Using the click-on attachments Note: The accessories supplied may v...
Page 56 - Using the beard styler attachment without; Storage
English 55 3 Press the length selector and then push it to the left or right to select the desired hair length setting. 4 Switch on the appliance. 5 Move the appliance upwards while you exert gentle pressure. Make sure the front of the comb is in full contact with the skin. 6 Switch off the applianc...
Page 57 - How do I clean my appliance and the; How do I use the Quick Clean Pod?; What does the icon on my Quick Clean Pod; Becomes visible on the; Preparing the Quick Clean Pod for use; Lift the tab on the seal and pull it by the corner
English 56 stand (if supplied) or in the Philips Quick Clean Pod (if supplied). How do I clean my appliance and the attachments? How do I use the Quick Clean Pod? What does the icon on my Quick Clean Pod mean? Icon Behavior Meaning Becomes visible on the Quick Clean Pod The Quick Clean Pod Cartridge...
Page 58 - Press the small circular piece on the handle of the; Do not tilt the Quick Clean Pod to prevent leakage.; Using the Quick Clean Pod; Pod (see 'How do I clean my appliance and the; Always shake excess water off the shaver before; Place
English 57 4 Press the small circular piece on the handle of the Quick Clean Pod Cartridge to break the snap hook on the handle. 5 Place the Quick Clean Pod Cartridge into the Quick Clean Pod. 6 Put the top of the Quick Clean Pod back onto the base and turn it clockwise until you hear a click. Do no...
Page 59 - Replacing the Quick Clean Pod Cartridge; Frequency of use
English 58 3 Let the shaver air-dry completely in the Quick Clean Pod before storing it. Replacing the Quick Clean Pod Cartridge Replace the Quick Clean Pod Cartridge immediately when the cartridge replacement icon on the Quick Clean Pod becomes visible or follow the table below. Frequency of use Cy...
Page 60 - Place a new Quick Clean Pod Cartridge into the; Cleaning the shaver under the tap; Never dry the shaving unit with a towel or tissue,; Switch off the shaver. Press the release button to
English 59 4 Place a new Quick Clean Pod Cartridge into the Quick Clean Pod. Scan the QR code to the left or visit www.philips.com/cleaning-cartridge to order replacement Quick Clean Pod Cartridges. Clean the appliance and the attachments after each use for optimal performance. Cleaning the shaver u...
Page 61 - Thorough cleaning
English 60 5 Rinse the shaving head holder under a warm tap. 6 Carefully shake off excess water and let the shaving head holder air-dry completely. 7 Close the shaving unit. Thorough cleaning We advise you to clean the shaving heads thoroughly once a month or when the shaver does not shave as well a...
Page 62 - Cleaning the pop-up trimmer; Never dry the trimmer teeth with a towel or
English 61 5 Clean the cutter and guard under the tap. 6 Shake off excess water. 7 Put the shaving heads back into the shaving unit. For detailed instructions, see 'How do I replace the shaving heads?'. 8 Insert the hinge of the shaving head holder into the slot in the top of the shaving unit and cl...
Page 63 - Cleaning the click-on attachments; Cleaning the beard styler attachment; Never dry the cutting unit with a towel or
English 62 Cleaning the click-on attachments Never dry the trimmer or beard styler attachments with a towel or tissue, as this may damage the trimming teeth. The accessories supplied may vary for different products. The box shows the accessories that have been supplied with your product. Cleaning th...
Page 64 - When the comb is dry, re-attach it to the beard; How do I connect my shaver and smartphone?; Benefits of connecting your shaver to the app; Real-time motion and pressure feedback and; Pair the shaver and smartphone
English 63 7 When the cutting unit is dry attach it to the beard styler attachment. 8 When the comb is dry, re-attach it to the beard styler. How do I connect my shaver and smartphone? Benefits of connecting your shaver to the app You can use the app for a variety of personalization and coaching opt...
Page 65 - Synchronize your shaves
English 64 2 Make sure Bluetooth on your smartphone is switched on. 3 Switch on the shaver to activate Bluetooth. 4 Open the app and follow the instructions to start the pairing process. 5 Once paired, the shaver and app connect automatically when the app is open and Bluetooth on your phone is switc...
Page 66 - Unpair the shaver and smartphone; Unpair the shaver; How do I replace the shaving heads?; two
English 65 Unpair the shaver and smartphone You can pair your shaver with only one smartphone at a time. To unpair your shaver from your smartphone (e.g. when you get a new smartphone), follow these steps: Unpair the shaver 1 Toggle through the menu items by pressing the menu button until you reach ...
Page 67 - Replacing the shaving heads; Switch off the shaver.
English 66 Always replace the shaving heads with original Philips shaving heads. Replacing the shaving heads 1 Switch off the shaver. 2 Press the release button on the shaving unit and pull the shaving head holder off the shaving unit. 3 Turn the retaining rings anticlockwise and remove them. Place ...
Page 68 - Ordering accessories
English 67 - Each retaining ring has two recesses that fit exactly into the projections of the shaving head holder. Turn the ring clockwise until your hear a click to indicate that the ring is fixed. 7 Insert the hinge of the shaving head holder into the slot in the top of the shaving unit and close...
Page 69 - Shaver; Problem
English 68 Shaver Problem Possible cause Solution I cannot connect the shaver. You have not downloaded the app. Download the app. Your shaver and smartphone are not paired yet. Pair your shaver and smartphone following the instructions in the app. The first pairing attempt failed. Unpair your shaver...
Page 71 - Philips Quick Clean Pod
English 70 Problem Possible cause Solution Hairs or dirt obstruct the shaving heads. Clean the shaving heads thoroughly. Water is leaking from the bottom of the appliance. During cleaning, water may collect between the inner body and the outer shell of the appliance. This is normal and not dangerous...
Page 72 - Further guidance; For more guidance and videos on your S9000 shaver,; Recycling; This symbol means that electrical products and
English 71 The shaver battery is empty. Charge the shaver before using the Philips Quick Clean Pod. My Philips Quick Clean Pod is overflowing. You regularly use the Philips Quick Clean Pod after rinsing the shaver but not shaking off excess water. Shake off excess water after rinsing the shaving hea...
Page 73 - Removal of built-in rechargeable battery; The built-in rechargeable battery must only be; Twist the shaving head to remove it from the
English 72 Removal of built-in rechargeable battery The built-in rechargeable battery must only be removed by a qualified professional when the appliance is discarded. Before removing the battery, make sure that the appliance is disconnected from the wall socket and that the battery is completely em...
Page 74 - Insert a flat-head screwdriver in between the
English 73 3 Insert a flat-head screwdriver in between the front panel and the trimmer and tilt until the front panel is released. Bend the front panel forward. 4 Insert a flat-head screwdriver in between the power unit and backshell to release the snap connections. 5 Slide the power unit out of the...
Page 75 - Lift out out the battery holder and cut the; Trademarks
English 74 8 Lift out out the battery holder and cut the wires with a pair of cutting pliers or scissors. 9 Bend the battery tags aside with a pair of cutting pliers or a screwdriver. 10 Remove the rechargeable battery. Be careful, the battery strips are sharp. Trademarks Apple, the Apple logo, iPad...
Page 76 - 保証書と修理サービスについて
75 保証と アフターサービス 保 証 期 間 お買い上げ日から 2 年間 対 象 部 分 本体、充電アダプタ、充電スタンド (シェービングユニット、クイック クリーンポッド、収納ケース、ヒゲ スタイラー、クリーニングブラシ、 その他アクセサリーを除く) 〈保証書・最終ページに付属〉 ● 保証書は、必ず「お買い上げ日・販売店名」等の記入を お確かめのうえ、販売店から受け取っていただき内容 をよくお読みのあと大切に保管してください。 【補修用性能部品の保有期間】 ● 補修用性能部品の保有期間は製造打ち切り後 6 年です。 ● 性能部品とは、その製品の機能を維持するために必要な部品です。 【ご不明...
Page 77 - ご使用の時、このような症状はありませんか?; 株式会社
76 品 番 S9982/30 S9985/30 S9986/30 S9987/30 S9982/54 S9985/50 S9986/50 S9987/59 ハ ン ド ル 品 番 S9982 S9985 S9986 S9987 替 刃 品 番 SH91 充 電 アダプタ 品 番 HQ8505 本 体 寸 法 ( 高 さ×幅×奥 行 ) 180 × 65 × 70mm 本 体 質 量 約 226g 電 源 方 式 充電式(専用充電アダプタ使用) 定 格 電 圧 AC100-240V 、 50/60Hz 充 電 時 間 約1時間 使 用 時 間 約 60 分 使 ...
Page 79 - 無料修理規定; 〈無料修理規定〉
78 無料修理規定 〈無料修理規定〉 1. 取扱説明書、本体貼付ラベル等の注意書に従った正常な使用状態で保証期間内に故障した場合には、無料修理します。 2. 保証期間内に故障して無料修理をお受けになる場合には、フィリップスサポー トセンターにお問い合わせください。 3. ご贈答品の修理に関するご相談は、フィリップスサポートセンターにお問い合わせください。 4. 保証期間内でも次の場合には有料修理になります。 ○ 1 使用上の誤り及び不当な修理や改造による故障及び損傷。 ○ 2 お買い上げ後の輸送、移動、落下等による故障及び損傷。 ○ 3 火災、地震、水害、落雷、その他の天災地変、公...
Page 80 - フィリップスサポートセンター; 製品の使用方法や修理に関するお問い合わせ; My Philips; 登録のご案内
キ リ ト リ 線 キ リ ト リ 線 フィリップス 電動シェーバー 保証書 C E R T I F I C A T E O F P U R C H A S E この保証書は、 「無料修理規定」記載内容で無料修理を行うことをお約束するものです。お買い上げの日か ら下記期間中に故障が発生した場合は、フィリップスサポートセンターにお問い合わせください。 お客 様にご 記 入 いただいた個 人 情 報( 保 証 書の控え)は 、株 式 会 社フィリップス・ジャパンのホーム ページ http://www.philips.co.jp/ http://www.philips.co.jp/ に掲載されている...


 Philips S9982/55 User Manual
 Philips S9983/55 User Manual
 Philips S9985/50 User Manual
 Philips S9986/59 User Manual
 Philips S9986/63 User Manual
 Philips S9987/55 User Manual
 Philips SA018302 Manual
 Philips SA1ARA Manual
 Philips SA1ARA08 Manual
 Philips SA1MXX02KN Manual
 Philips SA1OPS16 Manual