Page 4 - To reduce the risk of electric shock:; WARNING; To reduce the risk of burns, fire, electric shock, or injury; ENGLISH
IMPORTANT SAFETY INSTRUCTIONS When using an electric appliance, basic precautions should always be followed, including the following:Read all instructions before using this appliance. DANGER To reduce the risk of electric shock: 1. Do not reach for a corded shaver/SmartClean System that has fallen i...
Page 5 - IMPORTANT: The power plug contains a transformer.
2. Use this shaver/SmartClean System for its intended household use as described in this manual. Do not use attachments or a cleaning cartridge not recommended by Philips North America LLC. 3. Never operate this shaver/SmartClean System if it has a damaged cord or charging plug, if it is not working...
Page 7 - Table of Contents
7 Table of Contents Features ............................................................ 8LED Display ................................................... 11Before First Use ........................................... 13Charging ......................................................... 13Recharging ...
Page 8 - Features
8 ENGLISH Features MultiPrecision Blade System Super Lift and Cut Action Shaver Head Release Button • Hair Chamber captures shaven hair Electronic On/Off Button Turbo+ Mode Cleaning Reminder Indicator Replacement Shaving Heads Indicator Travel Lock ‘Unplug for use’ Indicator Battery Display • Batter...
Page 9 - How the Unique Philips Norelco Lift and Cut
9 SmartClick Precision Trimmer Travel Case Automatic Worldwide Voltage 100V to 240V AC Rechargeable 1-hour full charge for up to 60 min. of cordless shaving time Quick Charge - For one shave Cordless - To shave without a cord Full 2-Year Warranty 45-Day Money-Back Guarantee ENGLISH How the Unique Ph...
Page 11 - LED Display
ENGLISH 11 LED Display ◗ Remove any sticker or protective foil from the display before using shaver. ◗ The display provides the following information: ◗ Charging Indicator C - Quick charge: When you connect the power cord to an electrical outlet the lights of the batter y charge indicator light up o...
Page 12 - Low Battery Indicator
ENGLISH 12 ◗ Low Battery Indicator C - When the batter y is almost empty (5 or less shaving minutes left), the bottom charging light blinks orange and you will hear a beep. C ◗ 'Unplug For Use' Indicator The 'unplug for use' symbol will blink to remind you the shaver is connected to the outlet. C ◗ ...
Page 13 - Before First Use; Important; Charging
ENGLISH 13 C ◗ Travel Lock The shaver is equipped with a travel lock function. You can use the travel lock function when you are going to store the shaver for a longer period or if you are going to take the shaver with you when traveling. See ‘Travel Lock’ section for instructions on how to use this...
Page 14 - The power cord will automatically conver t to; Charging Shaver with SmartClean
ENGLISH 14 ◗ This shaver will not operate corded directly from the electrical outlet. ◗ Do not charge the shaver in a pouch or travel case. C 1 Connect cord directly to shaver and connect the power plug into any 100V to 240V AC outlet. Use only the power cord provided. ◗ An adaptor plug may be neces...
Page 15 - The shaver will only fit in the Smar tClean System
ENGLISH 15 C 2 Press the top cap down to open the SmartClean System. C 3 Hold the shaver head side down above the shaver holder with the display facing the shaver holder. C 4 Place the shaver into the holder (1), push shaver back (2) and press down the top cap to connect the shaver (3) (click). The ...
Page 16 - Recharging; When batteries are empty, recharging the shaver; Put It To The Test & Shaving Tips
ENGLISH 16 Recharging 1 Recharging requires one full hour. Recharge when the display indicates the battery is almost empty. Quick Charge When batteries are empty, recharging the shaver for 5 minutes gives enough energy for one cordless shave. Put It To The Test & Shaving Tips ◗ 21 Day Trial and ...
Page 17 - How To Shave With An Electric Shaver; The display lights up briefly to show the remaining
ENGLISH 17 ◗ If you are still not convinced after 21 days, Philips Norelco will refund you the full purchase price as long as the request is received within 45 days of purchase. How To Shave With An Electric Shaver C ◗ This symbol on the shaver indicates that the shaver can be used in the bath or sh...
Page 18 - Wet Shaving; You can also use the shaver on a wet face with
ENGLISH 18 2 Stretch your skin with your free hand so blades can lift and cut whiskers. Gently press shaver to skin so the floating heads can follow the contours of your face. DO NOT press too hard. Too much pressure can pinch the skin into the combs. 3 Turn shaver OFF by pressing the on/off button ...
Page 19 - NOTE: Rinse the shaver under the tap regularly
ENGLISH 19 C 3 Rinse the shaving unit under the tap to ensure that the shaving unit glides smoothly over your skin. 4 Press the on/off button once to switch on the shaver. C 5 Move the shaving heads in circular movements over your skin. NOTE: Rinse the shaver under the tap regularly to ensure that i...
Page 20 - Using the SmartClick Trimmer; NOTE: Do not turn the shaving unit while you
ENGLISH 20 Turbo+ Mode 1 Turn shaver ON by pressing the on/off button once. C 2 Press the Turbo+ button once if you want to shave areas of dense hair more quickly. C 3 Move the shaving heads over your skin in circular movements. 4 Turn off the Turbo+ mode by pressing the Turbo button once. Using the...
Page 21 - NOTE: Do not turn or twist the trimmer while
ENGLISH 21 3 Turn shaver ON. C 4 Hold trimmer to exact hairline desired. Move trimmer downward with gentle pressure. 5 Trim beard, moustache or sideburns using the trimmer. 6 Turn shaver OFF when finished. 7 Thoroughly clean the trimmer (see ‘Cleaning’). C 8 Pull the trimmer straight off the shaver....
Page 22 - Travel Lock
ENGLISH 22 Travel Lock If you are going to store the shaver for a longer time period or if traveling, it is possible to lock the shaver. The travel lock prevents the shaver from being switched on by accident. Activating the travel lock C 1 Press the ON/OFF button for 3 seconds. ◗ The travel lock sym...
Page 23 - Cleaning
ENGLISH 23 Cleaning ◗ Always clean your shaver after each use. ◗ Regular cleaning guarantees better shaving results. ◗ Never remove or replace shaving unit while motor is on. ◗ Do not apply pressure to shaving head combs. Do not touch shaving heads with hard objects as this may dent or damage precis...
Page 24 - BE CAREFUL TO TEST WATER FIRST SO AS
ENGLISH 24 1 Turn the shaver ON by pressing the on/off button once. C 2 For best results rinse the shaving unit by running under hot water for a few minutes. 3 Turn the shaver OFF. C 4 Press the Shaver Head Release Button to open the shaving unit. 5 Rinse the hair chamber under the tap. C 6 Rinse th...
Page 25 - Preparing SmartClean System For
ENGLISH 25 Preparing SmartClean System For Use CAUTION: Keep cleaning cartridge(s) out of reach of children. Do not take internally. Avoid contact with eyes. In case of eye contact, thoroughly flush with cold water. If irritation persists, get medical attention. Important ◗ For optimal cleaning resu...
Page 26 - To prevent leaking, do not tilt the Smar tClean
ENGLISH 26 C 1 Place the SmartClean System on a flat, level surface. To prevent leaking, do not tilt the Smar tClean System. C 2 While holding the SmartClean System with one hand, press the button located on the side of the SmartClean System (1) and lift the SmartClean System (2). C 3 Remove the sea...
Page 27 - When the Smar tClean System is ready for use,; Cleaning the Shaver in the
ENGLISH 27 When the Smar tClean System is ready for use, do not move appliance to prevent leakage. Cleaning the Shaver in the SmartClean System ◗ If the shaver does not contain enough power for one (1) shave, the SmartClean System may not work properly. Charge the shaver in the SmartClean System bef...
Page 30 - Cleaning the Trimmer; Tip: For optimal trimmer performance, lubricate; Replacing the Shaving Heads
ENGLISH 30 Cleaning the Trimmer Clean the trimmer after each use. C 1 Attach the trimmer to shaver. 2 Turn shaver ON. C 3 Rinse the trimmer under hot water. BUT BE CAREFUL TO TEST WATER FIRST SO AS NOT TO BURN OR SCALD HANDS. C 4 Turn the shaver OFF. Shake off excess water and allow trimmer to air d...
Page 31 - Replacement Shaving Heads; DO NOT discard the retaining ring.
ENGLISH 31 Replacement Shaving Heads Indication C ◗ The shaving unit symbol lights up continuously when the shaver is turned off to remind you to replace your shaving heads to obtain optimal shaving results. C 1 Press the shaver head release button to open the shaving unit. C 2 Pull the shaving head...
Page 33 - Replacing the SmartClean System; You can safely pour the cleaning fluid down the
ENGLISH 33 Replacing the SmartClean System Cleaning Cartridge C ◗ For optimal cleaning results, replace the cleaning cartridge when the replacement indicator blinks orange or every 3 months if used weekly. C 1 While holding the SmartClean System with one hand, press the cartridge release button on t...
Page 34 - Maintenance; NOTE: DO NOT place or clean any par ts of the
ENGLISH 34 C 6 While holding the SmartClean System with one hand, gently push the top part of the SmartClean System back down. You will hear a 'click'. When the Smar tClean System is ready for use, do not move appliance to prevent leakage. This shaver/Smar tClean System has no other user-ser viceabl...
Page 35 - Storage
ENGLISH 35 Storage ◗ The shaver can be placed in the travel case or SmartClean System for safe storage. ◗ Be sure shaver is turned off. Remove cord from outlet before storing in a safe, dry location where it will not be crushed, banged, or subject to damage. ◗ Do not wrap power cord around shaver or...
Page 36 - Disposal
ENGLISH 36 Disposal C ◗ This Philips Norelco shaver contains a rechargeable lithium-ion battery which must be disposed of properly. ◗ Contact your local town or city officials for battery disposal information or call 1-800-822-8837 or www.call2recycle.org for battery drop-off locations. ◗ Your produ...
Page 37 - Accessories
ENGLISH 37 Accessories C ◗ Replacement Shaving Heads Model SH50 - For maximum shaver performance, replace your Philips Norelco shaving heads once a year. ◗ SmartClick Beard Styler Model RQ111 - Philips Norelco Smar tClick Beard Styler ◗ Replacement Cleaning Cartridge Model JC302 - Philips Norelco Sm...
Page 39 - Lea las instrucciones antes de utilizar este producto.; PELIGRO; Para reducir el riesgo de descarga eléctrica:; ADVERTENCIA; Para reducir el riesgo de quemaduras, incendios, descargas; ESPAÑOL
INSTRUCCIONES IMPORTANTES DE SEGURIDAD Cuando utilice un artefacto eléctrico, tome las precauciones básicas. Lea las instrucciones antes de utilizar este producto. PELIGRO Para reducir el riesgo de descarga eléctrica: 1. No intente tocar una afeitadora enchufada ni un sistema SmartClean que haya caí...
Page 41 - GARANTÍA DE DEVOLUCIÓN DEL IMPORTE; No intente abrir el artefacto para cambiar la batería.; CONSERVE ESTAS; IMPORTANTE: el conector de energía contiene un
GARANTÍA DE DEVOLUCIÓN DEL IMPORTE DE 45 DÍAS Use su nueva afeitadora Philips Norelco para hombres como método exclusivo de afeitado durante tres semanas para disfrutar de un afeitado cómodo y al ras. Esto permite que su pelo y su piel se acostumbren al sistema de afeitado Philips Norelco. Si despué...
Page 42 - Tabla de contenido
ESPAÑOL 42 Tabla de contenido Tabla de contenido Características .............................................. 43Pantalla LED .................................................. 46Antes del primer uso .................................. 48Carga ...........................................................
Page 43 - Características
ESPAÑOL 43 Características Tecnología DynamicFlex Functionamiento del sistema Super Lift & Cut Boton de liberación del cabezal de afeitado • Cámara de recolección de vello recoge el pelo afeitado Electrónico Botón de encendido/apagado Modo Turbo+ Recortadorio de limpieza Reemplazo Cabezales de a...
Page 46 - Pantalla LED; Quite cualquier adhesivo o lámina protectora
ESPAÑOL 46 Pantalla LED ◗ Quite cualquier adhesivo o lámina protectora de la pantalla antes de usar la afeitadora. ◗ La pantalla proporciona la siguiente información: ◗ Indicador de carga C - Carga rápida: Cuando se conecta el cable de alimentación a una toma de corriente eléctrica, las luces del in...
Page 47 - Capacidad de carga disponible en la batería
ESPAÑOL 47 ◗ Capacidad de carga disponible en la batería C - La cantidad de luces de carga encendidas indican la capacidad de carga disponible en la batería. ◗ Indicador de nivel bajo de batería C - Cuando la batería está casi vacía (5 minutos o menos de tiempo de afeitado), la luz de carga inferior...
Page 48 - Antes del primer uso; Importante
ESPAÑOL 48 C ◗ Recordadorio de limpieza Para conseguir un rendimiento óptimo de afeitado, recomendamos limpiar la afeitadora después de CADA uso. El grifo parpadeante le recordará que la unidad de afeitado debe limpiarse. Esto ocurre después de cada afeitado. C ◗ Bloqueo para viajes La afeitadora es...
Page 49 - Carga; El cable de alimentación transformará
ESPAÑOL 49 Carga ◗ La carga, recarga o el almacenamiento del producto a temperaturas inferiores a los 4,5°C (40°F) o superiores a los 35°C (95°F) reduce la vida útil de las baterías. ◗ La carga o recarga requiere una hora completa. ◗ Una afeitadora completamente cargada otorga un tiempo de afeitado ...
Page 50 - Cargar la afeitadora con el sistema
ESPAÑOL 50 2 La pantalla de la afeitadora indicará que se está cargando. 3 La carga requiere una hora completa. Una afeitadora completamente cargada ofrece un tiempo de afeitado sin cable de hasta 60 minutos. Cargar la afeitadora con el sistema SmartClean 1 Conecte el enchufe pequeño al sistema Smar...
Page 51 - La afeitadora calza en el sistema Smar tClean en; Recarga
ESPAÑOL 51 C 4 Coloque la afeitadora en el soporte (1), empuje hacia atrás la afeitadora (2) y presione hacia abajo la tapa superior para conectar la afeitadora (3) (hasta que oiga un "clic"). La afeitadora calza en el sistema Smar tClean en una sola dirección. 5 El indicador de batería parp...
Page 52 - Carga rápida; Cuando las baterías estén vacías, al cargar la; Prueba y consejos de afeitado
ESPAÑOL 52 Carga rápida Cuando las baterías estén vacías, al cargar la afeitadora durante 5 minutos tendrá suficiente energía para un afeitado sin cable. Prueba y consejos de afeitado ◗ Proceso de prueba y adaptación de 21 días. Es un hecho que la piel y la barba tardan algún tiempo en acostumbrarse...
Page 53 - Cómo usar una afeitadora eléctrica; La pantalla se enciende brevemente para mostrar
ESPAÑOL 53 Cómo usar una afeitadora eléctrica C ◗ Este símbolo indica que la afeitadora puede utilizarse en el baño o en la ducha. ◗ Asegúrese de que el sistema SmartClean no se moje ni que esté cerca del agua. ◗ Por razones de higiene, la afeitadora sólo debe ser utilizado por una sola persona. ◗ U...
Page 54 - Afeitado húmedo; También puede utilizar la afeitadora sobre el
ESPAÑOL 54 3 Pulse una vez el botón de encendido/ apagado para apagar la afeitadora. 4 Limpie la afeitadora después de cada uso (consulte el capítulo "Limpieza"). C 5 Coloque la afeitadora en el sistema de SmartClean para proteger los cabezales. Afeitado húmedo También puede utilizar la afei...
Page 55 - NOTA: enjuague regularmente la afeitadora
ESPAÑOL 55 55 C 5 Mueva los cabezales de afeitado sobre la piel con movimientos circulares. NOTA: enjuague regularmente la afeitadora con el agua del grifo para garantizar que se siga deslizando suavemente sobre la piel. 6 Séquese la cara y limpie cuidadosamente la afeitadora después de cada uso (co...
Page 56 - Uso del recortador SmartClick; NOTA: no gire la unidad de afeitado mientras la
ESPAÑOL 56 C 3 Desplace los cabezales de afeitado sobre la piel, haciendo movimientos circulares. 4 Desactivar el modo turbo+ pulsando el botón turbo una vez. Uso del recortador SmartClick C 1 Extraiga la unidad de afeitado de la afeitadora. NOTA: no gire la unidad de afeitado mientras la extrae de ...
Page 57 - Sistema de bloqueo
ESPAÑOL 57 7 Limpie a fondo el recortador después de su uso (consulte el capítulo ‘Limpieza’). C 8 Extraiga el recortador de la afeitadora. NOTA: no gire ni tuerza la unidad de recor te mientras la extrae de la afeitadora. C 9 Inserte la muesca levantada de la unidad de afeitado en la ranura de la p...
Page 58 - Activación del sistema de bloqueo; La afeitadora se desbloquea automáticamente
ESPAÑOL 58 Activación del sistema de bloqueo C 1 Pulse el botón de encendido/apagado durante 3 segundos. ◗ El símbolo del sistema de bloqueo se ilumina constantemente y parpadea el símbolo de bloqueo. 2 Se ha activado el sistema de bloqueo. Desactivación del sistema de bloqueo 1 Pulse el botón de en...
Page 59 - Limpieza
ESPAÑOL 59 Limpieza ◗ Limpie siempre la afeitadora después de cada uso. ◗ La limpieza frecuente asegura mejores resultados en el afeitado. ◗ Nunca retire ni reemplace la unidad de afeitado con el motor en funcionamiento. ◗ No aplique presión a los peines del cabezal de afeitado. No toque los cabezal...
Page 60 - PRIMERO COMPRUEBE LA TEMPERATURA
ESPAÑOL 60 ◗ La limpieza frecuente asegura mejores resultados en el afeitado. ◗ Al enjuagar los cabezales de afeitado, es posible que salga agua por la base de la afeitadora. Esto es normal. 1 Pulse el botón de encendido/apagado una vez para encender la afeitado. C 2 Enjuague la unidad de afeitado b...
Page 61 - Preparación para el uso del sistema
ESPAÑOL 61 7 Elimine cuidadosamente el exceso de agua y deje que el soporte del cabezal de afeitado se seque completamente al aire. 8 Cierre el soporte del cabezal de afeitado. Preparación para el uso del sistema SmartClean PRECAUCIÓN: Mantenga los cartuchos de limpieza fuera del alcance de los niño...
Page 62 - Para evitar fugas, no se debe inclinar el sistema
ESPAÑOL 62 ◗ El conector de carga convierte los 100-240 V de CA a menos de 24 V de CC. ◗ Coloque el sistema SmartClean en una superficie plana, estable y resistente a los líquidos para evitar cualquier fuga. Se debe tener cuidado de no inclinar ni mover el sistema SmartClean cuando esté listo para u...
Page 63 - Cuando el sistema Smar tClean esté listo para; Limpieza de la afeitadora en el
ESPAÑOL 63 ◗ Cuando el filtro del cartucho de limpieza esté lleno, el símbolo de reemplazo parpadea para indicar que debe reemplazarse el cartucho de limpieza. Consulte la sección "Reemplazo del cartucho del sistema SmartClean". C 4 Coloque el cartucho de limpieza en el sistema SmartClean. C...
Page 67 - Limpieza del recortador; Sugerencia: Para obtener un rendimiento óptimo
ESPAÑOL 67 Limpieza del recortador Limpie el recortador después de cada uso. C 1 Coloque el recortador en la afeitadora. 2 Encienda la afeitadora. C 3 Enjuague el recortador con agua caliente. PRIMERO COMPRUEBE LA TEMPERATURA DEL AGUA PARA EVITAR QUEMADURAS EN LAS MANOS. C 4 Apague la afeitadora. El...
Page 68 - Reemplazo de los cabezales de afeitado
ESPAÑOL 68 Reemplazo de los cabezales de afeitado ◗ Reemplace los cabezales de afeitado una vez al año para obtener resultados óptimos de afeitado. ◗ Reemplace los cabezales de afeitado dañados o desgastados solo con los cabezales para la afeitadora Philips Norelco modelo SH50. Indicación de reempla...
Page 70 - NOTA: Cada anillo de retencion tiene dos huecos; Reemplazo del cartucho de limpieza
ESPAÑOL 70 7 Repita el proceso para los otros dos conjuntos de cuchillas y peines. C NOTA: Cada anillo de retencion tiene dos huecos y dos proyecciones que encaja exactamente en las proyecciones y huecos sopor te del cabezal de afeitado. Asegurese de que se oye un 'clic' que indica el anillo de rete...
Page 72 - Esta afeitadora y el sistema Smar tClean no; Mantenimiento; Siempre retire la afeitadora del sistema
ESPAÑOL 72 Esta afeitadora y el sistema Smar tClean no contienen ninguna otra pieza que pueda ser reparada por el usuario. Para solicitar asistencia, comuníquese al 1-800-243-3050. Mantenimiento ◗ Siempre retire la afeitadora del sistema SmartClean antes de proceder a la limpieza del aparato. ◗ El s...
Page 73 - Almacenamiento
ESPAÑOL 73 Almacenamiento ◗ La afeitadora puede colocarse en la funda de viaje o en sistema SmartClean para un almacenamiento seguro. ◗ Asegúrese de que la afeitadora esté apagada. Desenchufe el cable de la toma de corriente antes de guardarla en un lugar seguro y seco, donde no se aplaste, golpee n...
Page 74 - Asistencia; Para obtener asistencia, visite nuestro sitio; llame al número gratuito; La información en línea está disponible las 24
ESPAÑOL Asistencia ◗ Para obtener asistencia, visite nuestro sitio Web: www.philips.com/support o llame al número gratuito 1-800-243-3050 ◗ La información en línea está disponible las 24 horas, los 7 días de la semana. 74 4222_002_7353_1_DFU-Booklet_A6_v6.indd 74 06/06/17 16:14
Page 75 - Eliminación
ESPAÑOL Eliminación C ◗ Esta afeitadora Philips Norelco contiene una batería recargable de iones de litio que debe desecharse de manera adecuada. ◗ Para obtener información sobre la forma de desechar las baterías, comuníquese con las autoridades locales, llame al número 1-800-822-8837 o visite el si...
Page 76 - Accesorios
ESPAÑOL Accesorios C ◗ Reemplazo de los cabezales de afeitado Modelo SH50 - para obtener el máximo rendimiento de afeitado, reemplace los cabezales de la afeitadora Philips Norelco una vez al año. ◗ Modelador SmartClick Modelo RQ111 - modelador Smar tClick de Philips Norelco ◗ Reemplazo del cartucho...
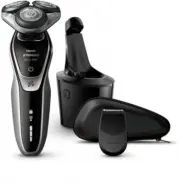


 Philips S5586/66 Quick Guide
 Philips S5587/10 Quick Guide
 Philips S5587/30 User Manual
 Philips S5588/30 User Manual
 Philips S5588/38 Quick Guide
 Philips S5589/38 User Manual
 Philips S5880/50 Quick Guide
 Philips S5883/10 Quick Guide
 Philips S5884/35 Quick Guide
 Philips S5884/38 Quick Guide
 Philips S5884/69 Quick Guide
 Philips S5885/10 Quick Guide