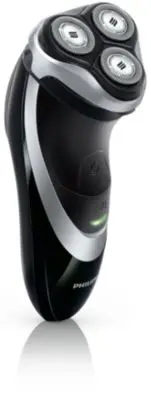
Page 4 - Introduction; Note: You can find the type number on the back of the shaver.; Important; ENGLISH
4 Introduction Congratulations on your purchase and welcome to Philips! To fully benefit from the suppor t that Philips offers, register your product at www.philips.com/welcome. Please read this user manual, as it contains information about the wonderful features of this shaver as well as some tips ...
Page 7 - Using the shaver; - Your skin may need 2 or 3 weeks to get accustomed to the Philips; Cleaning and maintenance; - Regular cleaning guarantees better shaving performance.
Using the shaver Note: You can also use the shaver directly from the mains. Simply connect the shaver to the mains.Shaving 1 Press the on/off button once to switch on the shaver. 2 Move the shaving heads over your skin. Make circular movements. - Your skin may need 2 or 3 weeks to get accustomed to ...
Page 8 - Cleaning the shaving unit under the tap; - Rinse the hair chamber and the inside of the shaving unit.; Cleaning the shaving unit with the cleaning brush
Cleaning the shaving unit under the tap 1 Switch off the shaver and disconnect it from the mains. 2 Press the release button to open the shaving unit. 3 Rinse the shaving unit and hair chamber under a hot tap for 30 seconds. Be careful with hot water. Always check if the water is not too hot, to pre...
Page 11 - The shaving head symbol lights up orange continuously.
Storage - Put the protection cap on the shaver after use to prevent damage and to avoid dir t accumulation in the shaving heads. - PT866 only: Store the appliance and the accessories in the pouch. Replacement For maximum shaving performance, we advise you to replace the shaving heads ever y two year...
Page 12 - Accessories; To retain the top performance of your shaver, make sure you clean it; Shaving heads; - We advise you to replace your shaving heads ever y two years. Always; Cleaning
Note: Make sure that the projections of the shaving heads fit exactly into the recesses. 7 Put the retaining frame back into the shaving unit (A) and turn the lock clockwise (B). 8 Insert the lug of the new shaving unit into the slot in the top of the shaver. Then close the shaving unit. Note: If th...
Page 14 - Troubleshooting; Problem
Troubleshooting This chapter summarises the most common problems you could encounter with the appliance. If you are unable to solve the problem with the information below, contact the Consumer Care Centre in your countr y. Problem Possible cause Solution The shaver does not shave as well as it used ...
Page 15 - INDONESIA
15 Pendahuluan Selamat atas pembelian Anda dan selamat datang di Philips! Untuk memanfaatkan sepenuhnya dukungan yang ditawarkan Philips, daftarkan produk Anda di www.philips.com/welcome. Baca petunjuk pengguna ini yang berisi informasi mengenai berbagai fitur menarik ser ta sejumlah saran agar lebi...
Page 19 - - Bilas wadah rambut dan bagian dalam unit cukur.; Membersihkan unit cukur dengan sikat pembersih
Catatan: Air mungkin merembes keluar dari soket di bagian bawah alat cukur saat Anda membilasnya. Hal ini normal dan tidak berbahaya karena semua komponen elektronik tersimpan dalam unit daya yang tertutup rapat dalam alat cukur.Membersihkan unit cukur di bawah keran 1 Matikan alat cukur dan lepaska...
Page 21 - Membersihkan pemangkas dengan sikat pembersih; Bersihkan pemangkas setiap kali Anda selesai menggunakannya.
Catatan: Pastikan bahwa kepala pencukur tepat masuk ke dalam wadahnya. 7 Masukkan kembali rangka penahan ke dalam unit cukur (A) lalu putar kunci searah jarum jam (B). 8 Masukkan tonjolan pada unit pencukur ke dalam selot di bagian atas alat cukur. Kemudian tutup unit pencukur. Catatan: Jika unit cu...
Page 22 - setetes minyak mesin jahit setiap enam bulan.; Penyimpanan; - Pasang tutup pelindung pada alat cukur setelah digunakan untuk; Penggantian; Untuk performa pencukuran yang maksimal, kami sarankan agar Anda; Pengingat penggantian; perlu diganti. Ganti kepala cukur yang rusak segera.
Tip: Agar performa pemangkas optimal, lumasi gigi-gigi pemangkas dengan setetes minyak mesin jahit setiap enam bulan. Penyimpanan - Pasang tutup pelindung pada alat cukur setelah digunakan untuk mencegah kerusakan dan menghindari kotoran menumpuk pada kepala pencukur. - Hanya PT866: Simpan alat dan ...
Page 25 - Masalah
6 Keluarkan baterai. Berhati-hatilah, strip baterai tajam.Jangan menghubungkan lagi alat cukur ke listrik setelah baterai isi ulang dikeluarkan. Garansi dan dukungan Jika Anda memerlukan informasi atau dukungan, silakan kunjungi www.philips.com/support atau baca pamflet garansi internasional. Jika P...
Page 26 - 충전기에 물이 묻지 않도록 주의하십시오.; 경고; 어린이가 제품을 가지고 놀지 못하도록 지도해 주십시오.; 한국어
26 소개 필립스 제품을 구입해 주셔서 감사합니다! 필립스가 드리는 다양한 혜택을 받으실 수 있도록 www.philips.co.kr/membership 에서 제품을 등록하십시오.이 사용자 설명서에는 이 면도기의 뛰어난 기능에 대한 정보뿐 아니라 면도를 보다 쉽고 즐겁게 할 수 있는 방법이 나와 있으므로 참고하시기 바랍니다. 제품정보 (그림 1) 1 보호 캡2 쉐이빙 유닛3 쉐이빙 유닛 열림 버튼 4 면도기 전원 버튼 5 면도헤드 표시등6 충전 표시등7 충전대 (PT866*/PT739*)8 파우치 (PT866*)9 어댑터10 청소용 ...
Page 27 - 주의; 면도기는 절대로 물에 담그지 마십시오.; 기준 준수
주의 - 면도기는 절대로 물에 담그지 마십시오. - 면도기를 목욕이나 샤워 중에 사용하지 마십시오. - 80°C보다 뜨거운 물로 면도기를 세척하지 마십시오. - 뜨거운 물을 사용하는 경우 주의하십시오. 화상을 입지 않도록 물이 너무 뜨겁지 않은지 항상 확인하십시오. - 이 면도기는 식기세척기에서 세척할 수 없습니다. - 헹구는 동안 면도기 하단의 전원 소켓에서 물이 흘러나올 수 있습니다. 이러한 현상은 정상이며, 모든 전자부품은 면도기 내부에 밀봉되어 있으므로 위험하지 않습니다. - 다칠 수 있으므로 면도기 또는 기타 다른 부품이 ...
Page 29 - 트리머를 사용하여 구레나룻 및 콧수염을 다듬을 수 있습니다.; 청소 및 유지관리
면도기 사용법 참고: 면도기를 전원에 직접 연결하여 바로 사용할 수도 있습니다. 면도 1 전원 버튼을 한 번 눌러 면도기를 켜십시오. 2 면도헤드를 피부에 대고 원을 그리듯이 고루 문지르십시오. - 필립스 면도 시스템에 피부가 익숙해지려면 약 2-3주 정도 걸립니다. 3 전원 버튼을 한 번 눌러 면도기를 끄십시오. 4 면도기를 세척하십시오 (‘청소 및 유지관리’란 참조). 트리밍 (PT919/PT866/PT860/PT845/PT739/PT737/PT731 모델만 해당) 트리머를 사용하여 구레나룻 및 콧수염을 다듬을 수 있습니다. 1...
Page 30 - 수돗물로 쉐이빙 유닛 청소; 수염받이와 쉐이빙 유닛 내부를 헹구십시오.; 청소용 브러시로 쉐이빙 유닛 청소
수돗물로 쉐이빙 유닛 청소 1 면도기의 전원을 끄고 전원 코드를 뽑으십시오. 2 열림 버튼을 눌러서 쉐이빙 유닛을 여십시오. 3 쉐이빙 유닛과 수염받이를 뜨거운 수돗물로 30초 동안 헹구십 시오. 뜨거운 물을 사용하는 경우 주의하십시오. 화상을 입지 않도록 물이 너무 뜨겁지 않은지 항상 확인하십시오. - 수염받이와 쉐이빙 유닛 내부를 헹구십시오. - 쉐이빙 유닛의 외부를 헹구십시오. 4 쉐이빙 유닛을 닫고 면도기를 흔들어 물기를 털어내십시오. 남은 물기를 털어낼 때 쉐이빙 유닛이 부딪히지 않도록 주의하십시오. 쉐이빙유닛과 수염받이를...
Page 33 - 면도헤드 표시등이 주황색으로 켜져 있습니다.
보관 - 면도헤드가 손상되는 것을 방지하고 먼지가 쌓이지 않도록 사용 후 면도기의 보호 캡을 씌우십시오. - PT866만 해당: 제품과 액세서리를 파우치에 넣어 보관하십시오. 교체 최고의 면도 성능을 위해서는 2년마다 면도헤드를 교체하는 것이 좋습니다. 교체 알림 면도헤드를 교체해야 하면 면도헤드의 표시등이 켜집니다. 손상된 면도헤드는 즉시 교체하십시오.면도헤드는 정품 HQ8 필립스 면도헤드 또는 HQ9 (PT919 모델만 해당) 필립스 면도헤드로만 교체하십시오. 1 면도헤드 표시등이 주황색으로 켜져 있습니다. 2 면도기의 전원을...
Page 34 - 액세서리
참고: 면도헤드의 돌출된 부분이 오목한 곳에 꼭 맞게 끼워져 있는지 확인하십시오. 7 지지대를 쉐이빙 유닛에 다시 넣고 (A) 잠금 장치를 시계 방향으로 돌리십시오 (B). 8 새 쉐이빙 유닛을 면도기 상단의 홈에 넣으십시오. 그 후 쉐이빙 유닛을 닫으십시오. 참고: 쉐이빙 유닛이 부드럽게 닫히지 않는 경우, 면도헤드가 올바르게 끼워져있는지와 지지대가 잠겨 있는지를 확인하십시오. 9 전원 버튼을 5초간 누르고 있으면 면도기의 교체 알림이 재설정되고 주황색 불이 꺼집니다. 액세서리 면도기 성능을 최상으로 유지하려면 정기적으로 청소하고...
Page 35 - 면도기를 전원 코드에서 분리하십시오.; 보증 및 지원; 를 방문하거나 제품 보증서를; 보증 제한
환경 - 수명이 다 된 제품은 일반 가정용 쓰레기와 함께 버리지 마시고 지정된 재활용 수거 장소에 버리십시오. 이런 방법으로 환경 보호에 동참하실 수 있습니다. - 내장형 충전식 면도기의 배터리에는 환경을 오염시키는 물질이 들어 있습니다. 면도기를 버리기 전에 항상 면도기에서 배터리를 분리하여 지정된 수거함에 버려 주십시오. 배터리는 지정된 배터리 수거함에 버리십시오. 배터리를 분리하기 어려울 경우 필립스 서비스 센터에 면도기를 가져오시면 배터리를 분리하여 안전한 방법으로 폐기해 드립니다. 면도기의 충전식 배터리 분리 면도기를 폐기...
Page 36 - 문제 해결; 문제점
문제 해결 이 장은 제품을 사용하면서 가장 일반적으로 경험하게 되는 문제와 그 해결 방법을 제시합니다. 발생한 문제를 아래 정보로 해결할 수 없는 경우에는 필립스 고객 상담실로 문의하십시오. 문제점 가능한 원인 해결책 면도기가 예전처럼 잘 작동하지 않습니다. 쉐이빙헤드가 손상 또는 마모되었습니다. 면도헤드를 교체하십시오 (‘교체’란 참조). 긴 체모가 쉐이빙헤드에 걸렸을 수 있습니다. 면도헤드를 하나씩 청소하십시오 (‘청소 및 유지관리’란 참조). 면도헤드를 제대로 끼우지 않았습니다. 면도헤드의 돌출된 부분이 오목한 곳에 꼭 맞게 ...
Page 37 - BAHASA MELAYU
37 Pengenalan Tahniah atas pembelian anda dan selamat datang ke Philips! Untuk mendapat manfaat sepenuhnya daripada sokongan yang ditawarkan oleh Philips, daftarkan produk anda di www.philips.com/welcome. Sila baca manual pengguna ini, kerana ia mengandungi maklumat mengenai ciri hebat pencukur ini ...
Page 40 - Menggunakan pencukur; sistem pencukuran Philips.; Pembersihan dan penyelenggaraan; anda daripada melecur.
Menggunakan pencukur Nota: Anda boleh gunakan pencukur terus daripada sesalur kuasa. Anda hanya perlu menyambung pencukur kepada sesalur kuasa.Pencukuran 1 Tekan butang hidup/mati sekali untuk menghidupkan pencukur. 2 Gerakkan kepala pencukur merentasi kulit anda. Buat gerakan membulat. - Kulit anda...
Page 41 - - Bilas ruang rambut dan bahagian dalam unit pencukur.; Membersihkan unit pencukur dengan berus pembersih
Nota: Air mungkin bocor keluar daripada soket di bahagian bawah pencukur ketika anda membilasnya. Ini adalah normal dan tidak merbahaya kerana semua bahagian elektronik dilindungi di dalam unit kuasa yang kedap di dalam pencukur.Membersihkan unit pencukur di bawah paip 1 Matikan pencukur dan putuska...
Page 44 - setitis minyak mesin jahit sekali dalam setiap enam bulan.; mengelakkan kerosakan dan agar kotoran tidak terkumpul di dalam; mengganti kepala pencukur setiap dua tahun.; Peringatan penggantian; Simbol kepala pencukur menyala cahaya jingga secara berterusan.
Petua: Untuk prestasi perapian yang optimum, lincirkan gigi perapi dengan setitis minyak mesin jahit sekali dalam setiap enam bulan. Penyimpanan - Pasang tukup pelindung pada pencukur selepas menggunakannya untuk mengelakkan kerosakan dan agar kotoran tidak terkumpul di dalam kepala pencukur. - PT86...
Page 46 - Putuskan sambungan pencukur daripada sesalur kuasa.
Aksesori Untuk mengekalkan prestasi terbaik pencukur anda, pastikan anda membersihkannya dengan tetap dan mengganti kepala pencukurnya pada masa yang disyorkan. Kepala pencukur - Kami menasihatkan anda agar mengganti kepala pencukur anda setiap dua tahun. Pastikan anda menggantinya dengan Kepala Pen...
Page 47 - mengeluarkan bateri boleh cas semula.; Jaminan dan sokongan
6 Tanggalkan bateri. Berhati-hati, jalur bateri sangat tajam.Jangan sambungkan semula pencukur ke sesalur kuasa setelah anda mengeluarkan bateri boleh cas semula. Jaminan dan sokongan Jika anda memerlukan maklumat atau sokongan, sila lawati www.philips.com/support atau baca risalah jaminan sedunia y...
Page 48 - ภาษาไทย
48 ขอมูลเบื้องตน ขอแสดงความยินดีที่คุณสั่งซื้อและยินดีตอนรับสผลิตภัณฑของ Philips! เพื่อใหคุณไดรับประโยชนอยางเต็มที่จากบริการที่ Philips มอบให โปรดลงทะเบียนผลิตภัณฑของคุณที่ www.philips.com/welcome โปรดอานคมือการใชเลมนี้เนื่องจากมีเนื้อหาเกี่ยวกับคุณสมบัติที่ดีเยี่ยมของเครื่องโกนหนวด...
Page 59 - Giới thiệu; Lưu ý: Bạn có thể tìm thấy số kiểu máy ở mặt sau của máy cạo râu.; Quan trọng; TIẾNG VIỆT
59 Giới thiệu Chúc mừng bạn đã mua được sản phẩm Philips mới và chào mừng bạn đến với Philips! Để có được lợi ích đầy đủ từ sự hỗ trợ do Philips cung cấp, hãy đăng ký sản phẩm tại www.philips.com/welcome. Vui lòng đọc hướng dẫn sử dụng này, vì nó có những thông tin về các tính năng tuyệt với của m...
Page 61 - Lưu ý: Sau khoảng 30 phút đèn báo sạc pin sẽ tắt để tiết kiệm năng lượng.
Chỉ báo sạc Pin yếu - Khi pin gần hết (khi chỉ còn không quá 5 phút cạo râu), đèn báo sạc sẽ bắt đầu nhấp nháy màu da cam. - Khi tắt máy cạo râu, đèn báo sạc tiếp tục nhấp nháy màu da cam thêm một vài giây. Sạc nhanh - Khi bạn bắt đầu sạc pin đã hết, đèn báo sạc pin lần lượt nhấp nháy màu cam và m...
Page 62 - Sử dụng máy cạo râu; Lưu ý: Bạn cũng có thể sử dụng máy cạo râu nối trực tiếp vào nguồn điện.; Vệ sinh và bảo dưỡng máy; Lưu ý: Nước có thể rò rỉ từ đui cắm ở phần dưới của máy cạo râu khi bạn rửa
Sử dụng máy cạo râu Lưu ý: Bạn cũng có thể sử dụng máy cạo râu nối trực tiếp vào nguồn điện. Chỉ cần cắm máy cạo râu vào ổ điện.Cạo râu 1 Bấm nút on/off (bật/tắt) một lần để bật máy cạo râu. 2 Di chuyển đầu cạo trên da. Di chuyển xoay vòng. - Da của bạn có thể cần 2 hoặc 3 tuần để làm quen với máy ...
Page 63 - Làm sạch bộ phận cạo dưới vòi nước; Rửa sạch khoang chứa râu tóc và bên trong bộ phận cạo.; Làm sạch bộ phận cạo bằng bàn chải làm sạch
Làm sạch bộ phận cạo dưới vòi nước 1 Tắt máy cạo râu và rút phích cắm của máy ra khỏi ổ điện. 2 Bấm nút để mở bộ phận cạo ra. 3 Rửa bộ phận cạo và khoang chứa râu tóc dưới vòi nước nóng trong 30 giây. Nên thận trọng với nước nóng. Luôn kiểm tra xem nước có quá nóng không để tránh làm bỏng tay b...
Page 65 - Làm sạch tông đơ bằng bàn chải làm sạch (chỉ có ở kiểu; Làm sạch tông đơ sau mỗi lần sử dụng.
7 Lắp khung giữ trở lại bộ phận cạo (A) và xoay khóa theo chiều kim đồng hồ (B). 8 Lắp vấu của bộ phận cạo vào khe ở phần trên cùng của máy cạo râu. Sau đó đóng bộ phận cạo. Lưu ý: Nếu bộ phận cạo không khớp sát với nhau, hãy kiểm tra xem bạn đã lắp các đầu cạo đúng vị trí chưa và khung giữ ...
Page 66 - Biểu tượng đầu cạo sẽ sáng liên tục màu da cam.
Lưu trữ sữa - Lắp nắp bảo vệ vào máy cạo râu sau khi sử dụng để tránh hư hỏng và để tránh sự tích tụ bụi bẩn trong đầu cạo. - Chỉ có ở kiểu PT866: Bảo quản thiết bị và phụ kiện trong túi. Thay thế phụ kiện Để có hiệu suất cạo tối đa, chúng tôi khuyên bạn nên thay đầu cạo hai năm một lần. Bộ phận n...
Page 67 - Phụ kiện; Để đạt hiệu cạo râu suất tối đa, đảm bảo bạn vệ sinh máy cạo râu thường; Đầu dao cạo; Chúng tôi khuyên bạn thay đầu cạo hai năm một lần. Luôn thay bằng; Vệ sinh
Lưu ý: Phải đảm bảo là các đầu cạo vừa sát vào khung trống. 7 Lắp khung giữ trở lại bộ phận cạo (A) và xoay khóa theo chiều kim đồng hồ (B). 8 Lắp vấu của bộ phận cạo mới vào khe ở phần trên cùng của máy cạo râu. Sau đó đóng bộ phận cạo. Lưu ý: Nếu bộ phận cạo không khớp sát với nhau, hãy ki...
Page 69 - Cách khắc phục sự cố; Sự cố
Cách khắc phục sự cố Chương này tóm tắt các sự cố thường gặp với thiết bị này. Nếu bạn không thể giải quyết được vấn đề sau khi tham khảo thông tin dưới đây, hãy liên hệ với Trung Tâm Chăm Sóc Khách Hàng của Philips tại nước bạn. Sự cố Nguyên nhân có thể Giải pháp Máy cạo râu không hoạt động tốt ...
Page 70 - 簡介; 注意: 您可以在電鬍刀背面找到型號。; 重要事項; 繁體中文
70 簡介 恭喜您購買本產品並歡迎加入飛利浦!請於 www.philips.com/ welcome 註冊您的產品,以善用飛利浦提供的支援。 請閱讀本使用手冊,其中內容不僅說明本電鬍刀的超強功能, 也提供一些秘訣,幫助您享受更加輕鬆、愉快的刮鬍過程。 一般說明 (圖 1) 1 保護蓋 2 電鬍刀組 3 電鬍刀組釋放按鈕 4 電鬍刀開/關 (On/Off) 按鈕 5 電鬍刀刀頭符號 6 充電指示燈 7 充電座 (PT866*/PT739*) 8 收納袋 (PT866*) 9 轉換器 10 清潔刷 11 鬢角刀釋放滑鈕 (僅限 PT919/PT866/PT860/PT845/PT739/ PT73...
Page 71 - 充電
- 請在溫度介於 10°C 到 35°C 之間的環境中使用、充電及收納 本產品。 - 使用時,請務必將電鬍刀置於防水表面。 - 僅可使用隨附的轉換器、充電器和配件。 - 請務必為電鬍刀蓋上保護蓋以防損壞,並避免污垢累積在刀頭中。 符合標準 - 本飛利浦產品符合所有電磁波 (EMF) 暴露的相關標準和法規, 可以直接以水龍頭的自來水安全清洗。 一般 - 本產品配備有自動電壓選擇器,適用 100 到 240 伏特的插座電 壓。 - 轉換器可將 100-240 伏特的電壓轉換為低於 24 伏特的安全低 電壓。 充電 PT919/PT866/PT860:電鬍刀完全充飽電約需 1 小時。 PT845/...
Page 72 - 電池充滿電; 當電池充飽電力後,充電指示燈會持續亮綠燈。; 使用轉換器充電; 您的皮膚可能需要 2 到 3 週的時間才能完全適應飛利浦電鬍刀
電池充滿電 - 當電池充飽電力後,充電指示燈會持續亮綠燈。 注意: 大約 30 分鐘後,充電指示燈會熄滅以節省能源。 使用轉換器充電 1 將小插頭插上電鬍刀。 2 將轉換器插入插座。 , 充電指示燈會顯示電鬍刀的充電狀態 (請參閱本單元的 「充電指示」一節)。 使用充電座充電 (僅限 PT866/PT739) 1 將小插頭插入充電座。 2 將轉換器插入插座。 3 請將電鬍刀置於充電座中。 , 充電指示燈會顯示電鬍刀的充電狀態 (請參閱本單元的 「充電指示」一節)。 使用本電鬍刀 注意: 您可以直接插電使用本電鬍刀,只要將電鬍刀連接到電源即可。 刮鬍 1 按一下開/關 (On/Off) 按鈕,...
Page 73 - 您可以使用鬢角刀修整鬢角與鬍髭。; 清潔與維護; 為達到最佳刮鬍性能,請於每回刮鬍之後清潔電鬍刀。; 在水龍頭下清潔電鬍刀組
鬢角刀 (僅限 PT919/PT866/PT860/PT845/PT739/PT737/PT731) 您可以使用鬢角刀修整鬢角與鬍髭。 1 按一下開/關 (On/Off) 按鈕,開啟電鬍刀電源。 2 將鬢角刀開關往下推即可開啟鬢角刀。 , 這時即可開始修整。 3 修整完後請收回鬢角刀,再關閉電鬍刀的電源。 清潔與維護 絕對不可使用壓縮空氣、鋼絲絨、磨蝕性的清潔劑或侵蝕性的液體 (例如汽油或丙酮) 清潔本產品。 - 為達到最佳刮鬍性能,請於每回刮鬍之後清潔電鬍刀。 - 定期清潔以維持較佳的刮鬍效果。 - 為達到最理想的清潔效果,我們建議您使用飛利浦噴霧清潔劑 (HQ110)。 - 請小心使用熱水...
Page 74 - 使用清潔刷清潔電鬍刀組
- 清洗電鬍刀組的鬍渣室及內部。 - 沖洗電鬍刀組的外側。 4 蓋上電鬍刀組,並將多餘的水甩乾。 甩乾多餘的水份時,請小心別讓電鬍刀組撞到任何東西。 切勿使用毛巾或紙巾擦乾電鬍刀組和鬍渣室,因為此舉可能傷害電鬍刀刀頭和連接軸。 5 再次打開電鬍刀組並保持開啟,讓電鬍刀完全晾乾。 使用清潔刷清潔電鬍刀組 1 關閉電鬍刀的電源,並將電鬍刀拔離電源插座。 2 按下釋放鈕,打開電鬍刀組。 3 將電鬍刀組從電鬍刀抽出。 4 以逆時針方向轉動鎖扣 (A),並移除固定架 (B)。 繁體中文 74
Page 77 - 電鬍刀刀頭符號會持續亮起橘光。
收納 - 使用後請為電鬍刀蓋上保護蓋以防損壞,並避免污垢累積在電鬍 刀刀頭中。 - 限 PT866:請將本產品及配件收藏於收納袋中。 更換 為達到最佳刮鬍性能,我們建議您每兩年更換一次電鬍刀刀頭。 更換提醒 電鬍刀刀頭符號會亮起,表示電鬍刀刀頭需要更換。請立即更換損 壞的電鬍刀刀頭。 更換電鬍刀刀頭時,限使用原廠 HQ8 或 HQ9 (僅限 PT919) 飛利浦電鬍刀刀頭。 1 電鬍刀刀頭符號會持續亮起橘光。 2 關閉電鬍刀的電源。將電鬍刀拔離電源插座。 3 按下釋放鈕,打開電鬍刀組。 4 將電鬍刀組從電鬍刀抽出。 5 以逆時針方向轉動鎖扣 (A),並移除固定架 (B)。 6 取下電鬍刀刀頭...
Page 78 - 配件; 若要維持電鬍刀的最佳效能,請務必定期清潔電鬍刀,並於建議的; 電鬍刀刀頭; 我們建議您每兩年更換一次電鬍刀刀頭。更換時請務必使用; 清潔
注意: 確定電鬍刀刀頭的凸出部分準確地安裝於凹處。 7 將固定架裝回電鬍刀組上 (A),並以順時針方向轉動鎖扣 (B)。 8 將新的電鬍刀組的突耳插入電鬍刀頂端的凹槽,然後蓋上電鬍刀 組。 注意: 若電鬍刀組無法順利關上,請檢查是否已妥善插入電鬍刀刀頭,並將固定架確實鎖好。 9 按住開/關 (On/Off) 按鈕 5 秒鐘以重設電鬍刀更換提醒。 橘色指示燈會熄滅。 配件 若要維持電鬍刀的最佳效能,請務必定期清潔電鬍刀,並於建議的 時間更換電鬍刀刀頭。 電鬍刀刀頭 - 我們建議您每兩年更換一次電鬍刀刀頭。更換時請務必使用 HQ8 或 HQ9 (僅限 PT919) 飛利浦電鬍刀刀頭 清潔 - 使用...
Page 81 - 简介; 注意: 您可以在剃须刀的背面找到型号。; 注意事项; 简体中文
81 简介 感谢您的惠顾,欢迎光临飞利浦!为了您能充分享受飞利浦提供的 支持,请在 www.philips.com/welcome 上注册您的产品。 请阅读本用户手册,手册包含有关此剃须刀各种功能的信息以及一 些使用技巧,让您的剃须体验更轻松更舒适。 基本说明 (图 1) 1 保护盖 2 剃毛刀头部件 3 剃须刀头部件释放按钮 4 剃须刀开/关按钮 5 剃须刀头符号 6 充电指示灯 7 充电座 (PT866*/PT739*) 8 收纳袋 (PT866*) 9 适配器 10 清洁刷 11 修剪器释放滑块(仅限于 PT919/PT866/PT860/PT845/PT739/ PT737/PT731...
Page 82 - 充电
- 如果剃须刀、适配器或任何其他部件损坏,请勿再使用, 否则可能对人体造成伤害。务必用原始型号更换损坏的剃须刀、 适配器或任何其他部件。 - 必须在 10°C 至 35°C 之间的温度下使用、存放和为本产品充 电。 - 一定要在抗有机溶剂腐蚀的表面上放置和使用剃须刀。 - 仅限于使用随附的适配器、充电器和附件。 - 务必盖上剃须刀保护盖,以防止损坏剃须刀头并避免其内积聚 灰尘。 符合标准 - 本飞利浦产品符合所有有关暴露于电磁场的适用标准和法规 (EMF),可放心在水龙头下清洗。 概述 - 本产品配有一个自动电压选择器,适合 100 至 240 伏范围内的 电源电压。 - 电源适配器可将 10...
Page 83 - 电池已完全充满; 电池充满电时,充电指示灯将持续亮起绿灯。; 使用适配器充电; 您的皮肤可能需要 2 到 3 周才能适应飞利浦剃须系统。
电池已完全充满 - 电池充满电时,充电指示灯将持续亮起绿灯。 注意: 大约 30 分钟后,充电指示灯熄灭以节省能源。 使用适配器充电 1 将小插头插入剃须刀。 2 将电源适配器插入电源插座。 , 充电指示灯显示剃须刀的状态(见本章中的“充电指示”一节)。 在充电座上充电(仅限于 PT866/PT739) 1 将小插头插入充电座。 2 将电源适配器插入电源插座。 3 将剃须刀插接在充电座中。 , 充电指示灯显示剃须刀的状态(见本章中的“充电指示”一节)。 使用剃须刀 注意: 您也可以直接插电使用剃须刀。只需将剃须刀接到电源即可。 剃须 1 按一下开/关按钮以启动剃须刀。 2 将剃须刀头在皮肤上...
Page 84 - 您可使用修剪器修剪鬓角和小胡子。; 清洁和保养; 每次剃须后清洁剃须刀,以获得最佳的剃须性能。; 在水龙头下冲洗剃须刀头部件
修剪(仅限于 PT919/PT866/PT860/PT845/PT739/PT737/PT731) 您可使用修剪器修剪鬓角和小胡子。 1 按一下开/关按钮以启动剃须刀。 2 向下推修剪器的滑动开关可打开修剪器。 , 现在可以开始修剪了。 3 修剪后请关闭修发器,然后关闭剃须刀。 清洁和保养 切勿使用压缩气体、钢丝绒、研磨性清洁剂或腐蚀性液体 (例如汽油或丙酮)来清洁产品。 - 每次剃须后清洁剃须刀,以获得最佳的剃须性能。 - 为保证更好的剃须效果,剃须刀必须定期清洗。 - 为了获得最佳的清洁效果,建议您使用飞利浦清洁喷雾剂 (HQ110)。 - 使用热水时一定要小心。切记先检查水温是否太高,以...
Page 85 - 用随附的刷子清洁剃须刀头部件
- 冲洗胡茬储藏室和剃须刀头部件内部。 - 冲洗剃须刀头部件外侧。 4 关闭剃须刀头部件并甩掉多余的水份。 甩掉多余的水份时,小心不要使剃须刀头部件敲到任何东西。 不要用毛巾或纸巾来擦干剃须刀头部件和胡茬储藏室, 因为这样可能会损坏剃须刀头和连结轴。 5 再次打开剃须刀头部件,使它保持打开状态,使其完全晾干。 用随附的刷子清洁剃须刀头部件 1 关闭剃须刀电源,将其插头从插座上拔下。 2 按下释放按钮,打开剃须刀头部件。 3 将剃须刀头部件拉出剃须刀。 4 逆时针转动锁定装置 (A),取下固定架 (B)。 简体中文 85
Page 87 - 每次使用后都要清洁修剪器。
8 将剃须刀头部件的凸缘插入剃须刀顶部的槽内。 然后关闭剃须刀头部件。 注意: 如果剃须刀头部件关闭不畅,请检查剃须刀头插入是否正确,固定架是否被锁住。 用清洁刷清洁修剪器(仅限于 PT919/PT866/PT860/PT845/PT739/PT737/PT731) 每次使用后都要清洁修剪器。 1 关闭剃须刀电源,将其插头从插座上拔下。 2 向下推修剪器的滑动开关可打开修剪器。 3 使用清洁刷的短毛一侧清洁修剪器。沿着修剪器齿上下刷净。 4 关闭修发器(可听到“咔哒”一声)。 提示: 为获得最佳修剪性能,请每隔六个月用一滴缝纫机油润滑修剪器齿。 简体中文 87
Page 88 - 剃须刀头符号会呈橙色持续亮起。
存储 - 使用后请盖上剃须刀保护盖,以防止损坏剃须刀头并避免其内积 聚灰尘。 - 仅限于 PT866:使用收纳袋存放产品和附件。 更换 为获得最佳剃须效果,建议每两年更换一次剃须刀头。 更换提醒 剃须刀头符号会亮起,指示需要更换剃须刀头。应立即更换损坏的 剃须刀头。 只能用原装 HQ8 或 HQ9(仅限 PT919)飞利浦剃须刀头更换剃须 刀头。 1 剃须刀头符号会呈橙色持续亮起。 2 关闭剃须刀。断开剃须刀的电源。 3 按下释放按钮,打开剃须刀头部件。 4 将剃须刀头部件拉出剃须刀。 5 逆时针转动锁定装置 (A),取下固定架 (B)。 6 取下剃须刀头,在剃须刀头部件上装上新刀头。 简体...
Page 89 - 附件; 为了保持剃须刀的最佳性能,请确保定期清洁并在推荐的时间更换; 剃须刀头; 建议每 2 年更换一次剃须刀头。务必使用 HQ8 或 HQ9; 清洁
注意: 确保剃须刀头凸起部位正好插入凹陷部位。 7 将固定架放回剃须刀头部件 (A),顺时针转动锁定装置 (B)。 8 将新剃须刀头部件的凸缘插入剃须刀顶部的槽内。 然后关闭剃须刀头部件。 注意: 如果剃须刀头部件关闭不畅,请检查剃须刀头插入是否正确,固定架是否被锁住。 9 按住开/关按钮 5 秒钟可重置剃须刀更换提醒。 橙色指示灯会熄灭。 附件 为了保持剃须刀的最佳性能,请确保定期清洁并在推荐的时间更换 剃须刀头。 剃须刀头 - 建议每 2 年更换一次剃须刀头。务必使用 HQ8 或 HQ9 (仅限于 PT919)飞利浦剃须刀头进行更换。 清洁 - 使用清洁喷雾剂 (HQ110) 彻底清洁剃须...
Page 91 - 故障种类和处理方法; 问题
故障种类和处理方法 本章归纳了使用本产品时最可能遇到的问题。如果您无法根据下面 的信息解决问题,请联系您所在国家/地区的飞利浦客户服务中心。 问题 可能的原因 解决方法 剃须刀的剃须效果没 有以前好。 剃须刀头已损坏或 磨损。 更换剃须刀头(见“更换”一章)。 过长的胡须堵塞了 剃须刀头。 逐一清洁剃须刀头(参阅“清洁和保养” 一章)。 您没有正确插入剃 须刀头。 确保剃须刀头凸起部位正好插入凹陷部位 (见“清洁和保养”一章)。 按下开/关钮时,剃须 刀不工作。 充电电池的电量已 耗尽。 为电池充电(见“充电”一章)或将剃须刀接 到电源。 剃须刀的温度过 高。此时,剃须刀 无法工作。 一旦剃须...