Page 2 - Contents
3 9 Other features 19 Listen to an external device 19 Record from disc 19 Record from radio 19 Record from external source 19 Set the sleep timer 19 Set the alarm timer 20 Listen through headphone 20 10 Product information 21 Specifications 21 USB playability information 22 Suppor ted MP3 disc forma...
Page 3 - Important; Safety
4 g Do not block any ventilation openings. Install in accordance with the manufacturer’s instructions. h Do not install near any heat sources such as radiators, heat registers, stoves, or other apparatus (including amplifiers) that produce heat. i Protect the power cord from being walked on or pinch...
Page 4 - Hearing safety
5 How to connect a plug The wires in the mains lead are coloured with the following code: blue = neutral (N), brown = live (L). As these colours may not correspond with the colour markings identifying the terminals in your plug, proceed as follows: Connect the blue wire to the terminal • marked N or...
Page 5 - Recycling; Notice
6 Any changes or modifications made to this device that are not expressly approved by Philips Consumer Lifestyle may void the user’s authority to operate the equipment. The making of unauthorized copies of copy-protected material, including computer programs, files, broadcasts and sound recordings, ...
Page 7 - System; Introduction
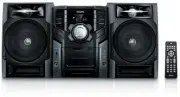
8 2 Your Mini Hi-Fi System Congratulations on your purchase, and welcome to Philips! To fully benefit from the suppor t that Philips offers, register your product at www.philips.com/welcome. Introduction With this unit, you can enjoy audio from discs, tapes, USB devices and other external devices, o...
Page 8 - Overview of the main unit
9 e CLOCK/DISPLAY Set the clock. • During play, display the clock. • f Source buttons (DISC, TUNER, USB/MP3 LINK, TAPE/AUX) Select a source: DISC, TUNER , USB, • MP3 LINK, TAPE or AUX. g Jack for a USB mass storage device. • Overview of the main unit a Turn on the unit, switch to standby • mode, or ...
Page 11 - Get started; Connect speakers
12 Install remote control batteries Caution Risk of explosion! Keep batteries away from • heat, sunshine or fire. Never discard batteries in fire. Risk of decreased battery life! Never mix • different brands or types of batteries. Risk of product damage! When the remote • control is not used for lon...
Page 12 - Switch to standby; Connect power
13 Turn on1 Press . The unit switches to the last selected » source. Switch to standby 1 Press to switch the unit to standby mode. The backlight on the display panel is » reduced.The clock (if set) appears on the » display panel. To switch the unit to Eco Power Standby mode: 1 In standby mode, press...
Page 13 - Play; Play from USB
14 2 Press USB to select the USB source. Play star ts automatically. » To pause/resume play, press • . To stop play, press • . To select an album, press • ALBUM/ PRESET +/- . To skip to a track, press • / . To search within a track, press and • hold / . Release to resume normal play. 4 Play Play dis...
Page 14 - Play options; Repeat play; Play a track repeatedly; Program tracks
15 1 At CD mode, in the stop position, press PROGRAM on the remote control to activate the program mode. [PROG] (program) blinks on the » display. 2 For MP3/WMA tracks, press ALBUM/ PRESET +/- to select an album. 3 Press / to select a track number, then press PROGRAM to confirm. 4 Repeat steps 2 to ...
Page 15 - Listen to the; Tune to a radio station; Program radio stations
16 The first programmed radio station is » broadcast automatically. Program radio stations manually Note You can program a maximum of 20 preset • radio stations. 1 Tune to a radio station. 2 Press PROGRAM to activate program mode. [PROG] (program) blinks on the » display. 3 Press ALBUM/PRESET +/- to...
Page 16 - Play tape
17 7 Play tape 1 Press TAPE / AUX on the main unit to select the tape source. 2 Pull OPEN on the front panel to open the tape button cover. 3 Press to open the tape door. 4 Load the tape with the open side downward and the full spool to the left. 5 Press to star t play. To pause/resume play, press •...
Page 17 - Adjust sound
18 8 Adjust sound Adjust volume1 During play, press VOL +/- to increase/ decrease the volume. Select a preset sound effect1 During play, press DSC repeatedly to select: [OPTIMAL] (optimal) • [ JAZZ] (jazz) • [TECHNO] (techno) • [ROCK] (rock) • Enhance bass1 During play, press DBB to turn on or off d...
Page 18 - Set the sleep timer; Other features; Listen to an external device
19 To pause, press • . To resume, press again. To stop, press • . Record from radio1 Tune to a radio station. 2 Press to open the tape door. 3 Inser t a blank tape and close the tape compar tment. 4 Press to star t to record. To pause, press • . To resume, press again. To stop, press • . Record from...
Page 19 - Activate and deactivate alarm timer; Set the alarm timer
20 Activate and deactivate alarm timer 1 Press TIMER repeatedly to activate or deactivate timer. If timer is activated, the display shows » . If timer is deactivated, » disappears on the display. Listen through headphone1 Plug a headphone into the socket on the unit. When sleep timer is deactivated,...
Page 20 - information; Specifications; Amplifier
21 TunerFM Tuning Range 87.5 - 108 MHz Tuning grid 50 KHz Sensitivity - Mono, 26dB S/N Ratio - Stereo, 46dB S/N Ratio <22 dBu <45 dBu Search Selectivity <28 dBu Total Harmonic Distor tion <3%Signal to Noise Ratio >45 dB MW Tuning Range 531 - 1602 kHz Tape deck Frequency Response - Nor...
Page 21 - General information; USB playability information
22 Unsupported formats: Empty albums: an empty album is an • album that does not contain MP3/ WMA files, and will not be shown in the display. Unsuppor ted file formats are • skipped. For example, Word documents (.doc) or MP3 files with extension .dlf are ignored and not played. AAC, WAV, PCM audio ...
Page 23 - 1 Troubleshooting
24 Reduce the distance between the remote • control and the unit. Inser t the battery with its polarities • (+/– signs) aligned as indicated. Replace the battery. • Aim the remote control directly at the • sensor on the front of the unit. No disc detected Inser t a disc. • Check if the disc is inser...