Page 3 - Contents
3 EN Contents 1 Important 4 Safety 4 Notice 4 2 Your camcorder 5 Introduction 5 What’s in the box 5 Functional over view 6 3 Get started 8 Load the Micro SD card 8 Turn on 8 First-time setup 8 Charge the built-in batter y 9 4 Use your camcorder 10 Record video 10 Take pictures 10 Play 10 Adjust sett...
Page 4 - Notice; Safety
4 Notice This product complies with the radio interference requirements of the European Community. Your product is designed and manufactured with high quality materials and components, which can be recycled and reused. When this crossed-out wheeled bin symbol is attached to a product it means that t...
Page 5 - Your camcorder; Introduction
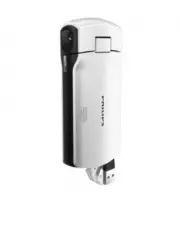
5 2 Your camcorder Introduction With this portable camcorder, you can: • take full HD (1080P) or VGA movies • take pictures • play recorded movies or pictures either directly or on the large screen of a connected TV • upload the recorded movies or pictures to the Internet directly via your PC/Mac Wh...
Page 6 - Functional overview; j k
6 j HDMI • Connect to a TV through an HDMI cable with a mini HDMI connector (type C). k RESET • Restore default settings. l MICRO SD • Load a Micro SD card. m • Turn on/off the camcorder. n Mode switch button • Switch between picture and video recording modes. Functional overview a Built-in micropho...
Page 8 - Select a scene; Get started; Load the Micro SD card
8 First-time setup When you turn on the camcorder for the first time, a menu for OSD language selection is displayed. 1 On the swivel touch screen, tap / to select a language. 2 Tap [OK] to confirm. » A welcome message is displayed briefly. » An inquir y box for date and time setting is displayed. 3...
Page 9 - Select a special effect; Charge the built-in battery
9 3 Wait until the status indicator stops flashing and turns to green steadily. » The built-in batter y is fully charged. Tip • The camcorder is fully charged for first-time use. • It takes about 3.5 hours to fully charge the built-in batter y via the PC. You can also charge the camcorder via a USB ...
Page 10 - Preview; Use your; Record video
10 Take pictures 1 Switch the mode switch button to . » The file size and remaining number of pictures that can be taken are displayed on the swivel touch screen. 2 Hold the camcorder steadily and aim the lens as needed. 3 Press T/W to zoom in/out if necessar y. 4 Press the shutter button down halfw...
Page 11 - Delete a file
11 Play tagged files 1 During preview, tap again. » A tag operation menu is displayed. 2 Tap an option to highlight it, then tap [Yes] for confirmation. Menu option Description [Play all] Play all files. [Play tagged] Play tagged files only. [Quick impression] Play excerpts of tagged files. [Clear a...
Page 12 - Adjust settings
12 Settings menu option Description [Flash] Select a flashlight mode: [On] , [Off] or [Auto] . [Resolution] Select a video resolution: [Full HD] (for best video quality), [Sports HD] (for filming of fast moving objects), or [Standard] (for reduced video file size). [Photo Size] Select the size of th...
Page 13 - Install the camcorder software; Use more of; View video or pictures on TV; Install and use the camcorder
13 Note • The software supplied only works on PCs that operate Microsoft® Windows® XP, Vista and Windows 7. • When you connect the camcorder to a Mac, use the iMovie software to impor t and edit your pictures/ videos directly. Install the camcorder software 1 Connect the camcorder to a PC (see ‘Get ...
Page 15 - Technical
15 System suppor t Windows XP/Vista/ Windows 7, Mac (mass storage only ) TV out NTSC/PAL selectable, Mini HDMI (type C) Power rating DC 5V, 500mA Weight 0.06kg Dimensions (W x H x D) 54 x 110 x 21.5 mm Note • *Rechargeable batteries have a limited number of charge cycles. Batter y life and number of...
Page 16 - Frequently
16 Why do my video/pictures look blurry? • Hold the camcorder steady in your hands during shooting. • During video capture, do not move the camcorder too fast. • Use a tripod (not supplied) if necessar y. Why do my video/pictures look distorted on a TV screen? • Select the correct TV system. How do ...