Page 3 - Contents
1 EN Contents 1 Important 2 Safety 2 Notice 2 2 Your CD Soundmachine 4 Introduction 4 What's in the box 4 Over view of the main unit 5 3 Get started 7 Connect power 7 Turn on 8 Turn off 8 4 Play 9 Play a CD 9 Play options 9 Play tape 10 Play from an external device 10 5 Listen to FM radio stations 1...
Page 4 - Important; Safety; Notice
2 EN 1 Important Safety • Read these instructions. • Follow all instructions. • Do not block any ventilation openings. Install in accordance with the manufacturer's instructions. • Do not install near any heat sources such as radiators, heat registers, stoves, or RWKHUDSSDUDWXVLQFOXGLQJDPSOLÀHUVWKDW...
Page 6 - Introduction
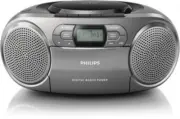
4 EN 2 Your CD Soundmachine Introduction With this CD Sound machine, you can: • Listen to FM radio; • Listen to DAB radio; • Enjoy audio from discs, tapes, and other external audio devices; • Program the play sequence of tracks. The CD sound machine offers you Dynamic %DVV%RRVW'%%WRHQULFKVRXQG What'...
Page 7 - Overview of the main unit
5 EN Overview of the main unit a DBB • Turn dynamic bass boost on/off. b /MENU • Stop playing. • Access FM/DAB menu. a b cd k h i j e f g m n o p FM DAB BAND TAPE/OFF AUDIO-IN/CD RADIO l c / • Select a preset radio station. d MODE/DISPLAY • Select a play mode. • Display the RDS information. • Displa...
Page 9 - Get started; Connect power; Option 2: Battery power
7 EN 3 Get started Caution • Use of controls or adjustments or performance of procedures other than herein may result in hazardous laser exposure or other unsafe operation. Always follow the instructions in this chapter in sequence. If you contact Philips, you will be asked for the model and serial ...
Page 10 - Turn on; Turn off
8 EN Turn on Switch the source selector on the product to CD/RADIO/TAPE. Switch to standby mode • The product switches to standby mode automatically when there is no audio detected for over 15 minutes. • Press to wake up the product from standby mode. Turn off Switch the source selector on the main ...
Page 11 - Play; Play a CD; Play options; Control play; Program tracks
9 EN 4 Play Play a CD Note • You cannot play CDs encoded with copyright protection technologies. • When an audio-in cable is plugged, CD playback stops, and the unit switches to audio in mode automatically. • Make sure that no external device is connected with the CD sound machine through AUDIO IN s...
Page 12 - Adjust sound; Play tape; Play from an external device
10 EN 5 Press to play the programmed tracks. » During play, [PROG] SURJUDPLV displayed. • To erase the program, press twice. Adjust sound During play, you can adjust volume and select the sound effects. Key Function +VOLUME- Increase or decrease volume. DBB Turn dynamic bass enhancement on or off. P...
Page 14 - Adjust FM settings; Scan setting; System menus
12 EN Adjust FM settings 1 In FM mode, press MENU to access FM menus. 2 Press / to toggle through the menus. • [SCAN SET] : Access the scan settings. • [SYSTEM] : Access system settings. Scan setting 1 Press OK to access the [SCAN SET] menu. 2 Press / to select an option: • [STRONG] : Search for str...
Page 15 - Listen to DAB radio stations; Program radio stations; Display DAB information
13 EN 6 Listen to DAB radio stations Listen to DAB radio stations Note • For optimal reception, fully extend the antenna and adjust its position. • You can program a maximum of 20 DAB radio stations. • Check with local retailer or go to www.WorldDAB.org for applicable DAB radio frequencies in your a...
Page 16 - Use DAB menus; Tune to a station manually; Remove invalid stations
14 EN Use DAB menus 1 In DAB mode, press MENU to access the DAB menus. 2 Press / to toggle through the menus. • [FULL SCAN] :Scan for the DAB stations. • [MANUAL] : Tune to a station manually. • [DRC] :Enable or disable DRC. • [PRUNE] : Remove invalid stations • [SYSTEM] : Access system setting menu...
Page 17 - Reset the product; Check the current software
15 EN 7 Use system menus With the system menus, you can: • [RESET] : Reset the product to factor y default status. • [UPGRADE] : Upgrade the software. • [SW VER] : Check the version of current software of this product. Reset the product 1 Press OK to display the options. 2 Press / to select an optio...
Page 18 - Disc
16 EN 8 Product information Note • Product information is subject to change without prior notice. 6SHFLÀFDWLRQV $PSOLÀHU Rated Output Power 2 x 1 W RMS Frequency Response 125 -16000 Hz, -3dB Signal to Noise Ratio >55 dBA Total Harmonic Distor tion <1 % Audio-in Input 650 mV RMS Disc Laser Type...
Page 19 - Maintenance
17 EN Maintenance Clean the cabinet • Use a soft cloth slightly moistened with a mild detergent solution. Do not use a solution containing alcohol, spirits, ammonia or abrasives. Clean discs • When a disc becomes dir ty, clean it with a cleaning cloth. Wipe the disc from the centre out. • Do not use...
Page 20 - Troubleshooting
18 EN 9 Troubleshooting Warning • Never remove the casing of this device. To keep the warranty valid, never tr y to repair the system yourself. If you encounter problems when using this device, check the following points before requesting ser vice. If the problem remains unsolved, go to the Philips ...