Philips AJ260/37 - Quick Guide
Philips AJ260/37 – Quick Guide, read for free online in PDF format. We hope this helps you resolve any issues you may have. If you have further questions, please contact us through the contact form.


AJ260
Clock Radio
QUICK START
MISE EN SERVICE RAPIDE
INICIO RÁPIDO
Thanks for buying
Philips AJ260 clock radio
.
Our
Quick Start
guides you through just some of the features on the set.
Please read our instruction booklet to really rise & shine!
•
Press
ALM1
or
ALM2
.
Radio
1
.
Press
RADIO ON/OFF
once to switch on the
radio.
2
.
Press
AUTO SCAN/DATE
to program all
available stations.
3
.
Press
PRESET+/-
until the desired preset station
is displayed.
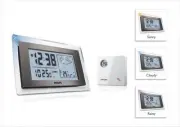
Weather forecast and Indoor
thermometer
The unit can auto detect and measure atmospheric
pressure changes to graphically display the weather
forecast in the next 12 to 24 hours, and current
indoor temperature.
Note:
–
The weather forecast based on the atmospheric
pressure may vary slightly from the actual weather
situation.
Using the outdoor sensor
The outdoor sensor is supplied to work with the
main unit to measure and display the outdoor
temperature.
1
.
Place the sensor in a desired open area. The place
must be within 50 meters away from the main
unit. (Make sure that the sensor is loaded with 2
AA batteries.)
• For the first time
using the outdoor sensor
and the main unit, press
RESET
located on the
sensor back, and
RESET
located in the batter y
compar tment of the main unit. Then, the main
unit will begin to receive transmission from the
sensor.
•
To update the outdoor temperature from the
sensor any time, press and hold
ENGLISH
Step
A
•
Connect the supplied mains adapter to the set’s
7.5V DC jack and the plug into a wall outlet.
Step
B
How to set the Clock & Alarm time
1
.
Press and hold
TIME SET / RCC SYNC
or
ALM1
/
ALM2
until the time digits flash.
2
.
Press and hold
TUNING +/-
to adjust time.
3
.
Press
TIME SET / RCC SYNC
or
ALM1
/
ALM2
to confirm.
4
.
Repeat the
steps 2~3
to complete all the other
time items setting.
To perform RCC (Radio Controlled Clock)
searching
Press briefly
TIME SET / RCC SYNC
. is
displayed.
Notes:
–
The RCC time search will stop 10 minutes later if no
time signal is received.
–
Refer to the supplied user manual for RCC
information.
Step
C
Selecting the Alarm mode
In standby mode, slide the
RADIO/BUZ
to select
desired mode.
Helpful hints:
–
If you have selected
RADIO
, make sure you have
properly tuned to a station before turning off the set.
3
ways to switch off the alarm
•
Either press briefly:
SLEEP/ALARM RESET
or
REPEAT ALARM
/
BRIGHTNESS CONTROL
.
C
A
B/3
3
R
B
DC 7.5V
R
AJ260_37-QSG_sheet
6/3/07, 18:51
1
"Loading the manual" means you need to wait until the file loads and becomes available for online reading. Some manuals are very large, and the time they take to appear depends on your internet speed.