Page 2 - Contents
1 1.1 1.2 1.3 1.4 1.5 2 2.1 2.2 2.3 2.4 2.5 2.6 3 3.1 3.2 3.3 3.4 3.5 3.6 4 4.1 4.2 4.3 4.4 4.5 4.6 4.7 5 5.1 5.2 5.3 5.4 5.5 5.6 5.7 6 6.1 6.2 6.3 6.4 6.5 6.6 6.7 7 7.1 7.2 7.3 7.4 7.5 7.6 7.7 7.8 Contents Getting started 3 TV tour 3 Setting up 7 Keys on the TV 9 Register your TV 10 Help and suppor...
Page 3 - Getting started; TV tour; Smart TV
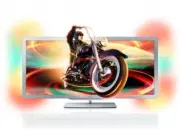
1 1.1 Getting started TV tour Cinema 21:9 This Cinema 21:9 TV perfectly matches the original movie format and is equipped with a full High Definition (HD) display. A full HD 2560x1080p, the highest resolution of HD sources. This display offers a brilliant flickerfree progressive scan picture with op...
Page 5 - Connecting devices
Yellow With the yellow key, you can select the yellow option. Blue With the blue key, you can select the blue option. Read more about the remote control in Help > Basics > Remote control > Overview . Or go to the ¬ Search page in this Help to look for any topic. Press u to select the next T...
Page 7 - Stand or wall mounting; VESA info
1.2 Setting up Stand or wall mounting Always make sure to position the TV on a solid surface when it is mounted on the TV stand. Wall mounting With the foot and neck of the TV stand, you can mount the TV to the wall. Combine the foot and neck to make a swivel mount or alternatively use only the foot...
Page 12 - Basics; Remote control; Overview
2 2.1 Basics Remote control Overview 1 Standby O To switch the TV on or back to standby. 2 Home h To open or close the Home menu. 3 Navigation key To navigate up, down, left or right. 4 OK key To activate a selection. 5 Find ¬ To open or close the channel list or your list of photos, music or movies...
Page 14 - Batteries; Cleaning
Batteries To open the battery cover, press the small button on the edge of the remote control inwards and lift the cover. Use 2 type AAA -LR03 -1.5V batteries. Make sure the + and the - ends of the batteries line up correctly. Remove the batteries if you are not using the remote control for a long t...
Page 16 - OPTIONS
In the Adjust menu you can adjust these settings: • 3D • 3D depth • Two player gaming • Ambilight On or Off • Ambilight dynamics • Picture format • Smart picture (presets) • Smart sound (presets) • Speakers • Surround • Picture shift Ambilight Read more about the Ambilight settings in Help > Setu...
Page 23 - Connected devices; Select a device
2.5 Connected devices Select a device Select from the Home menu To select and watch a connected device or activity, press h to open the Home menu and select the device or its activity and press OK . Make sure the device is switched on. Add a connected device to the Home menu for easy selection. Read...
Page 25 - Smart TV; Net TV; What you need
3 3.1 Smart TV Net TV What is Net TV? Net TV offers Internet applications called apps. These apps are tailored for your TV. With these apps you can read your national newspaper, look at infotainment, or rent a movie from a video store or watch programmes you missed with catch -up TV apps. A wide ran...
Page 27 - Online TV
Rent a video When you open a video store you will be asked to log in or to create a log in account. With a text entry field selected, press OK to open the on -screen keyboard. Consult the video store website for more information. Online TV With the online TV apps in Net TV you can watch programmes y...
Page 31 - Pause TV and recording; Smart USB recording
3.4 Pause TV and recording Smart USB recording With this TV you can pause a TV broadcast from a digital channel. You can pause a TV broadcast to watch it later. Simply connect a USB Hard Drive device to your TV and you can pause the broadcast. If your TV is connected to the Internet, you can also re...
Page 32 - Recording
Specifics The Audio Description audio (commentary) for the visually impaired is not available for playback in Smart USB Recording. Recording If the TV is connected to the Internet and there is a Recordings button on the Programme guide page, you can record a digital TV broadcast on the USB Hard Driv...
Page 33 - Play a game
3.5 Games Play a game Add a game console In the Home menu, start Add your devices to add the console to the Home menu for easy selection later on. When adding a game console to the Home menu, select Game when the TV asks for the device type. If your game console is an EasyLink HDMI -CEC device it mi...
Page 36 - Setup; Picture and sound; Picture
4 4.1 Setup Picture and sound Picture In the Picture menu, you can adjust all picture settings individually. To open the Picture settings , press h > Setup > TV settings > Picture . • Contrast Sets the contrast level of the picture. • Brightness Sets the brightness level of the picture. • C...
Page 37 - ISF Calibration
Reset a Smart setting To reset a Smart setting to its original values, select the Smartsetting you want to reset in the ADJUST menu. Then press h > Setup > TV settings > Picture , select Reset , press OK and confirm. Read more about using Smart picture and sound settings in Help > Basics...
Page 47 - Connections; First connections; Power cable; Antenna cable
5 5.1 Connections First connections Power cable Insert the power cable into the power socket of the TV. When disconnecting the power cable, always pull the plug, never the cable. Although this TV has a very low standby power consumption, switch off the TV with the power switch to save energy if you ...
Page 48 - Cables and connections; Cable quality
5.2 Cables and connections Cable quality Before you connect devices to the TV, check which connectors are available on the device. Connect the device to the TV with the highest quality connection available. Good quality cables ensure a good transfer of picture and sound. Read the other chapters of C...
Page 49 - Video; VGA
Video If you have a device with only a Video (CVBS) connection , you need to use a Video to SCART adapter (not supplied). Connect the Video to Scart adapter to the included Scart adapter of the TV. You can add the Audio L/R connections. VGA Use a VGA cable (DE15 connector) to connect a computer to t...
Page 50 - SoundBar
5.3 Connect devices SoundBar Use an HDMI cable to connect the device to the TV. If you use the HDMI -ARC connections on both TV and device, no other cable is needed. If not, read on. If you do not use the HDMI -ARC connection, add a digital audio cable (optical). Blu- ray Disc / DVD player Use an HD...
Page 51 - Home Theatre System with disc player
Home Theatre System with disc player Use an HDMI cable to connect the device to the TV. If you use the HDMI -ARC connections on both TV and device, no other cable is needed. If not, read on. If you do not use the HDMI -ARC connection, add a digital audio cable (optical). Connections / Connect device...
Page 52 - Recorder
Audio to Video synchronisation (sync) If the sound does not match with the video on screen, you can set a delay on most DVD Home Theatre Systems to match the sound and video. Read more about Audio to Video sync in Help > Setup > Devices > Audio to Video sync . Do not connect the audio signa...
Page 53 - Digital receiver / Satellite receiver
Digital receiver / Satellite receiver If you use a digital receiver to watch TV (a set top box - STB) and you do not use the remote control of the TV, then switch off the automatic switch off. This will prevent the TV from switching off automatically after a 4 hour period without a key press on the ...
Page 56 - Digital HD receiver
Then use an HDMI cable to connect the Disc Recorder to the TV. Then use an HDMI cable to connect the Home Theatre System to the TV. If you do not use the HDMI -ARC connection on the TV and the device, add a digital audio cable (optical). Digital HD receiver If you use a digital receiver to watch TV ...
Page 58 - Connect more devices; Game
5.4 Connect more devices Game Connect a game console to the side or back of the TV. You can use an HDMI, YPbPr or SCART connection. If your game console only has Video (CVBS) and Audio L/R output, use a Video Audio L/R to SCART adapter to connect to the SCART connection. Read more about Games in Hel...
Page 59 - Camcorder
If the list with the content of the camera does not appear automatically, your camera might need to be set to transfer its content with PTP (Picture Transfer Protocol). Read the user manual of the digital photo camera. Camcorder Connect a camcorder to the side or back of the TV. You can use an HDMI,...
Page 60 - Keyboard and mouse
Keyboard and mouse USB keyboard You can connect a USB keyboard to enter text on your TV. With a keyboard connected, you can type in a new channel name or type in what you are looking for in the YouTube app in Net TV. Install Switch the TV on and connect the USB keyboard to one of the USB connections...
Page 61 - TV as PC monitor
For use with Net TV . . . - Tab and Shift Tab = Next and Previous - Home = scroll to the top of the page - End = scroll to the bottom of the page - Page Up = jump one page up - Page Down = jump one page down - + = zoom in one step - - = zoom out one step - * = fit to width USB mouse You can connect ...
Page 63 - Wireless; Wired
5.5 Network Wireless To set up the wireless network connection, read Help > Setup > Network . Wired To set up the wired network connection , read Help > Setup > Network Connect the router to the TV with a network cable. To fulfil EMC regulations, use a shielded FTP Cat. 5E Ethernet cable...
Page 64 - Memory size; Insert the card
5.6 SD card Memory size To store videos downloaded from a Video store on Net TV, you need to insert an SD memory card into the TV SD card slot. Once formatted, leave the card permanently in the slot. SD memory card size Use a SD HC (High Capacity) memory card with at least 4GB of storage capacity. F...
Page 65 - Common interface CAM; CAM
5.7 Common interface CAM CAM Scrambled digital TV channels can be decoded with a Conditional Access Module (CAM). Digital TV service operators provide the CAM when you subscribe to their services. Contact a digital TV service operator for more information and to see terms & conditions. Insert a ...
Page 66 - Troubleshooting; Contact information
6 6.1 Troubleshooting Contact information If the advice and suggestions in Troubleshooting do not help resolve the problem, try switching the TV off and back on again. Warning If your TV breaks down, NEVER try to repair the TV yourself. Consumer Care If the TV problem is not solved you can call the ...
Page 67 - TV and remote control
6.2 TV and remote control The TV does not switch on • Switch the TV off and on again with the switch on the bottom of the TV. • Check the power cable connection. • Try using the keys on the TV to switch on. The TV does not switch on from standby • Check that the batteries of the remote control are n...
Page 69 - Picture and sound
6.4 Picture and sound No picture • Check if the antenna is connected properly. • Check if the correct device is selected and connected properly.• Check the contrast or brightness setting in h > Setup > TV settings > Picture > Contrast or Brightness . The picture is poor • Bad weather can...
Page 73 - Specifications; Software; Software version
7 7.1 Specifications Software Software version To view the current TV software version, press h > Setup > Software settings and press OK . Select Current software info and read Version: . Open source software This television contains open source software . TP Vision Netherlands B.V. hereby off...
Page 74 - EU Energy Label; Energy saving
7.2 Environmental EU Energy Label EU Energy label The European Energy Label informs you on the energy efficiency class of this product. The greener the energy efficiency class of this product is, the lower the energy it consumes. On the label, you can find the energy efficiency class, the average po...
Page 75 - End of use
Light sensor To save energy, the built -in ambient light sensor lowers the brightness of the TV screen when the surrounding light darkens. Energy saving The energy saving Smart picture setting, combines several TV settings that result in saving energy. Low standby power The class-leading and highly ...
Page 76 - Power and reception; Reception
7.3 Power and reception Power Product specifications are subject to change without notice. For more specification details of this product, see www.philips.com/support. Power • Mains power : AC 220-240V +/ -10% • Ambient temperature : 5°C to 35°C • Standby power consumption : < 0.15W • Power savin...
Page 77 - Display and sound
7.4 Display and sound Display / Picture • Diagonal size : - 50PFL7956 : 127 cm / 50" • Easy 3D • Picture enhancement : - Pixel Precise HD • Display type : LCD Full HD, LED backlight • Panel resolution : 2560 x 1080p • Colour processing : 2250 trillion colours 17bit RGB • Brightness : 450 cd/m2 •...
Page 78 - Display resolutions
7.5 Display resolutions Video formats Resolution — Refresh rate • 480i - 60 Hz • 480p - 60 Hz • 576i - 50 Hz • 576p - 50 Hz • 720p - 50 Hz, 60 Hz • 1080i - 50 Hz, 60 Hz • 1080p - 24 Hz, 25 Hz, 30 Hz • 1080p - 50 Hz, 60 Hz Computer formats Resolutions (amongst others) • 640 x 480p — 60 Hz • 800 x 600...
Page 81 - Dimensions and weights
7.8 Dimensions and weights 50PFL7956 Width 1242 mm Height 580 mm Depth 37 mm Weight ±22 kg . . . with TV stand Height 633 mm Depth 253 mm Weight ±25 kg UMv 3104 327 0050.4 - 120229 Specifications / Dimensions and weights 81
Page 82 - Index
Index 3 3D depth 22 3D glasses 22 3D, 2D to 3D 22 3D, start 22 A Adjust menu 15 Ambilight colour 38 Ambilight, setup 38 Ambilight, switch on 38 Audio Description 45 Audio Out delay 44 Auto switch off 36 B Balance 36 Black bars 20 C CAM 65 Channel list copy 40 Channel list, options 17 Channel, favour...