Page 2 - Contents
EN 2 1 Get started 3 TV tour 3 Important 5 Environmental efforts 7 Position the TV 8 Help and support 9 2 Use your TV 10 Controls 10 Watch TV 12 Watch a connected device 15 Browse PC through DLNA 16 Browse Net TV 18 Rent online video 20 3 Use more of your TV 22 Pause TV 22 Record TV shows 23 Enjoy H...
Page 3 - Get started; TV tour; Econova
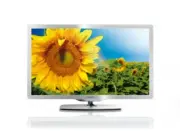
EN 3 En gl is h 1 Get started TV tour Econova With this Econova TV, you can enjoy best-in-class technology while minimising your impact on the environment. This is a TV with the lowest energy consumption possible, without compromising on picture and sound quality. Other environmental innovations inc...
Page 5 - High Definition TV; Important; Safety
EN 5 En gl is h You can learn more on device connections in Connect your TV > Connect devices . High Definition TV For high-definition (HD) picture quality, watch HD programmes. On standard-definition (SD) programmes, the picture quality is standard. You can watch HD video content in these ways a...
Page 7 - Screen care; Environmental efforts; Energy efficiency
EN 7 En gl is h Risk of hearing damage! Avoid using earphones or headphones at high volumes or for prolonged periods of time. Screen care Risk of damage to the TV screen! Never touch, push, rub or strike the screen with any object. Unplug the TV before cleaning. Clean the TV and frame with a...
Page 8 - Position the TV; Placement; Mount the TV
EN 8 When this crossed-out wheeled bin symbol is attached to a product it means that the product is covered by the European Directive 2002/96/EC. Please inform yourself about the local separate collection system for electrical and electronic products. Please act according to your local rules and do ...
Page 9 - Location; Lock the TV; Help and support; Use Help
EN 9 En gl is h Location A range of TV settings are applied to suit the location of the TV. Shop or home mode Set the TV location to Home mode to access all TV settings. In Shop mode, you can access only a few settings. 1. While you watch TV, press . 2. Select [Setup] > [TV settings] > [Prefer...
Page 10 - Use your TV; Controls; TV controls; Indicators; Remote control
EN 10 2 Use your TV Controls TV controls 1. VOL +/-: Increase or decrease volume. 2. Remote control sensor and standby indicator. 3. MENU : Access the TV menu. Press again to launch an activity in the TV menu. 4. CH / : Switch to the next or previous channel. 5.Power : Switch the TV on or off. Indic...
Page 11 - Charging the remote control
EN 11 En gl is h 4. ( Home ): Access the Home menu. 5. ( Navigation buttons ): Navigate through menus and select items. 6. CH - / CH + ( Previous/Next ): Switch channels, navigate through menu pages, tracks, albums or folders. 7. OK : Confirm an entry or selection. 8. ( Back ): Return to the previou...
Page 12 - Watch TV; Switch TV on or off
EN 12 EasyLink controls Note : EasyLink controls are available when the connected device is HDMI-CEC compliant. EasyLink allows you to control your TV and other HDMI-CEC devices with one remote control. Access EasyLink controls 1. While you view content from a connected HDMI-CEC device, press OPTION...
Page 13 - Adjust TV volume
EN 13 En gl is h Automatic switch off This TV is designed with energy efficiency settings. If there is no user interaction (such as pressing a remote control button or a control on the front panel) for four hours, the TV will automatically switch to standby. To disable automatic switch off, While yo...
Page 15 - Change picture format; Watch a connected device; Add new device
EN 15 En gl is h [Drama] : Ideal settings for drama programs. [Sports] : Ideal settings for sports. Change picture format Change the picture format to suit your preference. 1. Press ADJUST . 2. Select [Picture format] , then press OK . 3. Select a picture format, then press OK to confirm. The av...
Page 16 - Browse PC through DLNA; What you can do
EN 16 Caution: TP Vision is not responsible if the USB storage device is not supported, nor is it responsible for damage or loss of data in the device. Do not overload the USB port. If you connect an HDD device that consumes more than 500mA power, make sure that it is connected to its own external p...
Page 17 - Enable sharing on Windows Media
EN 17 En gl is h You will also need to set up the network connection: Connect your TV and the computer to the same home network. See Connect your TV > Computers and the Internet (Page 50). Switch on your computer and the router. Proceed to set up a media sharing server with Windows Media Play...
Page 18 - Play files from computer; Browse Net TV
EN 18 4. Type a name for your media server, and then click Save changes . 5. Back in the Twonky Media screen, select Basic Setup > Sharing . 6. Browse and select folders to share, and then select Save Changes . Your Macintosh rescans the folders automatically so that they are ready to share. Play...
Page 19 - Options
EN 19 En gl is h Notes: You can lock Net TV Applications (Apps) with a 4 digit pin-code. All adult Apps can be locked as one selection. When you lock an adult Application, the advertisements and Web pages not adapted for Net TV remain accessible. Connect the TV to the Internet On your home netwo...
Page 20 - Rent online video
EN 20 Press OPTIONS and select [Show remote control] . Use the onscreen keys to operate the connected audio or video player. Select a key and press OK to carry out its function. Press to hide the onscreen keys. Select P+ and P- to scroll up and down on a web page. Zoom page To zoom in and out on an ...
Page 21 - Rent
EN 21 En gl is h Rent View a video store 1. Press . 2. Select [Browse Net TV] and press OK . 3. Access the App Gallery to search for available video stores in your country. 4. Press the Navigation buttons to select a store, then press OK to confirm. The icon of the video store is added to the home p...
Page 22 - Pause TV; Hard disk installation
EN 22 3 Use more of your TV Pause TV What you can do While watching a digital channel, you can pause a programme to answer an urgent phone call or to have a break. The broadcast is stored on a USB hard disk that is connected to the TV; you can replay the broadcast instantly. Note: The maximum time...
Page 23 - Pause a live TV broadcast; Record TV shows
EN 23 En gl is h Pause a live TV broadcast 1. On a digital channel, press (pause) to pause a TV broadcast. 2. Press (play) to continue watching. The status bar shows the following time indicators: A. When the programme is paused for the first time. B. Where the paused programme is currently playing....
Page 25 - Manage recordings
EN 25 En gl is h If your TV remote control does not have a button: 1. Press and select [Programme guide] . 2. With the current TV programme selected, press OPTIONS and select [Record] . The TV sets the end time of the recording to the end of the programme. 3. Select [Schedule] and press OK to start ...
Page 26 - Enjoy HbbTV
EN 26 Delete a recording To delete an existing recording: 1. Select the recording in the list and press OPTIONS . 2. Select [Delete recording] and press OK . Cancel a scheduled recording To cancel a scheduled recording: 1. Select the recording and press OPTIONS . 2. Select [Cancel recording] and pre...
Page 27 - View Teletext
EN 27 En gl is h View Teletext Select a page 1. Select a channel that has teletext feature, then press TEXT . 2. Select a page in one of the following ways: Enter the page number with the Numeric buttons . Press or to view the next or previous page. Press the Colour buttons to select a colour ...
Page 28 - Set locks and timers; Clock
EN 28 Teletext 2.5 Teletext 2.5 offers more colours and better graphics than normal teletext. If Teletext 2.5 is broadcast by a channel, it is switched on by default. To switch Teletext 2.5 on or off 1. Press . 2. Select [Setup] > [TV settings] > [Preferences] . 3. Select [Text 2.5] > [On] ...
Page 29 - View subtitles
EN 29 En gl is h Parental rating Some digital broadcasters rate their programmes according to age. You can set your TV to display only programmes with age ratings lower than your child's age. 1. Press . 2. Select [Setup] > [Channel settings] or [Satellite settings] . 3. Select [Child lock] > [...
Page 30 - Use EasyLink; What you need; Switch on
EN 30 1. Connect the USB storage device to the TV. 2. Press . 3. Select [Browse USB] , then press OK . 4. Select a picture, then press OPTIONS . 5. Select [Set as Scenea] , then press OK . 6. Select [Yes] , then press OK . 7. Press any button to exit Scenea. Use EasyLink What you can do Get the most...
Page 31 - Control devices simultaneously
EN 31 En gl is h 1. Press . 2. Select [Setup] > [TV settings] > [EasyLink] . 3. Select [On] or [Off] , then press OK . Control devices simultaneously If you connect multiple HDMI-CEC devices that support this setting, all the devices respond to the TV remote control. Caution: This is an advanc...
Page 32 - Retain picture quality; Maximize video display; Hear another device at TV standby
EN 32 [TV] : On by default. Stream TV audio through the TV and the connected HDMI-CEC audio device until the connected device switches to system audio control. TV audio is then streamed through the connected device. [Amplifier] : Stream audio through the connected HDMI-CEC device. If system audi...
Page 33 - Set up your TV; Settings assistant; More picture settings
EN 33 En gl is h 4 Set up your TV Settings assistant Use the settings assistant to guide you through the picture and sound settings. 1. While you watch TV, press . 2. Select [Setup] > [Quick picture and sound settings] , then press OK . 3. Select [Start] , then press OK . 4. Follow the onscreen i...
Page 34 - Channels; Reorder and rename
EN 34 Audio settings Select audio language If the TV channel has multiple or dual sound broadcast, you can select the preferred audio language. While you watch TV, press OPTIONS . [Audio language] : Select the audio language for digital channels. [Dual I-II] : Select the audio language for analo...
Page 35 - Update channel list
EN 35 En gl is h Update channel list When the TV was switched on for the first time, a full installation of channels was performed. You can automatically add or remove digital channels or manually update channels. Note : If you are prompted to enter a code, enter '8888'. Automatic update To automati...
Page 37 - Menu language
EN 37 En gl is h the same hardware type, as indicated by the sticker on the back of the TV, (for example Qxxx.xx.Lx), and compatible software versions. An onscreen message will notify you if the channel list cannot be copied to the second TV. Note: If you are prompted to enter a code, enter '888...
Page 38 - Visually impaired; Other settings; TV demo; Update software; TV software
EN 38 To switch on hearing impaired audio and subtitles 1. While you watch TV, press OPTIONS . 2. Press one of the following buttons to select an option: Red : Switch hearing impaired on or off. Green : Switch on hearing impaired audio and subtitles. 3. Press to exit. Visually impaired Tip: To v...
Page 39 - Onscreen Help
EN 39 En gl is h For more information, see the following pages. Update with USB Before performing this procedure, make sure that you have the following: Spare time to complete the entire update. A USB flash drive that has at least 256MB of storage space, is FAT or DOS formatted, and has its writ...
Page 40 - Reinstall the TV
EN 40 Update [Help] Do not switch off the TV or remove the USB storage device during the update. If a power failure occurs during the update, do not remove the USB storage device from the TV. The TV continues to update as soon as power is restored. If an error occurs during the update, retry t...
Page 41 - Connect your; About cables; Cable quality; HDMI
EN 41 En gl is h 5 Connect your TV About cables Cable quality Overview Before you connect devices to the TV, check the available connectors on the device. Connect the device to the TV with the highest quality connection available. Good quality cables ensure a good transfer of picture and sound. The ...
Page 43 - Blu-ray or DVD disc player; TV receiver
EN 43 En gl is h Blu-ray or DVD disc player Connect the disc player with an HDMI cable to the TV. Connect the disc player with a component cable (Y Pb Pr) and an audio L/R cable to the TV. TV receiver Connect the satellite or digital TV receiver with an antenna cable to the TV. (SAT is available on ...
Page 45 - Recorder; Game console
EN 45 En gl is h Recorder Connect the recorder with an antenna cable to the TV. (SAT is available on certain models only.) Connect the recorder with a SCART cable to the TV. Connect the recorder with a component cable (Y Pb Pr) and an audio L/R cable to the TV. Game console The most practical connec...
Page 46 - Home theatre system
EN 46 Connect the game console with an HDMI cable to the TV. Connect the game console with a component cable (Y Pb Pr) and an audio L/R cable to the TV. Home theatre system Connect the home theatre with an HDMI cable and an optical or coaxial audio cable to the TV. (Optical audio output is available...
Page 47 - Digital camera
EN 47 En gl is h Connect the home theatre with a SCART cable to the TV. Connect the home theatre with a component cable (Y Pb Pr) and an audio L/R cable to the TV. Digital camera Connect the digital camera with a USB cable to the TV.
Page 48 - Digital camcorder; Connect more devices; External hard disk
EN 48 Digital camcorder Connect the digital camera with an HDMI cable to the TV. Connect the digital camcorder with a component cable (Y Pb Pr) and an audio L/R cable to the TV. Connect more devices External hard disk Connect the external hard disk with a USB cable to the TV.
Page 49 - Computer; Keyboard and mouse
EN 49 En gl is h Computer Connect the computer with an HDMI cable to the TV. Connect the computer with a DVI-HDMI cable to the TV. Connect the computer with a VGA cable and an audio cable to the TV. Keyboard and mouse USB keyboard *Available on certain models only. You can connect a USB keyboard to ...
Page 51 - Connect; Wired connection
EN 51 En gl is h Wi-Fi MediaConnect With Wi-Fi MediaConnect you can bring up (project) your PC screen on the TV screen wirelessly. You start Wi-Fi MediaConnect from your PC. See Connect your TV > Computers and the Internet > (Page 53 ). What you need Warning: This TV complies with the EMC dire...
Page 52 - Wireless LAN ready
EN 52 Wireless LAN ready This section is only for wireless ready TVs . With the Wireless USB adapter PTA01 accessory (sold separately), you can connect the TV to your home network wirelessly. You can enjoy the best of the web from Net TV services, and sharing of content between your devices connecte...
Page 54 - Common interface
EN 54 200 MB free hard disk space Wi-Fi 802.11g Internet connection Project your PC: PC requirements Recommended specifications Windows XP, Vista, Windows 7 (PC only) Intel Pentium Core 2 Duo 2.1 GHz 1 GB RAM 200 MB free hard disk space Wi-Fi 802.11n Internet connection Common inte...
Page 55 - Troubleshooting; Contact Philips; General TV; TV channel
EN 55 En gl is h 6 Troubleshooting Contact Philips Warning: Do not attempt to repair the TV yourself. This may cause severe injury, irreparable damage to your TV or void your warranty. If you cannot resolve your problem, refer to the frequently asked questions (FAQs) for this TV at www.philips.com/s...
Page 56 - Sound
EN 56 Make sure that the correct device is selected as the display source. Make sure that the external device or source is properly connected. There is sound but no picture: Make sure that the picture settings are set correctly. There is poor TV reception from an antenna connection: Make sure ...
Page 58 - Power and reception; Display and sound; Display resolutions
EN 58 7 Product specifications Power and reception Product specifications are subject to change without notice. Power Mains power: AC 220-240 V~, 50-60 Hz Standby power: < 0.15 W Ambient temperature: 5 to 40 degree Celsius For power consumption, see the product specifications at www.phili...
Page 59 - Multimedia; Connectivity
EN 59 En gl is h Multimedia Supported multimedia connections USB : NTFS, FAT 16, FAT 32. Connect only USB devices which consume 500mA of power or less. SD card slot Ethernet UTP5 Supported image files JPEG (*.jpg) Supported audio/video files Multimedia file names must not exceed 128 characte...
Page 60 - Help version
EN 60 Rear (PFL6806K/02) EXT 1 (RGB/CVBS): SCART EXT 2: Component video (Y Pb Pr), Audio (L/R) SERV.U: Service port AUDIO IN: DVI/VGA stereo 3.5-mm mini-jack SAT (DVB-S) Rear (PFL6806T/12) EXT 1 (RGB/CVBS): SCART EXT 2: Component video (Y Pb Pr), Audio (L/R) SERV.U: Service port ...
Page 61 - Index
EN 61 En gl is h 8 Index A age rating - 29 analogue channels, fine-tune - 36 analogue channels, subtitles - 29 audio language - 34 C CAM, enable - 54 CAM, insert - 54 CAM, see Conditional Access Module - 54 care - 7 channel list - 13 channels, favourites - 13 channels, fine-tune (analogue) - 36 chan...


 Philips 46PFL3807T/12 User Manual
 Philips 46PFL3908/F7 User Manual
 Philips 46PFL4208T/12 User Manual
 Philips 46PFL4508T/12 Quick Guide
 Philips 46PFL4706/F7 User Manual
 Philips 46PFL5605H/12 Manual
 Philips 46PFL7007T/12 User Manual
 Philips 46PFL7505D/F7 Quick Guide
 Philips 46PFL7605H/12 Quick Guide
 Philips 46PFL8007T/12 User Manual
 Philips 46PFL8008S/12 User Manual
 Philips 46PFL8605H Manual