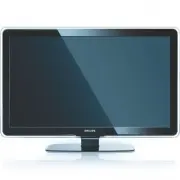
Page 3 - Important 3; Connections overview 29; Technical data 39
Table of contents 1 Important 3 1.1 Safety 3 1.2 Care of the screen 3 1.3 Recycling 3 2 Your TV 4 2.1 Television overview 4 2.2 Product highlights 5 3 Getting started 5 3.1 Position the TV 5 3.2 Wall mounting - VESA 6 3.3 Remote control batteries 7 3.4 Antenna cable 7 3.5 Power cable 7 4 Use your TV...
Page 5 - Important; Safety
ENGLISH Impor tant 3 1 Important Read this user manual before you star t to use thisproduct. Pay attention to this section and closely follow theinstr uctions. The warranty does not apply todamage caused by not taking into account theinstr uctions. 1.1 Safety • To avoid shor t circuit, do not expose...
Page 6 - Television overview; Controls; Connections
2 Your TV This section gives you an over view of the controlsand functions of this TV. 2.1 Television overview Controls 1 Indicator light 2 Remote control sensor 3 Volume up and down 4 Menu 5 Program/Channel up and down 6 Power switch Connectors 1 Back connector s 2 Side connector s For more info se...
Page 7 - Product highlights; Get started; Position the TV
ENGLISH 2.2 Product highlights Your new TV is equipped with some of the mostmodern audio or video innovations.Your TV offer s the following advantages ... Full High Definition LCD display A full HD resolution of 1920x1080p, the highestresolution of HD sources. It offer s a brilliant flicker-free pro...
Page 8 - Caution; Koninklijke Philips Electronics N.V. bears; The VESA fixation points; Locate the four screws of the TV stand.
6 Your TV 3.2 Wall mounting - VESA ) Caution Consider the TV’s weight when you wall mount it.Improper mounting can result in severe injur y ordamage. Koninklijke Philips Electronics N.V. bears no responsibility for improper mounting ormounting that results in accident or injury . Your TV is prepared...
Page 9 - Remote control batteries; and; Antenna cable; Inser t the antenna cable tightly into the; Power cable; Inser t the mains cord tightly.
3.3 Remote control batteries ‡ Open the batter y cover on the back of theremote control. ® Inser t the 2 batteries supplied (Type AA-R6-1,5V). Make sure the + and - ends of the batteries line up correctly (inside of case ismar ked.) Ò Close the cover. r Note Remove the batteries if not using the rem...
Page 10 - Turn on or off - Standby; Note; Watch TV; Switch channels; Volume
4 Use your TV Learn how to operate your TV for daily use. 4.1 Turn on or off - Standby r Note The TV may take up to 15 seconds to turn on. To turn on the TV:• Press B Power at the right of the TV if the standby indicator is off. • Press B on the remote control if the standby indicator is on. To swit...
Page 11 - Watch channels from a; Watch connected devices; OK; Watch a DVD; OK; Select a Teletext page
9 ENGLISH 4.3 Watch channels from a digital receiver ‡ Switch on the digital receiver.The picture from your receiver automaticallyappear s on the screen. ® Use the remote control of your digital receiverto select TV channels. If the picture does not appear : ‡ Press the Source v key. ® Press o or œ ...
Page 12 - Remote control; Remote control overview; Use more of your TV
5.1 Remote control 5.1.1 Remote control overview 1 Standby B To switch the TV on or back to standby. 2 Source v • To switch the Source menu on or off.• To select a connected device or to return to TV. 3 Teletext To switch teletext on or off. 4 Colour keys • Easy selection of teletext pages.• Easy se...
Page 13 - INFO; TV menus; The menu
Use more of your TV 15 +P- Channel up or down To switch to the next or previous channel inthe channel list. 16 Menu To switch the menu on or off 17 On screen information INFO To show channel or programme information ifavailable. 18 Dual screen b To show teletext on the right and the pictureon the le...
Page 14 - Use of the menu; Picture and Sound settings; Smart settings
Use more of your TV 5.2.2 Use of the menu Learn to use the menus with this example. ‡ Press Menu . The TV menu appear s on the screen. ® Press o or œ to select Picture . Ò Press π to enter the picture settings. † Press œ to select Brightness. º Press π to enter the brightness setting. ◊ Press o or œ...
Page 15 - Widescreen picture format
Use more of your TV • Sharpness Changes the level of sharpness of fine details. • Noise reduction Filter s out and reduces the noise in the picture.Set the level to Minimum, Medium, Maximum orOff. • Tint Sets the colour s to Normal, Warm (reddish) orCool (bluish). Select Custom to make a setting ofy...
Page 17 - Teletext; Select a teletext language
• TV speakers If you have connected an audio system to yourTV, you can switch off the TV speaker s.This option is only available if EasyLink is set toOn. See Menu > Setup > Installation >Preferences > EasyLink.Select Automatic (EasyLink) to have the sound from your TV automatically repro...
Page 19 - Select a favourite list
5.5 Create favourite channel lists View the All channels list or set up a Favourite listof your own with your preferred TV channels andradio stations. 5.5.1 Select a favourite list You can select one of the favourite channel lists. ‡ Press OK . The fir st time after you have finished theinstallation...
Page 20 - Electronic Programme; Switch on EPG
Use more of your TV 5.6 Electronic Programme Guide - EPG - The Electronic Programme guide is an on screenguide to scheduled digital TV programmes.You can navigate, select and view programmes bytime, title or genre. There are two types of EPG,‘Now and Next’ and ‘7 or 8 day’ EPG. When digital channels...
Page 21 - Timers and locks; Automatically switch to standby; Tip
5.7 Timers and locks This section describes how to switch the TV on oroff at a specified time and to lock or unlock the TV. 5.7.1 Automatically switch to standby Sleeptimer switches the TV to standby after a time. ‡ Press Menu . ® Select Features > Sleeptimer and press π to enter the sleeptimer b...
Page 22 - Subtitles; Watch and play your
Set an age rating to a digital programme Some digital broadcaster s have their programmesrated (depending on your countr y). When therating is higher than your child’s age, theprogramme will be locked. ‡ Select Custom lock . ® Press π to enter. Ò Press o or œ to select Parental rating . † Press π . ...
Page 23 - slideshow and play music; Slideshow settings; Thumbnails; Listen to music; Music settings
5.9.3 Watch your pictures, start a slideshow and play music Look up your pictures in the Picture album of yourUSB device. ‡ Select the Picture folder for the picture files youhave stored on your USB device. ® Press π to enter the Picture folder. Ò Press o or œ to select a picture or a picture album....
Page 24 - Watch a slideshow with background music; Listen to digital radio; Step 1: TV identification
Watch a slideshow with background music Watch a slideshow of your stored picturesaccompanied with your stored background music. ‡ Select an album of songs fir st and press OK . ® Highlight the Picture folder and select an albumof pictures and press OK . 5.10 Listen to digital radio channels If digit...
Page 25 - Send; Step 3: Software update transfer to the TV; Operation successful
Step 2: Software download from the PC to the USB device ‡ Inser t the USB memor y device into a PC linkedto the internet. ® Locate and open the file update.htm on your USB device. Ò Read the instr uctions on screen and click onthe Send ID button. If new software is available, the update isdownloaded...
Page 26 - The TV switches back on again. The update is; Software update by digital broadcast; Now
≈ The TV switches back on again. The update is done. 5.11.2 Software update by digital broadcast Your TV might receive new software from thedigital broadcast system automatically.If you receive an update message on screen it isstrongly advised to update the softwareimmediately - select Now . If you ...
Page 27 - Channel installation; Automatic installation; Step 1: Menu language; Step 2: Select your country
6 Channel installation The fir st time you turned on your TV • you have selected the language of the TV menus and the countr y where you are located • all the available TV Channels have been installed.This chapter provides instr uctions on how toreinstall channels as well as other useful channelinst...
Page 29 - Rearrange stored channels
6.2 Analogue: Manual installation You can tune-in analogue TV channels channel bychannel manually with Manual installation. 6.2.1 Select the system ‡ Press Menu. ® Select Setup > Installation > Channelinstallation > Analogue: Manual installation . Ò Press π to enter the Manual installation ...
Page 30 - Reorder the channels; Channel management; Automatic search; Digital reception test; Factory settings
Ò Press π to enter the channel list. † Press o or œ in the channel list to select the channel you want to uninstall or reinstall. º Press the green key to uninstall or reinstall thechannel. ◊ Press Menu to quit the menu. 6.3.3 Reorder the channels Change the order of the stored channels. ‡ Press Men...
Page 31 - Digital Audio Out; Connections; Connection overview
Side connectors 1 Headphones Stereo Mini jack 2 Audio L/R Audio L/R input to be used together with Videoor S-Video on the side of the TV. 3 Video Video input to be used together with the Audio L/R on the side of the TV. 4 S-Video S-Video input to be used together with theAudio L/R on the side of the...
Page 32 - About connections; What you need to know; HDMI; DVI to HDMI – Higher quality; Component Video; Scart; Scar t cable
7.2 About connections 7.2.1 What you need to know Connect your device with the highest possiblequality connection.Look for the highest quality connection on yourdevice. Use that connection to your TV. HDMI - Highest quality ★★★★★ An HDMI connection has the best picture andsound quality. One cable co...
Page 33 - Connect with the
Video - Basic quality ★ Use a Video (cinch) cable together with an AudioL/R (cinch) cable. Match the cable colour s whenyou connect. Combined Video - yellow and Audio L/R cable - red and white 7.2.2 HDMI with EasyLink Connected devices that are compliant with theHDMI CEC standard can wor k together....
Page 34 - DVD player; Use a scar t cable to connect the device to the; DVD Recorder or Digital Receiver; Use a scar t cable and 2 antenna cables.; DVD Recorder and Digital Receiver; Use 3 scar t cables and 3 antenna cables.
7.4.1 DVD player Use a scar t cable to connect the device to the EXT1 input at the back of the TV. 7.4.2 DVD Recorder or Digital Receiver Use a scar t cable and 2 antenna cables. 7.4.3 DVD Recorder and Digital Receiver Use 3 scar t cables and 3 antenna cables. 32 Connections EXT 3 VGA SERVICE UART O...
Page 36 - Use an HDMI cable and 2 antenna cables.
7.4.7 HD Digital receiver / HD satellitereceiver Use an HDMI cable and 2 antenna cables. 7.4.8 DVD-R, Home Theatre System andDigital receiver Use 3 scar t cables, 3 antenna cables and 1 audio(cinch) cable. 7.4.9 Blu-ray Disc player Use an HDMI cable. 34 Connections L R HDMI 1 HDMI 2 HDMI 3 AUDIO HDM...
Page 38 - Set the TV picture format to
7.4.12 Personal Computer You can connect your PC directly to the TV.The TV wor ks as a monitor of your PC .As a monitor the PC can be connected at the sidewith a DVI to HDMI adaptor or with a PC to TVcable. Alternatively you can connect the PC at theback with the VGA connection. ç Caution Before con...
Page 39 - Connection setup; Naming your devices
7.5 Connection setup The TV needs to know what connections you havemade and which device is connected to whichconnector.If you have used the Connection assistant theconnection setup is already done. 7.5.1 Naming your devices Name the connected devices for easy selection andbest signal handling.Assig...
Page 40 - Warning; Gently inser t the C AM into the; Common interface menu; Press
7.6 Preparing for digital services Scrambled digital TV channels can be decoded witha Conditional Access Module (C AM) and a Smar tcard provided by a digital TV ser vice operator. TheC AM may enable several ser vices depending on theoperator you choose (e.g. Pay TV).Contact your digital TV ser vice ...
Page 41 - Technical data
Technical data 8 Technical data Picture / Display • Display type: LCD Full HD W-UXGA• Panel resolution: 1920x1080p• Pixel Plus picture enhancement• 1080p 24/25/30/50/60Hz processing• 100 Hz Clear LCD (if present) Supported display resolutions • Computer formats Resolution Refresh rate 640 x 480p 60 ...
Page 42 - Television and remote control
9 Troubleshooting Television and remote control The TV does not switch on • Verify the mains cord connection.• Verify if the batteries of the remote control are not empty or weak. Verify their + / - orientation.You can use the keys on the TV to switch the TV on. • Unplug the mains cord, wait a minut...
Page 46 - digital
Information about how tore-tune your TV during the digital TV switchover. Keep this user manual safe- you'll need it. ......................................... Television in the UK is going digital, bringing us allmore choice and new ser vices. Star ting in late 2007and ending in 2012, television se...
Page 47 - When does switchover happen?
When does switchover happen? * Calls charged at BT rate of 3p pr minute daytime and 1p per minute evenings and weekends. Rates may var y for calls from non-BT lines. Visit us at digitaluk.co.ukCall us on 0845 6 50 50 50* * Copeland switches on October 17, 2007 The exact date you switchdepends on the...
Page 50 - Contact information; Local
Printed in Belgium Contact information Type no. Product no. België / Belgique078 250 145 € 0.06/min Danmark3525 8759 Local Deutschland01803 386 852 € 0.09/min France0821 611 655 € 0.09/min E§§A™ 0 0800 3122 1280 ¢ˆÚÂ¿Ó España902 888 784 € 0.10/min Ireland01 601 1777 Local Italia8403 20086 € 0.08/min...