Philips 25M2N3200W/00 - User Manual
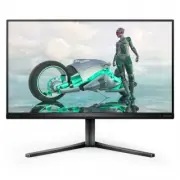
This user manual covers a Philips LCD monitor, detailing its operation, setup, maintenance, and advanced features like SmartImage and AMD Adaptive Sync. The document addresses essential topics such as safety precautions–including electrical hazards and environmental conditions–to prevent damage–and provides guidelines for proper handling, cleaning, and disposal in compliance with regulations. It also includes installation instructions for mounting the monitor via VESA standards, connectivity options (HDMI, DisplayPort), and physical adjustments like tilt, swivel, and height. Key functional areas include display optimization (resolution, refresh rates, SmartContrast), power management settings, and troubleshooting common issues such as burn-in or ghost imaging. Additionally, it outlines warranty policies for pixel defects and customer support procedures.


Table of Contents:
- Page 1 – Table of Contents and Support Information
- Page 2 – Monitor Manual Structure
- Page 3 – Safety Precautions and Operational Guidelines
- Page 4 – Monitor Handling and Maintenance
- Page 5 – Burn-in Prevention and Notation
- Page 6 – Environmental Disposal and Recycling
- Page 7 – Monitor Installation and Assembly
- Page 8 – PC Connectivity and Setup
- Page 9 – Monitor Operation and OSD Menu
- Page 10 – Display Resolution and Settings Navigation
- Page 11 – Physical Adjustability of the Monitor
- Page 12 – VESA Mounting Instructions
- Page 13 – SmartImage Features and Modes
- Page 14 – Display Modes and SmartContrast Technology
- Page 15 – Adaptive Sync Technology
- Page 16 – Computer Vision Syndrome Prevention
- Page 17 – Monitor Technical Specifications
- Page 18 – Power, Dimensions, and Environmental Compliance
- Page 19 – Cabinet Specifications
- Page 20 – Supported Resolution and Refresh Rates
- Page 21 – Power Management Features
- Page 22 – Pixel Defect Warranty Policy
- Page 23 – Sub-pixel Defect Criteria
- Page 24 – Acceptable Dot Defect Levels
- Page 25 – Customer Care and Warranty Extension
- Page 26 – Troubleshooting Common Issues
- Page 27 – Display Troubleshooting FAQs
- Page 28 – User Settings and Compatibility
- Page 29 – Compatibility and Burn-in Prevention
- Page 30 – Copyright and Trademark Information
25M2N3200W
Register your product and get support at www.philips.com/welcome
EN
User manual
1
Customer care and warranty
20
Troubleshooting and FAQs
24
"Loading the manual" means you need to wait until the file loads and becomes available for online reading. Some manuals are very large, and the time they take to appear depends on your internet speed.
Was this manual helpful?
About this manual
- Brand
- Philips
- Model
- 25M2N3200W/00
- Document type
- User Manual
- Language(s)
- English
- Pages
- 30
- File size
- 2.4 MB
- Format
Other Manuals for Philips 25M2N3200W/00
Summary
Index for the user manual covering customer care, warranty, troubleshooting, FAQs, and product registration links.
Outline of the instruction manual sections including safety precautions, setup instructions, image optimization, technical specifications, power management, and troubleshooting.
Guidelines for safe operation, electrical hazards, avoiding direct sunlight and oil, and tilt limitations to prevent panel damage.
Ask a question
Related manuals
Popular Philips Other


More Philips Other models
 Philips 24PHS6019/12 Quick Guide
 Philips 24PHS6808/12 User Manual
 Philips 24PHT4000/12 Quick Guide
 Philips 24PHT4031/05 User Manual
 Philips 24PHT4031/12 Quick Guide
 Philips 24ST2200/27 Manual
 Philips 25M2N5200P/00 User Manual
 Philips 25PT 2152 Manual
 Philips 25PT 4457 Manual
 Philips 25PT5125 Manual
 Philips 26PF5321/10 User Manual
 Philips 26PFL3404/12 Quick Guide