Page 2 - Table of Contents; Safety precautions and
Table of Contents 1. Important ...................................... 1 1.1 Safety precautions and maintenance ................................. 1 1.2 Notational Descriptions ............ 31.3 Disposal of product and packing material .......................................... 4 2. Setting up the mon...
Page 3 - Warnings
1 1. Important 1. Important This electronic user’s guide is intended for anyone who uses the Philips monitor. Take time to read this user manual before you use your monitor. It contains important information and notes regarding operating your monitor. The Philips guarantee applies provided the produ...
Page 5 - Notational Descriptions; Note
3 1. Important known as “after-imaging” or “ghost imaging”, on your screen. • “Burn-in”, “after-imaging”, or “ghost imaging” is a well-known phenomenon in LCD panel technology. In most cases, the “burn-in” or “after-imaging” or “ghost imaging” will disappear gradually over a period of time after the...
Page 7 - Setting up the monitor; Package contents; *Different according to region
5 2. Setting up the monitor 2. Setting up the monitor 2.1 Installation Package contents * VGA * HDMI * Audio cable * DVI * USB A-B * DP AC/DC Adapter * Stylus Register your product and get support at www.philips.com/welcome Quick Start B Line 162B9 *Different according to region Note Use only the AC...
Page 8 - Connect to PC; Operating the monitor; Description of the control buttons
6 2. Setting up the monitor Connect to PC 2 1 1. Connect the power cord to the back of the monitor firmly. 2. Turn off your computer and unplug its power cable. 3. Connect the monitor signal cable to the video connector on the back of your computer. 4. Connect USB upstream cable between monitor and ...
Page 9 - Description of the On Screen Display
7 2. Setting up the monitor Description of the On Screen Display What is On-Screen Display (OSD)?On-Screen Display (OSD) is a feature in all Philips LCD monitors. It allows an end user to adjust screen performance or select functions of the monitors directly through an on-screen instruction window. ...
Page 10 - Resolution notification; Physical Function
8 2. Setting up the monitor Resolution notification This monitor is designed for optimal performance at its native resolution, 1366 x 768 @ 60 Hz. When the monitor is powered on at a different resolution, an alert is displayed on screen: Use 1366 x 768 for best results. Display of the native resolut...
Page 11 - Remove the Base Assembly
9 2. Setting up the monitor 2.3 Remove the Base Assembly for VESA Mounting Before you start disassembling the monitor base, please follow the instructions below to avoid any possible damage or injury. 1. Place the monitor face down on a smooth surface. Pay attention not to scratch or damage the scre...
Page 12 - Image Optimization; How to enable SmartImage?
10 3. Image Optimization 3. Image Optimization 3.1 SmartImage What is it? SmartImage provides presets that optimize display for different types of content, dynamically adjusting brightness, contrast, color and sharpness in real time. Whether you're working with text applications, displaying images o...
Page 14 - Operating System requirements
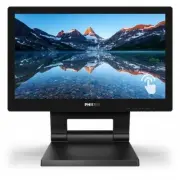
12 4.SmoothTouch 4. SmoothTouch What is it? This is a display which uses “Projected capacitive” 10 point touch panel technology. Used with latest OS like Windows 10, it offers you groovy touch gestures like tap, grab, pinch, rotate, zoom, swipe, etc. Your older applications come to life, and now you...
Page 15 - Technical Specifications; SmoothTouch
13 5.Technical Specifications 5. Technical Specifications Picture/Display Monitor Panel Type TN Backlight W-LED Panel Size 15.6" (39.6 cm) Aspect Ratio 16:9 Pixel Pitch 0.252 (H) mm x 0.252 (V) mm Contrast Ratio (typ.) 500:1 Optimum Resolution 1366 x 768 @ 60 Hz Viewing Angle 90° (H) / 60° (V) @...
Page 16 - Stand
14 5.Technical Specifications OSD Languages English, German, Spanish, Greek, French, Italian, Hungarian, Dutch, Portuguese, Brazil Portuguese, Polish, Russian, Swedish, Finnish, Turkish, Czech, Ukranian, Simplified Chinese, Traditional Chinese, Japanese, Korean Other Convenience VESA mount (100 x 10...
Page 17 - Environmental and energy
15 5.Technical Specifications Relative humidity (operation) 20% to 80% Atmospheric pressure (operation) 700 to 1060hPa Temperature range (Non-operation) -20°C to 60°C Relative humidity(Non-operation) 10% to 90% Atmospheric pressure(Non-operation) 500 to 1060hPa Environmental and energy ROHS YES Pack...
Page 18 - Recommended Resolution
16 5.Technical Specifications 5.1 Resolution & Preset Modes Recommended Resolution 1366 x 768 @ 60 Hz H. freq (kHz) Resolution V. freq (Hz) 31.47 640 x 480 59.94 37.88 800 x 600 60.32 48.36 1024 x 768 60 44.77 1280 x 720 59.86 47.71 1366 x 768 59.79 Note Please notice that your display works bes...
Page 20 - Customer care and warranty; Customer care and; Philips’ Flat Panel Monitors; subpixel; Pixels and Sub pixels
18 7.Customer care and warranty 7. Customer care and warranty 7.1 Philips’ Flat Panel Monitors Pixel Defect Policy Philips strives to deliver the highest quality products. We use some of the industry's most advanced manufacturing processes and practice stringent quality control. However, pixel or su...
Page 21 - Proximity of Pixel Defects
19 7.Customer care and warranty Proximity of Pixel Defects Because pixel and sub pixels defects of the same type that are near to one another may be more noticeable, Philips also specifies tolerances for the proximity of pixel defects. Pixel Defect Tolerances In order to qualify for repair or replac...
Page 23 - Philips Customer Care Center number listed below.
21 7.Customer care and warranty 7.2 Customer Care & Warranty For warranty coverage information and additional support requirements valid for your region, please visit www.philips.com/support website for details or contact your local Philips Customer Care Center. For Warranty Period please refer ...
Page 24 - FAQs; Common Problems
22 8.Troubleshooting & FAQs 8. Troubleshooting & FAQs 8.1 Troubleshooting This page deals with problems that can be corrected by a user. If the problem still persists after you have tried these solutions, contact Philips customer service representative. Common Problems No Picture (Power LED ...